Slices
Last updated
What are slices?
Slices are sections of a website page — like a block of text, a hero, or a call to action. They are modeled using a collection of fields.
Content writers build website pages using a stack of slices.
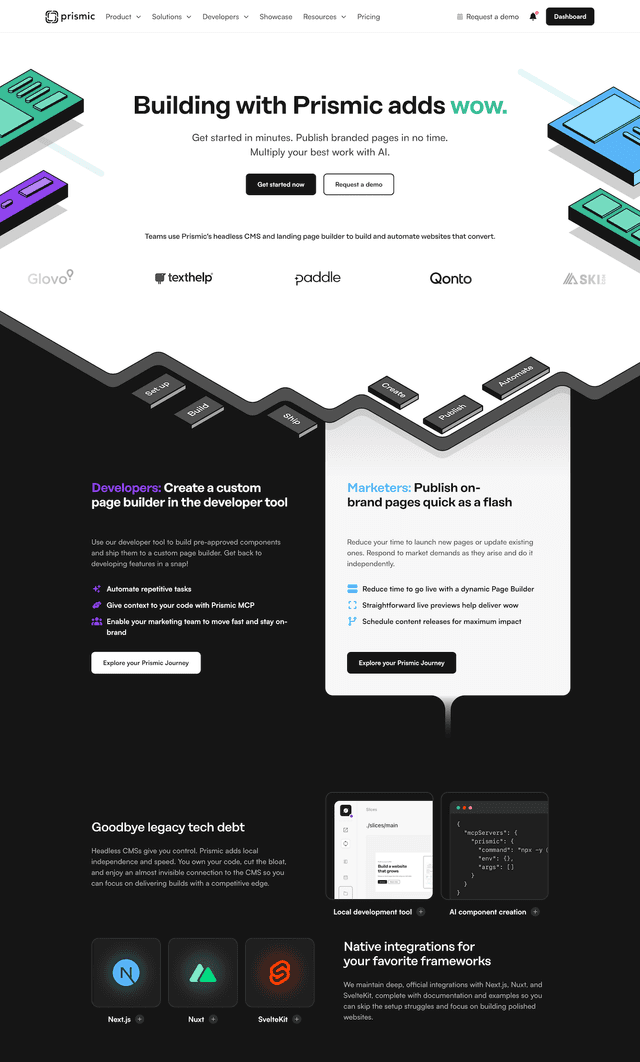
A page built with slices. This website has slices like Hero and Company Logos.
Slices are created from scratch by developers. A slice’s fields are modeled by a developer during the content modeling process. A developer then builds a UI component to display when the slice is used in a page.
Developers control which slices are available to content writers. For example, a homepage might allow a Hero slice, while a blog post might allow a Quote slice. When needed, slices can be made available to multiple page types.
A slice’s files, including its model and component, are saved in the website’s code.
Learn more about content modeling
How to create a slice
Slices are created using the Type Builder, a tool for building by hand, or the Prismic CLI, a tool for AI agents.
Watch for changes
In your local website project, start the Prismic CLI’s
synccommand. The CLI will watch for changes in the Type Builder and pull them into your project.npx prismic sync --watchCreate a slice
In the Type Builder, select Slices from the sidebar and click Create a new slice. Provide the following in the dialog:
- Name: The label shown to content writers in the Page Builder. Use an easily understood, pascal-case name.
- API ID: The ID shown to developers in the website’s code.
Model your content
Slices need fields to hold content. Click the Add a field button and select a field type. Repeat for as many fields as needed. Click Save when finished.
See the available field typesCreate a slice component
Every slice has a UI component to display the slice on your website. The
syncCLI command generates a basic component to get you started.Add a screenshot
Screenshots help content writers select the correct slice. Take a screenshot of your slice’s design, then select ”…” → Update screenshot.
Add to a page type
A slice needs to be added to at least one page type before the slice can be used.
Navigate to a page type and select Add → Reuse an existing slice in the Slices section. Enable your slice in the dialog, click Add slices, then Save.
You can now close the Prismic CLI
synccommand or create your next slice.
Model your content
Use the
prismic field addcommand to add fields to the slice.npx prismic field add rich-text text \ --to-slice CallToAction \ --allow "heading2,paragraph,strong,hyperlink" npx prismic field add link button \ --to-slice CallToAction \ --allow-textTypeScript types are generated automatically each time the CLI updates a slice.
See the available field typesCreate a slice component
Every slice has a UI component to display the slice on your website. The Prismic CLI generates a basic component to get you started.
Add a screenshot
Screenshots help content writers select the correct slice. Take a screenshot of your slice’s design, then use the
prismic slice edit-variationcommand to add the screenshot.npx prismic slice edit-variation default \ --screenshot ./my-screenshot.png \ --from-slice CallToAction \In this example, the
defaultID refers to the slice’s Default variation, which all slices have by default. The screenshot is uploaded to Prismic and can be removed from your computer.Add to a page type
A slice needs to be added to at least one page type before the slice can be used. Use the
prismic slice connectcommand to make a slice available to a specific page type.npx prismic slice connect call_to_action --to pageIn this example, the
pageID refers to the Page page type.
There are two stages to creating a slice:
- Local development: Model the slice and create its UI component.
- Push to Prismic: Add it to a page type and make it available to content writers.
Local development
Start by building your slice in your local development environment. You can spend as much time as needed in this stage before making it available to content writers.
Open Slice Machine
In your Prismic project, start Slice Machine to begin editing content models.
npx start-slicemachine --openCreate a slice
In Slice Machine, navigate to the Slices settings from the sidebar.
Click the Create button in the top-right corner.

The create slice button in Slice Machine.
The slice name determines the label shown to content writers in the Page Builder and the name shown to developers in the website’s code. Use an easily understood, pascal-case name.
The target library determines which slice library the slice is added to.
Model your content
Use the Add a field button to add fields to the slice as needed.
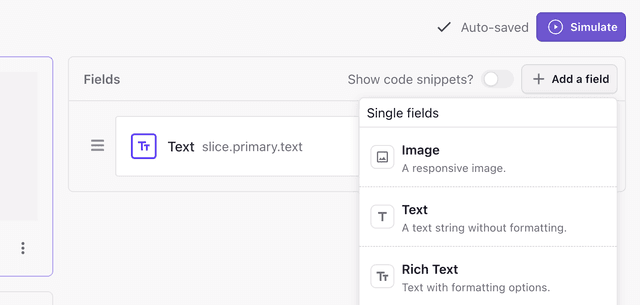
Slice fields in Slice Machine.
Add a screenshot
Screenshots help content writers select the correct slice.
Take a screenshot of your slice’s design. Then click the ”…” button and select Update screenshot.
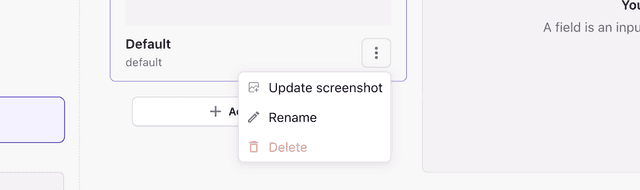
The update screenshot menu in Slice Machine.
Create a slice component
Every slice has a UI component to display the slice on your website.
Slice Machine generates a basic component to get you started. Where the component is generated depends on your website’s framework.
Push to Prismic
When your slice is ready to be used by content writers, add it to a page type and push it to Prismic.
Add to a page type
A slice needs to be added to at least one page type before the slice can be used.
Navigate to the page type you want to update using the sidebar. In the page type’s Slices section, click the Add button and choose Select existing.
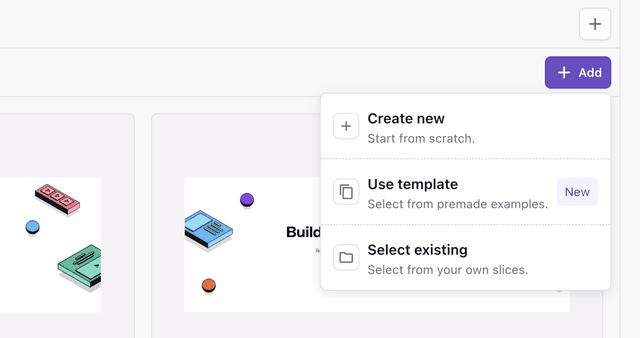
The add slice menu in Slice Machine.
In the modal, enable your slice and click Add.
Push to Prismic
When your slice and page type are ready for content writers, push it to your Prismic repository.
Click Review changes in the sidebar. Then, if the changes look correct, click the Push button in the top-right corner.
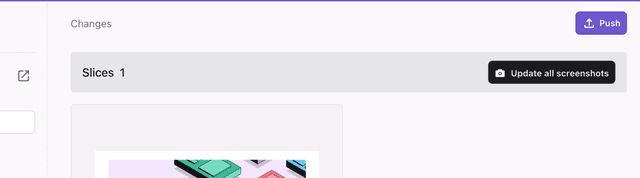
The review changes page in Slice Machine.
The Page Builder will now recognize your slice.
Slice variations
Multiple versions of a slice can be modeled as slice variations.
For example, a “Text with Image” slice might have a variation for “Image on Left” and another for “Image on Right.”
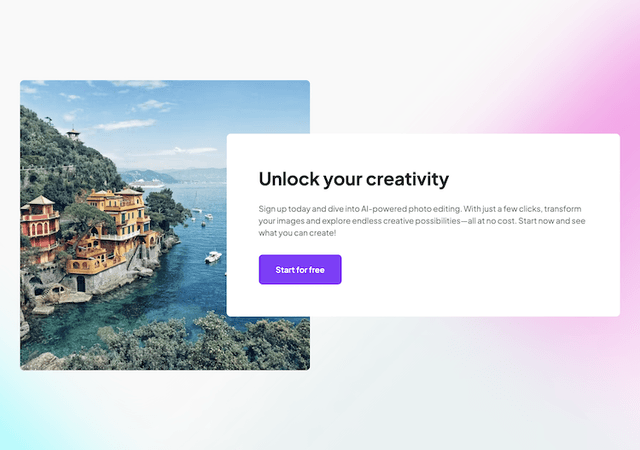
Image on Left
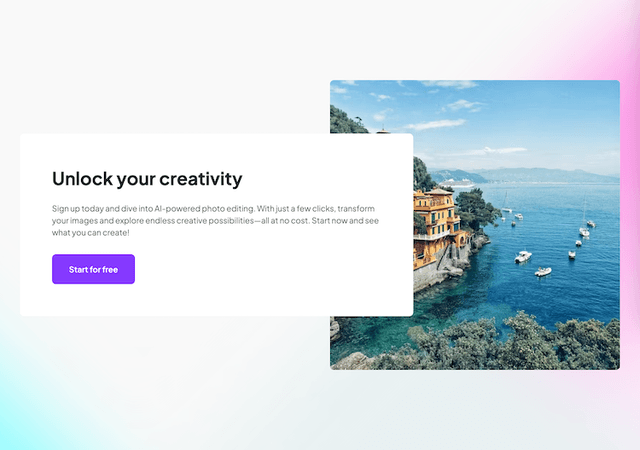
Image on Right
Content writers can select a variation in the Page Builder.
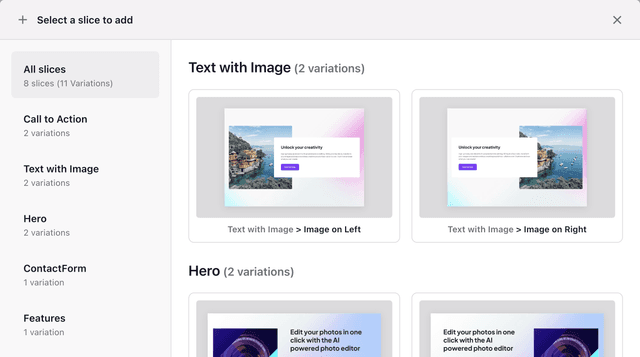
Selecting a variation in the Page Builder.
Each variation has its own set of fields to account for content differences between variations.
How to add a slice variation
Watch for changes
In your local website project, start the Prismic CLI’s
synccommand. The CLI will watch for changes in the Type Builder and pull them into your project.npx prismic sync --watchOpen a slice
In the Type Builder, navigate to the slice you want to modify.
Add a variation
In the slice’s variations list, click the Add a variation button. Provide the following in the dialog:
- Variation name: The label shown to content writers in the Page Builder. Use an easily understood name.
- Variation ID: The ID used to reference the variation in the Content API. Use a short, camel-cased name.
- Duplicate from: The existing variation to copy fields from.
Add a screenshot
Screenshots help content writers select the correct variation. Take a screenshot of your variation’s design, then select ”…” → Update screenshot.
Update the slice component
Update the slice’s UI component to recognize the slice variation. Use the slice’s
variationproperty to determine which variation was selected.if (slice.variation === "withButton") { // Display the "With Button" variation. } else { // Display the default variation. }You can now close the Prismic CLI
synccommand or add your next variation.
Add a variation
Use the
prismic slice add-variationcommand:npx prismic slice add-variation "With Button" --to CallToActionAdd a screenshot
Screenshots help content writers select the correct variation. Take a screenshot of your variation’s design, then use the
prismic slice edit-variationcommand to add the screenshot.npx prismic slice edit-variation withButton \ --screenshot ./my-screenshot.png \ --from-slice CallToAction \In this example, the
withButtonID refers to the slice’s With Button variation. The screenshot is uploaded to Prismic and can be removed from your computer.Update the slice component
Update the slice’s UI component to recognize the slice variation. Use the slice’s
variationproperty to determine which variation was selected.if (slice.variation === "withButton") { // Display the "With Button" variation. } else { // Display the default variation. }
Open a slice
In Slice Machine, navigate to the slice you want to modify.
Add a variation
In the section next to the slice’s fields, click the Add a variation button.

The add a variation button in Slice Machine.
The variation name determines the label shown to content writers in the Page Builder. Use an easily understood name.
The variation ID determines the ID used to reference the variation in the Content API. Use a short, camel-cased name.
The duplicate from dropdown determines which existing variation to use as a starting point for the new variation.
Add a screenshot
A screenshot will help content writers select the correct variation.
Take a screenshot of your slice’s design. Then click the ”…” button and select Update screenshot.
The update screenshot menu in Slice Machine.
Update the slice component
Update the slice’s UI component to recognize the slice variation. Use the slice’s
variationproperty to determine which variation was selected.if (slice.variation === "withButton") { // Display the "With Button" variation. } else { // Display the default variation. }Push to Prismic
When your variation is ready for content writers, push it to your Prismic repository.
Click Review changes in the sidebar. Then, if the changes look correct, click the Push button in the top-right corner.
The review changes page in Slice Machine.
The Page Builder will now recognize your variation.
Display slices
Prismic provides components to display a page’s slices for Next.js, Nuxt, and SvelteKit.
<SliceZone
  slices={page.data.slices}
  components={{
    text: TextSlice,
    call_to_action: CallToActionSlice,
  }}
/>
See the <SliceZone> documentation to learn more.
Slice components
Each slice has a corresponding React, Vue, or Svelte component, depending on your website’s framework. A slice’s component is displayed whenever the slice is used in a page.
All slice components are exported from a generated index.ts file. The export can be passed directly to <SliceZone>’s components prop.
import { components } from "@/slices";

<SliceZone slices={page.data.slices} components={components} />;Simulate slices
You can interactively develop slice components using the Type Builder. The simulator provides a live view of your slice and a mock editor for providing the slice’s content.
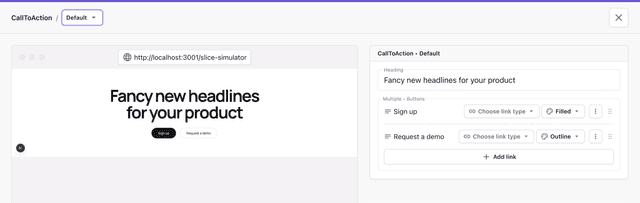
A slice running in the Type Builder’s simulator.
The simulator runs off a special page on your website, typically /slice-simulator.
How to simulate slices
Start your website’s development server
The simulator runs off your website’s development server. Run your website’s development command to start the server.
npm run devOpen the simulator
In the Type Builder, navigate to the slice you want to modify and click Preview.
Develop the slice component
Use the simulator’s view of the slice to develop your slice’s component. The slice will update as you update your code.
Use the mock editor to the right of the simulator to fill in content.
Start your website’s development server
The simulator runs off your website’s development server. Run your website’s development command to start the server.
npm run devOpen a slice
In Slice Machine, navigate to the slice you want to modify.
Open the simulator
Click the Simulate button in the top-right corner.
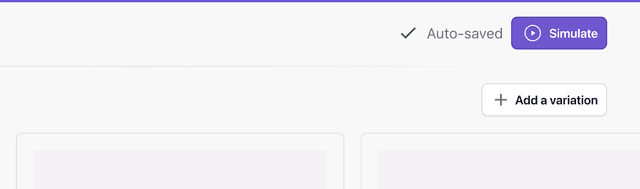
The simulate button accessible when editing a slice.
Develop the slice component
Use the simulator’s view of the slice to develop your slice’s component. The slice will update as you update your code.
Edit the mock content
Use the mock editor to the right of the simulator to fill in content.
Slice preview fails on Vercel with password protection
If slice preview works on localhost but fails when your simulator URL points to a hosted Vercel site, your deployment may be blocking follow-up asset requests.
Common symptoms include a blank simulator or errors in the browser network tab, such as 401 Unauthorized responses on /_next/static/... files.
This happens because adding only x-vercel-protection-bypass to your /slice-simulator URL authorizes the first request. Static assets loaded afterward do not include that query parameter, so Vercel applies protection again. Prismic loads /slice-simulator in an iframe, so you also need Vercel to set a bypass cookie that works in that context.
Update your slice simulator or live preview URL to include both query parameters:
x-vercel-protection-bypass=YOUR_TOKENfrom Vercel Deployment Protection > Protection Bypass for Automationx-vercel-set-bypass-cookie=samesitenone
https://your-site.com/slice-simulator?x-vercel-protection-bypass=YOUR_TOKEN&x-vercel-set-bypass-cookie=samesitenoneWhen not using localhost, set this URL in Prismic or in localSliceSimulatorURL in slicemachine.config.json.
Slice libraries
Developers can use slice libraries to organize a website’s code. A slice library is a directory containing slices and their files.
For example, a developer may group slices for marketing pages into a src/slices/marketing directory and slices for blog posts into a src/slices/blog directory. Each directory is a slice library.
Slice library components
Slice Machine generates an index.ts file for each slice library exporting all of the library’s components. The export is useful for the <SliceZone> component.
See Display slices to learn more.
How to add a slice library
Open Slice Machine configuration
Slice libraries are registered in Slice Machine’s configuration file:
slicemachine.config.json.Open
slicemachine.config.jsonin your text editor.Add a slice library
Slice libraries are listed in the
librariesproperty.Add a directory for the new slice library.
slicemachine.config.json{ "repositoryName": "example-prismic-repo", "adapter": "@slicemachine/adapter-next", "libraries": [ "./src/slices/marketing", "./src/slices/blog" ], "localSliceSimulatorURL": "http://localhost:3000/slice-simulator" }Restart the Slice Machine server
The new slice library will be available after restarting the Slice Machine server.
If Slice Machine is running, press Control + C in the terminal to stop it. Then start Slice Machine again.
npx start-slicemachine --openThe library will now be an option when creating a new slice.
API Response
Here is what a slice looks like from the Content API:
{
  "id": "quote$e568fae3-e996-43c2-af06-dbf42b215cc2",
  "slice_type": "quote",
  "variation": "default",
  "version": "initial",
  "primary": {
    "quote": "Lorem ipsum dolor sit amet, consectetur adipiscing elit."
  },
  "items": []
}
The slice’s primary content is determined by the slice’s fields.
A page’s slices are returned as an array:
{
  "id": "YCiUyRUAACQAxfZK",
  "uid": "my-first-post",
  "url": "/blog/my-first-post",
  "type": "blog_post",
  "href": "https://example-prismic-repo.cdn.prismic.io/api/v2/...",
  "tags": ["Tag 1", "Tag 2"],
  "first_publication_date": "2021-02-14T03:22:26+0000",
  "last_publication_date": "2022-07-09T00:36:18+0000",
  "slugs": ["my-first-post"],
  "linked_documents": [],
  "lang": "en-us",
  "alternate_languages": [],
  "data": {
    "title": "My first post",
    "slices": [
      {
        "id": "quote$e568fae3-e996-43c2-af06-dbf42b215cc2"
        // ...
      },
      {
        "id": "text$afba88d2-3ce4-46b5-b42b-b89e8dcd6dc5"
        // ...
      }
    ]
  }
}