Use Next.js with Prismic
Last updated
Overview
Prismic has a first-party Next.js integration that supports all of Prismic’s features:
- Model content with page types and slices using the Type Builder or the Prismic CLI.
- Fetch and display content using SDKs with generated TypeScript types.
- Preview draft content with live previews and full-website previews.
Here’s what a Prismic page looks like in Next.js:
import { SliceZone } from "@prismicio/react";
import { createClient } from "@/prismicio";
import { components } from "@/slices";

export default async function Page({ params }: PageProps<"/[uid]">) {
  // 1. Fetch a page from Prismic
  const { uid } = await params;
  const client = createClient();
  const page = await client.getByUID("page", uid);

  // 2. Display the page's slices
  return <SliceZone slices={page.data.slices} components={components} />;
}
Next.js websites use @prismicio/client, @prismicio/react, and @prismicio/next.
Set up a Next.js website
Prismic can be added to new or existing Next.js websites. Set up your project using the Type Builder, a tool for building by hand, or the Prismic CLI, a tool for AI agents.
Set up your project
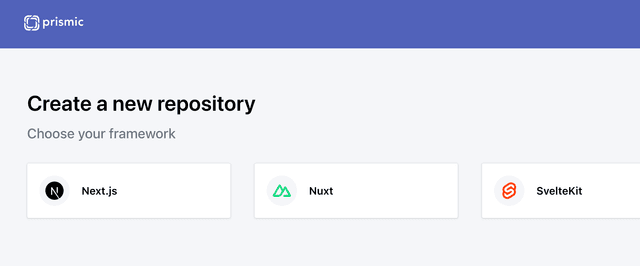
Follow the setup instructions shown in your Prismic repository. The instructions walk you through creating a Next.js project, connecting it to Prismic, and modeling content with the Type Builder.
Add
<PrismicPreview>to your root layout<PrismicPreview>adds support for content draft previews. The@/prismicioimport comes from a file thatprismic initcreates for you during setup.app/layout.tsximport { type ReactNode } from "react"; import { PrismicPreview } from "@prismicio/next"; import { repositoryName } from "@/prismicio"; export default function RootLayout({ children }: { children: ReactNode }) { return ( <html lang="en"> <body>{children}</body> <PrismicPreview repositoryName={repositoryName} /> </html> ); }Your Next.js website is now ready for Prismic. Continue to create pages and slices.
Create a Next.js project
npx create-next-app@latest my-website
cd my-website
You can also use an existing Next.js project.
Add Prismic to your project
The
initcommand creates a Prismic repository, installs packages, and configures your project.npx prismic initIf you already have a Prismic repository, provide its domain with
--repo:npx prismic init --repo your-domainAdd
<PrismicPreview>to your root layout<PrismicPreview>adds support for content draft previews. The@/prismicioimport comes from a file thatprismic initcreates for you.app/layout.tsximport { type ReactNode } from "react"; import { PrismicPreview } from "@prismicio/next"; import { repositoryName } from "@/prismicio"; export default function RootLayout({ children }: { children: ReactNode }) { return ( <html lang="en"> <body>{children}</body> <PrismicPreview repositoryName={repositoryName} /> </html> ); }Your Next.js website is now ready for Prismic. Continue to create pages and slices.
Create pages
Content writers create pages from page types, like a homepage, blog post, or landing page. Model page types by hand in the Type Builder, or with the Prismic CLI for AI agents. TypeScript types are generated automatically.
Learn how to create page types
Write page components
Each page type needs a Next.js page component. With file-system-based routing, you create a page file at each page’s path.
The example below shows a page component for a Page page type.
import type { Metadata } from "next";
import { SliceZone } from "@prismicio/react";
import { createClient } from "@/prismicio";
import { components } from "@/slices";

export default async function Page({ params }: PageProps<"/[uid]">) {
  const { uid } = await params;
  const client = createClient();
  const page = await client.getByUID("page", uid);

  return <SliceZone slices={page.data.slices} components={components} />;
}

export async function generateMetadata({
  params,
}: PageProps<"/[uid]">): Promise<Metadata> {
  const { uid } = await params;
  const client = createClient();
  const page = await client.getByUID("page", uid);

  return {
    title: page.data.meta_title,
    description: page.data.meta_description,
    openGraph: {
      images: [{ url: page.data.meta_image.url ?? "" }],
    },
  };
}

export async function generateStaticParams() {
  const client = createClient();
  const pages = await client.getAllByType("page");

  return pages.map((page) => ({ uid: page.uid }));
}Define routes
The Prismic CLI keeps routes in prismic.config.json in sync with your page types, whether you model in the Type Builder or with CLI commands.
Page routes are inferred from each page type’s API ID:
- A page type named Homepage maps to
/. - A page type named Page maps to
/:uid. - Any other page type, like Blog Post, maps to
/<api-id>/:uid(e.g./blog-post/:uid).
{
  "repositoryName": "example-prismic-repo",
  "routes": [
    { "type": "homepage", "path": "/" },
    { "type": "page", "path": "/:uid" },
    { "type": "blog_post", "path": "/blog/:uid" }
  ]
}
Edit prismic.config.json directly to customize routes. Make sure your routes match your Next.js file-system routes. Here are common examples:
| Route resolver path | Next.js file-system route |
|---|---|
/ | app/page.tsx |
/:uid | app/[uid]/page.tsx |
/blog/:uid | app/blog/[uid]/page.tsx |
/:grandparent/:parent/:uid | app/[...path]/page.tsx |
Create slices
Content writers build pages from reusable sections called slices, like a block of text, a hero, or a call to action. Model slices by hand in the Type Builder, or with the Prismic CLI for AI agents. TypeScript types are generated automatically.
Learn how to create slices
Write React components
The Prismic CLI generates a starter component in src/slices/<SliceName>/index.tsx. Edit the component to add your implementation.
The following example Call to Action component displays a rich text field and a link.
import type { Content } from "@prismicio/client";
import { PrismicRichText, type SliceComponentProps } from "@prismicio/react";
import { PrismicNextLink } from "@prismicio/next";

type CallToActionProps = SliceComponentProps<Content.CallToActionSlice>;

export default function CallToAction({ slice }: CallToActionProps) {
  return (
    <section className="flex flex-col gap-4 p-8">
      <PrismicRichText field={slice.primary.text} />
      <PrismicNextLink field={slice.primary.link} className="button" />
    </section>
  );
}
Learn how to display content
Fetch content
Use @prismicio/client and its methods to fetch page content.
The Prismic client
The Prismic CLI creates a prismicio.ts file when you run prismic init. It centralizes your client configuration, including routes and Next.js fetch options.
import {
  createClient as baseCreateClient,
  type ClientConfig,
} from "@prismicio/client";
import { enableAutoPreviews } from "@prismicio/next";
import prismicConfig from "../prismic.config.json";

export const repositoryName = prismicConfig.repositoryName;

export const createClient = (config: ClientConfig = {}) => {
  const client = baseCreateClient(repositoryName, {
    routes: prismicConfig.routes,
    fetchOptions: {
      next: { tags: ["prismic"] },
      cache: "force-cache",
    },
    ...config,
  });

  enableAutoPreviews({ client });

  return client;
};The generated fetchOptions includes the following Next.js cache settings:
next.tags: Tags all Prismic API calls withprismic.cache: API calls are cached forever until theprismictag is revalidated.
Fetch content in pages and slices
Import createClient() from prismicio.ts and create a client. Use the client to fetch content. The following example fetches content for a /[uid] dynamic route.
import type { Metadata } from "next";
import { SliceZone } from "@prismicio/react";
import { createClient } from "@/prismicio";
import { components } from "@/slices";

export default async function Page({ params }: PageProps<"/[uid]">) {
  const { uid } = await params;
  const client = createClient();
  const page = await client.getByUID("page", uid);

  return <SliceZone slices={page.data.slices} components={components} />;
}
You can fetch content in slices the same way. The following example fetches a Settings page.
import { Content } from "@prismicio/client";
import { SliceComponentProps } from "@prismicio/react";
import { createClient } from "@/prismicio";

type ContactFormProps = SliceComponentProps<Content.ContactFormSlice>;

export default async function ContactForm({ slice }: ContactFormProps) {
  const client = createClient();
  const settings = await client.getSingle("settings");

  // ...
}
Learn more about fetching content
Fetch new content
You may see stale content as you work on your website. You can fetch new content when working locally by hard-refreshing the page in your browser, usually with Shift+⌘R.
In production, set up content revalidation to fetch new content automatically.
Learn how to set up content revalidation
Secure with an access token
Published content is public by default. You can require a private access token to secure the API.
Learn more about content visibility
Generate an access token
npx prismic token createSave the new access token as an environment variable in a
.envfile..envPRISMIC_ACCESS_TOKEN=my-access-tokenAccess tokens can also be managed in your repository at Settings → API & Security.
Pass the access token to your client
Provide the token via the
accessTokenoption inprismicio.ts:prismicio.tsexport const createClient = (config: ClientConfig = {}) => { const client = baseCreateClient(repositoryName, { accessToken: process.env.PRISMIC_ACCESS_TOKEN, routes: prismicConfig.routes, fetchOptions: { next: { tags: ["prismic"] }, cache: "force-cache", }, ...config, }); enableAutoPreviews({ client }); return client; };Change your repository’s API access
Set the API access to private. Content API requests will immediately require an access token.
npx prismic repo set-api-access privateAPI visibility can also be managed in your repository at Settings → API & Security.
Display content
Display content using @prismicio/react and @prismicio/next. Here are the most commonly used components:
<PrismicNextLink>- Display links usingnext/link.<PrismicNextImage>- Display images usingnext/image.<PrismicRichText>- Display rich text.<PrismicText>- Display plain text.<SliceZone>- Display slices.
Learn how to display content from a field
Live previews in the Page Builder
The Page Builder shows live-updating thumbnails for each slice as content writers edit.
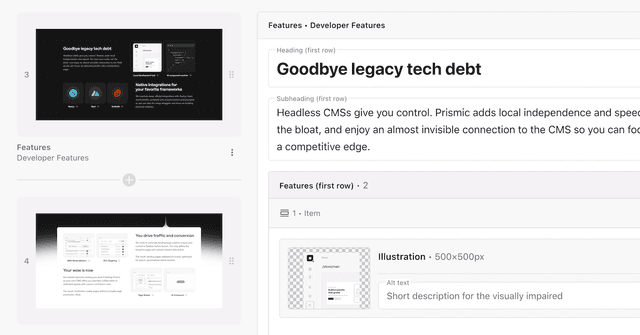
A page with live previews in the Page Builder.
Live previews are powered by the slice simulator, a special route that renders individual slices. The Prismic CLI creates the simulator page at app/slice-simulator/page.tsx when you run prismic init.
Tell Prismic where your simulator is running so the Page Builder can load it:
npx prismic preview set-simulator http://localhost:3000The simulator URL can also be set from any document. Click the ”…” button next to the Publish/Unpublish button in the top-right corner and select Live preview settings.
Once your website is deployed, update the simulator URL to your production domain.
Preview draft content
Full-website previews let content writers see draft content on your website before publishing. The prismic init command creates the needed routes during setup: /api/preview starts a draft preview session, and /api/exit-preview ends it.
Add a development preview URL so you can preview drafts locally:
npx prismic preview add http://localhost:3000/api/preview --name DevelopmentOnce deployed, add your production URL as a second preview. Previews can also be managed at Settings → Previews.
Deploy
Deploy your Next.js website with your hosting provider:
Handle content changes
The prismic init command creates a /api/revalidate Route Handler that clears the Next.js cache when content changes in Prismic.
Register the endpoint as a webhook so Prismic calls it when content is published or unpublished. You do not need to set up a webhook with your hosting provider.
npx prismic webhook create https://example.com/api/revalidate \
  --trigger documentsPublished \
  --trigger documentsUnpublished
Webhooks can also be managed at Settings → Webhooks.
SEO
Page types automatically include fields in an SEO & Metadata tab:
meta_title: The page’s title.meta_description: The page’s description.meta_image: A preview image when your page is shared on social platforms.
Use the metadata fields in generateMetadata inside page.tsx.
import type { Metadata } from "next";
import { asImageSrc } from "@prismicio/client";
import { createClient } from "@/prismicio";

export async function generateMetadata({
  params,
}: PageProps<"/[uid]">): Promise<Metadata> {
  const { uid } = await params;
  const client = createClient();
  const page = await client.getByUID("page", uid);

  return {
    title: page.data.meta_title,
    description: page.data.meta_description,
    openGraph: {
      images: [{ url: asImageSrc(page.data.meta_image) ?? "" }],
    },
  };
}Internationalization
Prismic supports multi-lingual websites. See Locales for details on locale management.
Add locales to your repository
Use the Prismic CLI to add locales.
npx prismic locale add fr-frLocales can also be managed in your repository at Settings → Translations & Locales.
Install the necessary packages
Install the packages needed for locale detection:
npm install negotiator @formatjs/intl-localematcherCreate an
i18n.tsfileCreate an
i18n.tsfile next to yourappdirectory. It provides locale helpers you’ll use in your website’s Proxy.i18n.tsimport type { NextRequest } from "next/server"; import { match } from "@formatjs/intl-localematcher"; import Negotiator from "negotiator"; /** * A record of locales mapped to a version displayed in URLs. The first entry is * used as the default locale. */ // TODO: Update this object with your website's supported locales. Keys // should be the locale IDs registered in your Prismic repository, and values // should be the string that appears in the URL. const LOCALES = { "en-us": "en-us", "fr-fr": "fr-fr", }; /** Creates a redirect with an auto-detected locale prepended to the URL. */ export function createLocaleRedirect(request: NextRequest): Response { const headers = { "accept-language": request.headers.get("accept-language"), }; const languages = new Negotiator({ headers }).languages(); const locales = Object.keys(LOCALES); const locale = match(languages, locales, locales[0]); request.nextUrl.pathname = `/${LOCALES[locale]}${request.nextUrl.pathname}`; return Response.redirect(request.nextUrl); } /** Determines if a pathname has a locale as its first segment. */ export function pathnameHasLocale(request: NextRequest): boolean { const regexp = new RegExp(`^/(${Object.values(LOCALES).join("|")})(\/|$)`); return regexp.test(request.nextUrl.pathname); } /** * Returns the full locale ID for a given URL locale. It returns `undefined` * if the locale is not in the master list. */ export function reverseLocaleLookup(locale: string): string | undefined { for (const key in LOCALES) { if (LOCALES[key] === locale) { return key; } } }Define locales in
i18n.tsi18n.tscontains a list of locales supported by your website.Update the
LOCALESconstant to match your Prismic repository’s locales. The first locale is used when a visitor’s locale is not supported.i18n.tsconst LOCALES = { "en-us": "en-us", "fr-fr": "fr-fr", };Change the values to control how locales appear in URLs. In this example, the
en-uslocale appears asenin the URL (e.g./en/about).i18n.tsconst LOCALES = { "en-us": "en", "fr-fr": "fr", };Create or modify
proxy.tsThe Proxy redirects visitors to the correct locale.
Create a
proxy.tsfile with the following contents, or modify your existingproxy.tsto include the highlighted lines.proxy.tsimport type { NextRequest } from "next/server"; import { createLocaleRedirect, pathnameHasLocale } from "@/i18n"; export function proxy(request: NextRequest) { if (!pathnameHasLocale(request)) { return createLocaleRedirect(request); } } export const config = { matcher: ["/((?!_next|api|slice-simulator|icon.svg).*)"], };Learn more about Proxy
Nest routes under a
[lang]dynamic route segmentCreate a directory at
app/[lang]and nest all other routes under this directory.The
langroute parameter will contain the visitor’s locale. For example,/en/aboutsetslangto"en".Learn about Next.js dynamic routes
Fetch content from the visitor’s locale
In your
page.tsxfiles, forward thelangparameter to your Prismic query.app/[lang]/[uid]/page.tsximport { createClient } from "@/prismicio"; import { reverseLocaleLookup } from "@/i18n"; export default async function Page({ params }: PageProps<"/[lang]/[uid]">) { const { lang, uid } = await params; const client = createClient(); const page = await client.getByUID("page", uid, { lang: reverseLocaleLookup(lang), }); // ... }The
reverseLocaleLookuphelper fromi18n.tsconverts a shortened locale (e.g.en) to its full version (e.g.en-us).Fetch all locales in
generateStaticParamsFetch pages from all locales using the Prismic client’s
lang: "*"option. Include thelangroute parameter.app/[lang]/[uid]/page.tsxexport async function generateStaticParams() { const client = createClient(); const pages = await client.getAllByType("page", { lang: "*", }); return pages.map((page) => ({ lang: page.lang, uid: page.uid, })); }