Please remember that WiKirby contains spoilers, which you read at your own risk! See our general disclaimer for details.
Treasure
| Treasure | |
|---|---|
 A treasure being collected in The Great Cave Offensive in Kirby Super Star | |
| Details | |
| Use | Scoring (Kirby Super Star), raises Percentage, unlocking items (Kirby & The Amazing Mirror & Kirby: Squeak Squad) |
| Obtained | Various points in stages |
| Game(s) | Kirby Super Star Kirby & The Amazing Mirror Kirby: Squeak Squad Kirby Super Star Ultra Kirby's Epic Yarn Kirby and the Rainbow Curse Kirby's Extra Epic Yarn |
| Comparable to | Collectible items, Treasure Chest |
- This article is about collectible items found in treasure chests. For the chests themselves as objects, see Treasure Chest.
- "Gold Medal" redirects here. For information about Gold Medal as a medal, see Medal.
Treasure[1] refers to any collectible series of items which can be found inside Treasure Chests in stages. Depending on which game they appear in, treasures may or may not be required to complete the Story Mode, but collecting all of them is a requirement for 100% completion. Treasures made their first appearance in Kirby Super Star, specifically in The Great Cave Offensive, where collecting all 60 is required to fully complete the game mode. Since then, they have appeared in a handful of other games, the most recent one being Kirby's Extra Epic Yarn. For the sake of simplicity, this article will not discuss collectible sets of items that may or may not appear in treasure chests, such as keychains, stickers, or Picture Pieces. This article will also not cover collectible items that can be purchased using in-game currency, such as the furniture in Chaise Woole's store in Kirby's Epic Yarn or any of the items in Magolor's Shoppe.
Game appearances[edit]
Kirby Super Star / Kirby Super Star Ultra[edit]

In The Great Cave Offensive in Kirby Super Star and its remake, Kirby Super Star Ultra, Kirby's quest involves collecting treasure. As Kirby navigates the various areas of an underground cavern system, he may find up to 60 treasure chests. The treasures are collectible items only and thus have no effect on Kirby's abilities; however, they are required to achieve 100% completion on the level. Many of the treasures are also cameos from other Nintendo games and/or products.
For details on how to collect these treasures, see the Sub-Tree, Crystal, Old Tower, and Garden pages.
Sub-Tree[edit]
| Sub-Tree Area Treasures | |||
|---|---|---|---|
| Treasure | Image | Value | Notes |
| Gold Medal |  
|
10,000 G | A common item awarded for merit in competitions. Likely based on the Gold Medal from Kirby's Dream Course. |
| Gold Coin |  
|
1,000 G | A koban, an ancient Japanese gold coin. |
| Whip |  
|
6,800 G | Referred to as the "Indy Whip" (インディウィップ) in Japanese, a reference to the famous weapon of the fictional treasure hunter Indiana Jones. |
| Crystal Ball |  
|
200,000 G | A common item used by fortune tellers. |
| Lucky Cat |  
|
500 G | A maneki-neko, a Japanese symbol of luck. |
| Seiryu Sword |  
|
142,000 G | Seiryu means "Azure Dragon" and is one of the Four Symbols of the Chinese constellations. This specific type of blade is a liuyedao or "willow-leaf blade", a common military blade throughout Chinese history. |
| Screw Ball (Kirby Super Star) |  
|
80,000 G | A reference to the Screw Attack power-up of the Metroid series. |
| Screw Attack (Kirby Super Star Ultra) | |||
| Echigo Candy |  
|
8,000 G | Refers to a common scenario in historical samurai dramas where a scheming merchant, Echigoya (越後屋), offers a box of sweets to a corrupt governor. He then reveals that the gift is actually a bribe for political power; the box is full of gold coins. |
| Zebra Mask (Kirby Super Star) |  
|
278,000 G | A mask split into black and white halves. While the Japanese name is simply "White/Black Mask" (しろくろマスク), its international names in all versions of Ultra besides the Korean version reference the Mario series' Phanto. |
| Phanto Mask (Kirby Super Star Ultra) | |||
| Star Stone |  
|
82,100 G | Referred to as a "Star Droplet" (ほしのしずく) in Japanese. Possibly a reference to the Warp Star. |
| Beast's Fang |  
|
7,300 G | A fang belonging to an unknown creature. May be in reference to the real-world value of ivory. |
| Bandanna |  
|
1,990 G | Referred to as the "Commando Bandanna" (コマンドバンダナ) in Japanese, likely in reference to bandannas worn by famous action movie heroes such as John Rambo. |
| Springtime (Kirby Super Star) | 
|
250,000 G | One of the four Season Hearts. May possibly be a reference to the Zelda series' Heart Container. |
| Seasons Heart (Kirby Super Star Ultra) | 
|
An amalgamation of four treasures from the original Kirby Super Star. | |
Crystal[edit]
| Crystal Area Treasures | |||
|---|---|---|---|
| Treasure | Image | Value | Notes |
| Dime |  
|
10 G | A reference to the common monetary piece. In Japanese, it's a ten yen coin, which is roughly equivalent to a dime, and is worth around 80% of one. |
| Glass Slippers (Kirby Super Star) |  
|
120,000 G | A reference to the iconic item found in the fairy tale of Cinderella. |
| Glass Slipper (Kirby Super Star Ultra) | |||
| Goblet |  
|
800 G | Otherwise known as a chalice. A footed cup used as a vessel for beverages in medieval times. |
| Saucepan |  
|
10 G | Referred to as a "Durable Pan" (じょうぶなおなべ) in Japanese. |
| Brass Knuckle |  
|
20,000 G | A common weapon for martial artists dating back to ancient times. |
| Amber Rose |  
|
22,100 G | Corresponding with the Glass Slipper, it may reference the fairy tale Beauty and the Beast. It may also reference how ancient flora and fauna were trapped and crystallized within amber, preserving them in the present day. |
| Fish Fossil |  
|
8,250 G | A fossilized fish. |
| Beast Fossil |  
|
24,220 G | A fossil depicting an unknown lizard-like creature. |
| Nunchuks (Kirby Super Star) | 
|
55,480 G | A weapon that originates from Okinawan martial arts. Referred to as "Lee's Nunchucks" (リーのヌンチャク) in the Japanese version, referencing the action movie actor Bruce Lee, who was famous for wielding them in his films. |
| Machine Parts (Kirby Super Star Ultra) | 
|
121,300 G | The horns of the Hydra from Kirby Air Ride. |
| Bucket |  
|
200 G | A reference to Mario & Wario. |
| Summertime (Kirby Super Star) | 
|
250,000 G | One of the four Season Hearts. |
| Power Paintbrush (Kirby Super Star Ultra) | 
|
222,000 G | A reference to Kirby: Canvas Curse. |
| 100-Dollar Coin |  
|
10,000 G | A 10,000 yen coin, worth roughly 100 US dollars per the exchange rate at the time of release. |
| Ancient Gem |  
|
68,000 G | Referred to as a "Magatama of Flame" (ほのおのまがたま) in Japanese. Could be a reference to the Yasakani no Magatama, one of the three Imperial Regalia of Japan. |
| Falcon Helmet |  
|
41,000 G | A reference to the F-Zero series. |
| Dud (Kirby Super Star) | 
|
30 G | A double meaning: it is both a "dud" as in a bomb that failed to detonate, and a "dud" in that its monetary value is quite low. |
| Cell Phone (Kirby Super Star Ultra) | 
|
40,210 G | A reference to Kirby & The Amazing Mirror. |
| Truth Mirror |  
|
500,000 G | A common item in Japanese folklore. Could be a reference to the mirror Yata no Kagami, one of the three Imperial Regalia of Japan. |
Old Tower[edit]
| Old Tower Area Treasures | |||
|---|---|---|---|
| Treasure | Image | Value | Notes |
| Star Tiara |  
|
408,200 G | A tiara emblazoned with a golden star. |
| Turtle Shell (Kirby Super Star) |  
|
800 G | Referred to as a generic "Turtle Shell" (かめこうら) in the Japanese version of both games. Its international name in all versions of Ultra besides the Korean version is a reference to the Mario series. |
| Koopa Shell (Kirby Super Star Ultra) | |||
| Sword (Kirby Super Star) |  
|
325,000 G | A reference to Falchion, Marth's legendary sword in the Fire Emblem series. It was simply called "Sword" in international versions of the original game, as it predated the international presence of Fire Emblem; it bears the proper name in Ultra. |
| Falchion (Kirby Super Star Ultra) | |||
| Warrior Shield |  
|
50,000 G | Likely meant to correspond to Falchion. A shield of similar design is used by the Sword Hero in Team Kirby Clash. |
| Unicorn's Horn |  
|
80,300 G | A reference to the legendary creature, the unicorn. |
| Autumntime (Kirby Super Star) | 
|
250,000 G | One of the four Season Hearts. |
| Three-Star Cane (Kirby Super Star Ultra) | 
|
222,000 G | A reference to Kirby: Squeak Squad. |
| Rice Bowl (Kirby Super Star) |  
|
50 G | A rice bowl with a cracked edge. |
| Broken Bowl (Kirby Super Star Ultra) | |||
| Tut's Mask |  
|
160,000 G | A reference to the ancient Egyptian Pharaoh Tutankhamun. |
| Mr. Saturn |  
|
120,000 G | A reference to the Mr. Saturn race from the Mother series. Its Japanese and Korean names specify that it is a statue of Mr. Saturn, not a living being. |
| Armor |  
|
212,000 G | A suit of armor. According to its Japanese and Korean names, it is made out of mithril, a fictional ore found in The Lord of the Rings. |
| Treasure Box |  
|
100,000 G | A senryōbako, or "box of 1,000 ryō", used for transporting coinage in the Tokugawa era. |
| Mannequin |  
|
3,000 G | A mannequin depicted in a strange pose. |
| Gold Crown |  
|
528,000 G | Referred to as the "Queen Crown" (クイーンクラウン) in Japanese. |
| King's Cape |  
|
508,000 G | A red robe with fur trimming, similar to that of King Dedede. Corresponds to the Gold Crown. |
| Model Ship |  
|
800,000 G | A model ship whose sail is shaped like a crescent moon, which is noted in the item's Japanese name (つきのうきふね, "Moon Model Ship"). |
| Sun Ring |  
|
800,000 G | A golden ring with an image of the sun on its front. Likely meant to correspond with the moon-shaped Model Ship. |
Garden[edit]
| Garden Area Treasures | |||
|---|---|---|---|
| Treasure | Image | Value | Notes |
| Wintertime (Kirby Super Star) | 
|
250,000 G | One of the four Season Hearts. |
| Gold Watering Can (Kirby Super Star Ultra) | 
|
200,000 G | A reference to the golden watering can from the Animal Crossing series. |
| Katana |  
|
990,000 G | A reference to the traditional Japanese long sword, the katana. It's the highest-valued treasure in both versions of the game. In the Japanese version, it is referred to as a meitō (名刀), meaning "legendary sword" or "masterwork sword", a name given to famous swords within Japan. Additionally, the sword itself is named Samurai (サムライ). |
| Charm |  
|
8,000 G | Referred to as an "amulet" (アミュレット) in Japanese. Bears an ankh-shaped design. |
| Xmas Tree |  
|
40,000 G | A reference to the ubiquitous Christmas decoration. |
| Kong's Barrel |  
|
1,500 G | A reference to the Donkey Kong series. |
| Ramia's Scale |  
|
12,800 G | A mistranslation of "Lamia's Scale". A lamia is a creature from Greek mythology depicted as being part-human, part-snake. |
| Shiny Bamboo |  
|
600,000 G | Named "Taketori's Daughter" (たけとりのむすめ) in Japanese, directly referencing the Japanese folk tale The Tale of the Bamboo Cutter, where the princess Kaguya was born from a piece of shiny bamboo; a baby's head can be seen peeking out from the bamboo in the sprite. |
| Tire |  
|
1,100 G | Referred to as the "Kart Tire" (カートのタイヤ) in Japanese, a possible reference to Super Mario Kart. |
| Spirit Charm |  
|
78,500 G | A bracelet with a blue gem on its front. |
| Pegasus Wing |  
|
42,800 G | A reference to the pegasus, a winged horse from Greek mythology. More specifically, a possible reference to the Wings of Pegasus item from the Kid Icarus series. |
| Raccoon Doll |  
|
8,150 G | A reference to the tanuki statues that can be found in many places throughout Japan. |
| Shell Whistle |  
|
82,000 G | Referred to as the "Ripple Whistle" (さざなみのふえ) in Japanese. An item of the same name is present in other RPGs, such as Shin Megami Tensei If.... |
| Orihalcon (Kirby Super Star) |  
|
512,000 G | Originally translated as "Orihalcon", it was given the proper name of Orichalcum in Ultra. |
| Orichalcum (Kirby Super Star Ultra) | |||
| Platinum Ring |  
|
40,000 G | A simple ring made out of platinum. |
| Triforce |  
|
800,000 G | A reference to the Triforce, the iconic symbol of the Zelda series. |

Also, on the map screen, a medal that looks like the Gold Medal treasure (seen to the right), signifies that all treasures have been found in the area.
Kirby & The Amazing Mirror[edit]

In Kirby & The Amazing Mirror, there are treasure chests scattered around the many different worlds, which contain items such as area maps, Spray Paint, Vitalities, and other objects such as Notes, and a music player. Also contained within treasure chests are more standard consumable items, such as food, 1-Ups, or batteries. Treasure chests come in two different sizes, with the larger ones always containing a permanent collectible item. The game is not considered 100% complete until every treasure chest, large and small, is opened, even if the item inside is mundane.
Although every chest must be opened to fully complete the game, the following table lists the locations of every significant collectible item in Kirby & The Amazing Mirror, along with how to collect them:
| Collectible treasures in Kirby & The Amazing Mirror | ||||
|---|---|---|---|---|
| Treasure | Area | Room | How to obtain | |
| World Map | Intro area | N/A | This item is located inside the large treasure chest that must be opened to access the Central Circle for the first time. | |
| Rainbow Route Area Map | Rainbow Route | Hub 1 | This treasure chest can be found in the middle of the room, and is easy to access. | |
| Green Spray Paint | Rainbow Route | Room 28 | This treasure chest can be accessed by hitting the lower of two adjacent Bomb Blocks along the path, then heading into the opened chamber to the right. | |
| Beginning Notes | Rainbow Route | Room 39 | This treasure chest is located in a small chamber which can be reached by breaking the metal blocks that otherwise block access. | |
| Moonlight Mansion Area Map | Moonlight Mansion | Entry | This treasure chest can be found out in the open just to the right of Kirby's landing point from the Warp Star ride. | |
| Orange Spray Paint | Moonlight Mansion | Room 7 | This treasure chest can be found by entering this room from Room 5. | |
| Enemy Sounds | Moonlight Mansion | Room 17 | This treasure chest can be found in a small cave to the lower-right, accessible by swimming down and then to the right. | |
| Chalk Spray Paint | Moonlight Mansion | Goal 2 | This treasure chest can be found in a small room accessible from the doorway from Room 18. | |
| Secret Sounds | Cabbage Cavern | Room 5 | This treasure chest is locked behind a gate which closes quickly after opening it using a nearby switch. Kirby needs to be quick or resourceful to get in there. | |
| Chocolate Spray Paint | Cabbage Cavern | Room 6 | This treasure chest is located in a small chamber blocked off using a Bomb Block which can only be hit using an ability that can attack through walls, such as Beam. | |
| Spunky Notes | Cabbage Cavern | Room 12 | This treasure chest is located in the upper-left area, which can only be reached by entering from Room 11. | |
| Sapphire Spray Paint | Cabbage Cavern | Room 14 | In order to get the treasure chest in this room, Kirby must quickly flip the switch right before where the doors on the right are, run quickly past the front gate, attack the Sword Knight and destroy the Bomb Block, and dash left until the treasure chest is reached. Kirby will likely need a stake-pounding ability to reach it. | |
| Cabbage Cavern Area Map | Cabbage Cavern | Goal | This large treasure chest is located in the upper-left corner, behind a Bomb Block barrier. Kirby needs to worm his way through the tunnels in a circuitous path to get there. | |
| Mustard Mountain Area Map | Mustard Mountain | Chest | This chest is tucked away at the right end of the room behind a gate with a tight switch timer. Kirby will need to be quick or resourceful to get inside. | |
| Cherry Spray Paint | Mustard Mountain | Goal 2 | This chest can be found high atop a small platform along the path in the first enclosed room, next to a Sword Knight who is guarding it. | |
| Secret Notes | Carrot Castle | Room 13 | This chest is located in the upper portion of this room, accessible by entering from Room 14. | |
| Yellow Spray Paint | Carrot Castle | Room 16 | This chest is locked by a Bomb Block barrier that can only be broken by entering the room beneath, but doing that requires hitting another Bomb Block on the upper path, which Kirby cannot come back down from. The upper Bomb Block needs to be broken remotely to get access to the chest, which can be done with certain abilities or with the help of friends. | |
| Vitality | Carrot Castle | Chest 1 | This chest is located in the center of this room, which can be accessed from Room 10. | |
| Carrot Castle Area Map | Carrot Castle | Chest 2 | This chest is located in the upper portion of this room, and is out in the open. It can be reached from the Warp room. | |
| Ocean Spray Paint | Olive Ocean | Room 6 | This chest can be found in a small chamber guarded by a Heave-Ho Block and a tight passage that only Mini Kirby can fit through. The intended strategy is to have the nearby Droppy hold on to Kirby's Mini ability so that he can inhale the block out of the way, and then get the ability back afterward to slip in. | |
| Vitality | Olive Ocean | Chest 1 | This chest can be found in the middle of the room, guarded by several switch gates and Bomb Block barriers. Kirby can solve this puzzle with nothing more than his inhale and some good footwork, though abilities and/or friends can make the process easier. | |
| Olive Ocean Area Map | Olive Ocean | Chest 2 | This chest can be found in a chamber under the main path, accessible by pounding a stake along the way. Bonkers is nearby to provide a suitable ability if needed. | |
| Sound Effects | Olive Ocean | Goal 2 | This chest can be found in a small chamber blocked by a gate that can be opened by hitting the switch nestled in the floor underneath. The intended way to get in is to use Ice Kirby to freeze the nearby Waddle Dee and then kick its frozen body through the wall into the switch. | |
| Snow Spray Paint | Peppermint Palace | Room 5 | This chest can be found in an isolated hallway on the right hand side, accessible only by coming in through the Chest room. | |
| Happy Notes | Peppermint Palace | Room 6 | To get this chest, Kirby needs to enter from a secondary door in Room 12. | |
| Dream Notes | Peppermint Palace | Room 8 | This chest can be found near the end of the three-pronged path leading to the right, along the middle path. | |
| Lavender Spray Paint | Peppermint Palace | Room 10 | This chest can be found near the top of the rightmost path in this room, guarded by a Golem. | |
| Pink Spray Paint | Peppermint Palace | Room 22 | This chest can be found at the end of a small tunnel choked with blocks that can be cleared by pounding a stake at the start of the path. The stake itself is behind a Bomb Block barrier, which is guarded by a Giant Rocky. | |
| Peppermint Palace Area Map | Peppermint Palace | Chest | This large chest can be found in the lower-right area of the room. To get there, Kirby will need to enter from Room 5, through the fight with Bonkers in that room. From there, he can zag past the Mirra guarding the door back to Room 5, then return from a different door to break a Bomb Block barrier that allows him to access the room holding the large chest. | |
| Battle Notes | Radish Ruins | Room 22 | This treasure chest is located to the lower-left in a cave blocked off by a Heave-Ho Block, which Kirby can move by inhaling. | |
| Vitality | Radish Ruins | Chest 1 | This treasure chest is out in the open, once Kirby reaches this room from Room 3. | |
| Radish Ruins Area Map | Radish Ruins | Chest 2 | This treasure chest is located at the far right end of the room, past a long hall of spikes and a wind current pushing down on it. Kirby can bridge the gap by hitting a Bomb Block above, but should be careful to not then get stuck in the upper hallway. | |
| Emerald Spray Paint | Radish Ruins | Goal 1 | This treasure chest can be found far below the goal door, by jumping down the pit just to the left (though not all the way down). | |
| Red Spray Paint | Candy Constellation | Room 2 | This treasure chest is located behind a gate that is set to a timed switch in the middle of the room. Kirby can break the Star Blocks below the switch to bring it closer to the gate. | |
| Kirby's Sounds | Candy Constellation | Room 16 | This chest can be accessed by breaking a Bomb Block to remove the wall in the way, but Kirby needs to be quick to get through or another wall will appear in its place shortly thereafter. | |
| Sound Player | Candy Constellation | Chest 1 | This treasure chest is out in the open, once Kirby reaches this room from Room 6. | |
| Carbon Spray Paint | Candy Constellation | Chest 2 | This treasure chest is out in the open, once Kirby reaches this room from Room 1. | |
| Vitality | Candy Constellation | Chest 2 | This treasure chest can be accessed after defeating Phan Phan, once Kirby reaches this room from Room 9. | |
| Candy Constellation Area Map | Candy Constellation | Chest 3 | This treasure chest is locked behind a series of times gates and switches. Kirby will need to be quick or resourceful to get in. | |
Kirby: Squeak Squad[edit]
In Kirby: Squeak Squad, Kirby can collect treasure chests in most stages, which he needs to carry using his Copy Palette. Most stages also feature a large treasure chest, which, when Kirby collects it, will typically make a high-ranking Squeak appear. If they manage to take the chest away from Kirby, he must then go to the base they entered to fight whoever brought the chest into the base along with a few Squeakers. If they are defeated, the treasure chest will appear. At the end of the stage, Kirby will open any treasure chests he has collected after his dance. In these treasure chests are all sorts of goods, including Spray Paint, Ability Scrolls, and Notes & Sounds. Some chests also contain Star Seals, which are required to reach Secret Sea and subsequently Gamble Galaxy. In addition to these treasure chests, another one appears whenever Kirby defeats a boss, which contains the corresponding Boss Battle Badge. If he collects every single one of these badges, the Boss Endurance sub-game will be unlocked.
The following tables list every treasure chest location in Kirby: Squeak Squad, along with notes on how to reach them:
Prism Plains[edit]
| Prism Plains Treasures | |||
|---|---|---|---|
| Treasure | Stage | Location | How to obtain |
| Beginning Notes | Stage 2 | 
|
This chest can be found out in the open in the last room of the stage. |
| Fire Scroll | Stage 3 | 
|
This chest can be found buried in the dirt that Kirby can use the Animal ability to clear out. |
| Sound Player | Stage 3 | 
|
This chest must be collected in the last area to continue, and triggers the Squeaks to appear. |
| Green Spray Paint | Stage 4 | 
|
In the fourth room, Kirby can find this chest in a separate chamber through a hole in the ceiling of the main hallway. |
| Graphic Piece - Yellow | Stage 4 | 
|
This chest can be found in the fifth room, under a thin floor and surrounded by spikes. |
| Hidden Door Key for Prism Plains | Stage 4 | 
|
This chest is in the last room. Kirby has to fight Storo to keep it. |
| Copy Palette - Check | Stage 5 | 
|
This chest can be found in a barrel at the very top of the room. |
| Boss Battle Badge - King Dedede | Boss | 
|
This treasure is obtained by defeating King Dedede. |
| Graphic Piece - Red | Secret | 
|
In the fourth room, with two vertical paths, Kirby needs to find a doorway on the left path to reach this chest. |
| Vitality | Secret | 
|
In the last room, this chest can be seen being carried away by a moving platform. Kirby needs to grab it and then get away from Doc and the Squeaks to safety. |
Nature Notch[edit]
| Nature Notch Treasures | |||
|---|---|---|---|
| Treasure | Stage | Location | How to obtain |
| Animal Scroll | Stage 1 | 
|
In the third room, Kirby needs to fire to the right when he can in the Cannon chain to reach this chest. |
| Kirby's Sounds | Stage 1 | 
|
In the fourth room, Kirby can use the Bubble ability to break some barriers to this chest, but should be careful not to trigger all of the Bomb Blocks. |
| Star Seal | Stage 1 | 
|
In the last room, Kirby can obtain this chest out in the open, but will need to run from the Squeaks in order to keep it. This item is required to complete the game. |
| Citrus Spray Paint | Stage 2 | 
|
In the third main area, Kirby needs to find a doorway in the upper-right corner to take him to a separate room where this chest can be picked up. |
| Ghost Medal piece | Stage 2 | 
|
Kirby needs to wrestle this chest away from Storo in the last area. |
| Wheel Scroll | Stage 3 | 
|
In the third room, Kirby can use the Wheel ability to nab this chest from a small grotto guarded by spikes. Grabbing the chest causes Doc and some Squeakers to appear. |
| Pastel Copy Palette | Stage 3 | 
|
In the fourth room, Kirby can access this chest by hitting a Bomb Block through a wall with an appropriate ability (such as Bubble). |
| Graphic Piece - Red | Stage 3 | 
|
In the sixth room, Kirby will need to dig through some soft dirt using the Animal ability to reach this chest. |
| Cutter Scroll | Stage 4 | 
|
In the last area, Kirby needs to outrun a boulder and enter the room where the chest is before it gets blocked off. |
| Beam Scroll | Stage 5 | 
|
In the third main area, Kirby can find a side door partially obstructed by flames and magma. Using Ice will let him pass through in the safest manner. Through the door is a small side room where the chest is. |
| Graphic Piece - Green | Stage 5 | 
|
In the fourth area, Kirby can get this chest after absorbing Big Metalun's power and using it to pound through some metal blocks. |
| Hidden Door Key for Nature Notch | Stage 5 | 
|
In the last area, Kirby will need to fight Spinni to obtain this chest. |
| Boss Battle Badge - Mrs. Moley | Boss | 
|
This treasure is obtained by defeating Mrs. Moley. |
| Graphic Piece - Red | Secret | 
|
In the second area, Kirby can use the Hammer ability from Bonkers to find a hidden door leading to this chest. |
| Secret Map piece | Secret | 
|
From the third area, Kirby will need to take the lower door. In the following room, Kirby needs to catch a Gold Waddle Dee (with a switch in this area to aid in that task) before it jumps into the bottomless pit ahead. Defeating the Gold Waddle Dee will cause it to drop this chest. |
| Vitality | Secret | 
|
In the last area, Kirby needs to fight Storo and the Squeakers for this chest. |
Cushy Cloud[edit]
| Cushy Cloud Treasures | |||
|---|---|---|---|
| Treasure | Stage | Location | How to obtain |
| Graphic Piece - Blue | Stage 1 | 
|
In the third area, Kirby can follow a path designed to be cleared away using the Laser ability, then find this chest at the end of it before proceeding. |
| Grape Spray Paint | Stage 1 | 
|
In the fourth main area, Kirby can find a side door leading to a room with an Acchi and the chest, buried in metal blocks. |
| Spark Scroll | Stage 1 | 
|
In the last area, Kirby needs to fight Spinni and the Squeakers for this chest. |
| Familiar Notes | Stage 2 | 
|
In the second main area, Kirby can find this chest by diving into the water and clearing a series of breakable blocks in a tunnel. |
| Star Seal | Stage 2 | 
|
In the last area, Kirby needs to wrestle this chest away from Doc and the Squeakers. |
| Graphic Piece - Green | Stage 3 | 
|
In the third main area, Kirby will want to tale the left path leading upward choked by Star Blocks to find a door leading to a side room where this chest is. |
| Secret Map Piece | Stage 3 | 
|
In the fourth main area, Kirby can find another optional doorway blocked by Star Blocks. In the room, Kirby needs to stop a Gold Waddle Dee from running off an edge, and can stop him by cutting some rope platforms. Defeating the Gold Waddle Dee yields this chest. |
| Ghost Medal Piece | Stage 3 | 
|
In the last area, Kirby needs to solve a timed switch puzzle to get this chest, then he needs to ferry it past Storo and his Squeakers to get to the exit. |
| Lavender Spray Paint | Stage 4 | 
|
In the second main area, Kirby needs to light a fuse and then enter the cannon to be launched to a side room where he can get this chest from inside some soft cloud platforms. |
| Hi-Jump Scroll | Stage 4 | 
|
In the fifth area, Kirby can find this chest by breaking the right set of Bomb Block barriers to drop it down, though breaking the wrong ones will cause it to be lost to a bottomless pit. |
| Hidden Door Key for Cushy Cloud | Stage 4 | 
|
In the last area, Kirby will need to race Spinni to get this chest, and then safely carry it to the exit. |
| Tornado Scroll | Stage 5 | 
|
In the last area, Kirby needs to chase this chest as it is being ferried away by a thundercloud. If he is too slow, the cloud will disintegrate and drop the chest into a bottomless pit. |
| Boss Battle Badge - Mecha-Kracko | Boss | 
|
This treasure is obtained by defeating Mecha-Kracko. |
| Orange Spray Paint | Secret | 
|
This chest can be ound in a side room accessible in the upper-right corner of the second main area. In this room, Kirby needs to free the chest from a Bomb Block container and then collect it without dropping it through the Breakable Block floor below. |
| Graphic Piece - Blue | Secret | 
|
This chest is located in a small side room accessible by taking the cannon in the lower-right corner from the second main area. |
| Vitality | Secret | 
|
This chest can be found in the lower-middle portion of the second area, right before the door leading into the next room. Collecting it causes the Squeaks to appear. |
Jam Jungle[edit]
| Jam Jungle Treasures | |||
|---|---|---|---|
| Treasure | Stage | Location | How to obtain |
| Graphic Piece - Yellow | Stage 1 | 
|
In the first area, Kirby can find this chest behind a switch gate that closes immediately after the switch is depressed. A Burn Switch can be found inside the area where the chest is, which will give Kirby an easier way in if hit. One way to do this is by aiming a Cutter blade. |
| Shadow Spray Paint | Stage 1 | 
|
In the fourth area, Kirby can access this chest by using the Laser ability to clear through a series of Bomb Block barriers and open the way. |
| Bubble Scroll | Stage 1 | 
|
In the last area, Kirby can find this chest by cutting a tall grass patch to reveal it. Grabbing the chest causes Doc and the Squeaks to appear. |
| Yellow Spray Paint | Stage 2 | 
|
In the third main area, Kirby can find this chest by hitting a certain Burn Switch on the path. After collecting the chest, a bunch of Maiga will appear to ambush him. |
| Star Seal | Stage 2 | 
|
In the last area, Kirby will need to nab the chest from a moving platform before Spinni gets it first. |
| Metal Scroll | Stage 3 | 
|
This chest can be found in the room following the split in the path in the third main area if Kirby takes the upper door. In the room, Kirby needs to make use of the Laser ability to clear a way to the chest. |
| Industrial Copy Palette | Stage 3 | 
|
This chest can be found in a room following the split in the fifth main area if Kirby takes the left cannon. In the room, Kirby needs to navigate a dark labyrinth to find the chest inside a barrel, but can light up the place using the Fire ability. |
| Vitality | Stage 3 | 
|
In the last area, Kirby needs to nab the treasure chest from Doc, who tries to get away with it. Using Wheel can help Kirby catch Doc faster. |
| Graphic Piece - Blue | Stage 4 | 
|
In the fourth main area, Kirby needs to ignore the door just to the left and instead go on a circuitous path that takes him through a fight against Buboo, then along a path that leads him to another door above some barrels. In this door, the chest can be found in an enclosed space blocked off by metal blocks that can be melted using the Fire ability. A bubble containing the Fire ability can be seen to the right. |
| Secret Map piece | Stage 4 | 
|
From the third area, Kirby needs to enter the right-most door on the split path leading downward. From there, he enters a deep cave where he needs to chase down a Gold Waddle Dee and get its treasure before it drops off into a pit. |
| Hidden Door Key for Jam Jungle | Stage 4 | 
|
At the end of the fifth area, Kirby needs to use the Fire ability to burn away some metal blocks blocking a side door rather than taking the main exit. This done, he can nab the large chest in the next room, but will then need to contend with Storo and his troops in the area after that. |
| Laser Scroll | Stage 5 | 
|
In the last room, Kirby needs to race down a long winding path to catch up with the falling chest and beat it to the bottom so he can pick it up without it falling into the pit below. |
| Boss Battle Badge - Yadgaine | Boss | 
|
This treasure is obtained by defeating Yadgaine. |
| Ice Scroll | Secret | 
|
In the fourth main area, Kirby can find this chest under a gate on the left side, which can be opened by breaking some floors above. |
| Party Notes | Secret | 
|
In the fifth main area, Kirby can find this chest by taking a path choked with Star Blocks and then hitting a switch inside a wall to retract the spikes in the way. |
| Ghost Medal Piece | Secret | 
|
In the last area before looping back to the start, Kirby can find this chest by hitting a switch in the middle of the hall. After picking up the chest, Kirby will need to contend with Spinni and his Squeakers. |
Vocal Volcano[edit]
| Vocal Volcano Treasures | |||
|---|---|---|---|
| Treasure | Stage | Location | How to obtain |
| Parasol Scroll | Stage 1 | 
|
In the third main area, Kirby will need to take a path lined with spikes (which can be removed by hitting a switch behind them) to access a big underground room with a grid of large Star Blocks inside. The chest can be found in the lower-right corner. |
| Enemy Sounds | Stage 1 | 
|
In the fourth main area, this chest can be found near the top, behind a gate with a switch that only opens it while it is being pressed. Kirby will need to break a Bomb Block inside to free the chest. |
| Star Seal | Stage 1 | 
|
In the last room, Kirby needs to retrieve this chest from a Squeaker who will jump off a cliff with it if Kirby isn't fast enough. After picking up the chest, Kirby needs to avoid Doc to get away with it. |
| Ivory Spray Paint | Stage 2 | 
|
In the second area, Kirby can find this chest behind a lava-fall. He'll need to hit a switch to block the lava flow. |
| Graphic Piece - Blue | Stage 2 | 
|
In the fourth area, Kirby encounters a split in the path. Kirby needs to take the left door to find his way to the chest. |
| Hammer Scroll | Stage 2 | 
|
In the last area, Kirby needs to use an appropriate ability to hit a switch in the floor to get the chest above. After this, Kirby needs to fight or avoid Spinni and the Squeakers to get to the exit. |
| Graphic Piece - Green | Stage 3 | 
|
To get this chest, Kirby needs to use the Hammer ability from Bonkers to hit a stake. |
| Ninja Scroll | Stage 3 | 
|
To get this chest, Kirby needs to use the Animal ability from Gao Gao to dig through some dirt. |
| Vitality | Stage 3 | 
|
To get this chest, Kirby needs to use the Metal ability from Big Metalun to pass through some spikes and hit some metal blocks underneath. |
| Secret Map Piece | Stage 4 | 
|
This chest can be found in a side area accessible via a door in the fourth main area which is hidden by Star Blocks. It is held by a Gold Waddle Dee. If Kirby wants to get the chest, he needs to not hit the switch above the Waddle Dee before dispatching the hapless creature. |
| Red Spray Paint | Stage 4 | 
|
This chest can be found behind a switch gate in the fifth main area, which Kirby needs to be very quick to pass through. Alternatively, the switch can be hit through the ceiling using an appropriate ability. |
| Hidden Door Key for Vocal Volcano | Stage 4 | 
|
In the last area, Kirby needs to fight Doc to obtain this chest, then get to the exit with it. |
| Boss Battle Badge - Bohboh | Boss | 
|
This treasure is obtained by defeating Bohboh. |
| Animal Copy Palette | Secret | 
|
Through the upper-left door from the start, Kirby finds a series of tunnels blocked off with barriers and stakes. He needs a stake-pounding ability such as Hammer to get through. The chest is located in the lower-right corner in this area. |
| Sleep Scroll | Secret | 
|
Through the upper-middle door from the start, Kirby finds a room filled with lava and gouts of fire. He can use the Ice ability to safely traverse the area and reach this chest. |
| Ghost Medal Piece | Secret | 
|
Through the upper-right door from the start, Kirby will need to fight Spinni to get this chest, and then proceed to the stage exit from there. |
Ice Island[edit]
| Ice Island Treasures | |||
|---|---|---|---|
| Treasure | Stage | Location | How to obtain |
| Sound Effects | Stage 1 | 
|
In the third main area, Kirby can dig through a large snow pit using Animal to bring a switch down to an area where he can use it to quickly slip through a gate and get this chest. |
| Graphic Piece - Blue | Stage 1 | 
|
In the fourth main area, Kirby can make use of the Laser ability to open a way to a side room containing this chest. |
| Sword Scroll | Stage 1 | 
|
In the last area, Kirby will need to fight Storo to get this chest. |
| Snow Spray Paint | Stage 2 | 
|
This chest can be found in a side area accessible through a door from the second main area, above a trio of Foleys. |
| Star Seal | Stage 2 | 
|
This chest is in the last main area, held by Spinni and his Squeakers. Kirby needs to battle them to get it. |
| Fighter Scroll | Stage 3 | 
|
In the third main area, this chest can be found under a barrier that can be opened by hitting a stake. Kirby will need to find a Hammer bubble through a side passage if he does not already have a stake-pounding ability. |
| Graphic Piece - Red | Stage 3 | 
|
In the fourth main area, Kirby can reach this chest by taking the left of two paths through the switch gates. |
| Vitality | Stage 3 | 
|
In the last area, Kirby and Doc will race for this chest as it is moved away on a thundercloud. Kirby needs to get the chest quickly and then head to the exit. |
| Happy Notes | Stage 4 | 
|
This chest can be found in the first main area, in a series of underground chambers accessible by breaking through an ice block barrier. |
| Chalk Spray Paint | Stage 4 | 
|
This chest is located in the fourth main area, but a rope platform and an embedded Bomb Block need to be dealt with to reach it. The Magic ability can take care of both. |
| Hidden Door Key for Ice Island | Stage 4 | 
|
In the last area, this chest can be accessed from behind some ice blocks. From here, Kirby needs to fight or avoid Storo and his Squeakers. |
| Graphic Piece - Yellow | Stage 5 | 
|
Kirby needs to fight Spinni to get this chest. |
| Cupid Scroll | Stage 5 | 
|
Kirby needs to fight Storo to get this chest. |
| Machine Copy Palette | Stage 5 | 
|
Kirby needs to fight Doc to get this chest. |
| Boss Battle Badge - Daroach | Boss | 
|
This treasure is obtained by defeating Daroach. |
| Cherry Spray Paint | Secret | 
|
This chest can be found in the first main area, at the end of a cave. Kirby needs to hit a Bomb Block and then race its chain reaction to the end before it blocks off the chest. The Wheel ability is suited for this task. |
| Secret Map Piece | Secret | 
|
This chest is located in a side room accessible from the fourth main area blocked off by ice blocks. It is held by a Gold Waddle Dee, who Kirby needs to catch before it drowns. |
| Ghost Medal Piece | Secret | 
|
In the last area, Kirby will need to wrestle this chest away from Spinni and his Squeakers. |
Secret Sea[edit]
| Secret Sea Treasures | |||
|---|---|---|---|
| Treasure | Stage | Location | How to obtain |
| White Spray Paint | Stage 1 | 
|
This chest is located in the third main area, in a side chamber accessible off the main path by riding a water current upward shortly past the chest's location. |
| Secret Sounds | Stage 1 | 
|
This chest is in the fifth main area, accessible by an underwater tunnel which can be broken open via a Bomb Block. |
| Throw Scroll | Stage 1 | 
|
In the last area, Kirby needs to battle Storo to get this chest. |
| Sapphire Spray Paint | Stage 2 | 
|
This chest can be found in the second main area, located under the main path on some scattered cloud platforms. |
| Green Graphic Piece | Stage 2 | 
|
In the fifth area, this chest can be found inside the cloud structure, which can be accessed using a fiery ability. |
| Ghost Medal Piece | Stage 2 | 
|
In the last area, Kirby will need to fight Doc to get the chest. |
| Yellow Graphic Piece | Stage 3 | 
|
This chest is located in a side room accessible from the first main area. To reach the door, Kirby needs to bust through the cloud walls. |
| Spunky Notes | Stage 3 | 
|
This chest is located in the second main area, between two floating blocks. It can be released with the help of a ranged ability, where it will then fall to a floating platform below. |
| Bomb Scroll | Stage 3 | 
|
This chest is located in the last area. It slowly sinks in the water in a central column, and Kirby has to race Spinni to reach it. |
| Ocean Spray Paint | Stage 4 | 
|
This chest can be found in the second main area, in the underwater maze. Kirby will need to hit a switch to break the blocks under the chest so he can access it, but he then needs to get back to the chest quickly before it falls out of reach. |
| Magic Scroll | Stage 4 | 
|
This chest is located in the fifth main area, behind a spike and Bomb Block barrier and inside a barrel in the upper-left area. Kirby is intended to use an ability that can generate electric sparks along the ground to reach it. |
| Hidden Door Key for Secret Sea | Stage 4 | 
|
This chest is located in the last main area, held by one of the Squeakers. Kirby will need to rough up this foe to take the chest and then run to the exit with it before he is overwhelmed. |
| Chocolate Spray Paint | Stage 5 | 
|
In this stage, Kirby needs to race against the chest as it is ferried away quickly by a moving platform. Kirby needs the Wheel ability and good timing to catch the chest before it gets away. |
| Boss Battle Badge - Meta Knight | Boss | 
|
This treasure is obtained by defeating Meta Knight. |
| Secret Map Piece | Secret | 
|
To get this chest, Kirby needs to proceed up through the middle path until he reaches a room with a Gold Waddle Dee and two switches. Kirby needs to be careful not to hit the lower switch first, since that will open a hatch that can cause the Waddle Dee to fall out of bounds. |
| Green Graphic Piece | Secret | 
|
At the juncture with only two doors, Kirby needs to take the right door to get to this chest. |
| Vitality | Secret | 
|
In the last room, Kirby will have to battle Storo to get this chest. |
Gamble Galaxy[edit]
| Gamble Galaxy Treasures | |||
|---|---|---|---|
| Treasure | Stage | Location | How to obtain |
| Red Graphic Piece | Stage 1 | 
|
From the cannon hub, Kirby needs to shoot into the room straight upward to find this chest. The room is dark, so lighting a candle might help. |
| Battle Notes | Stage 1 | 
|
From the cannon hub, Kirby needs to shoot into the room in the lower-left to find this chest. Kirby will need to use the Wheel ability to quickly race through the hall in this room and get the chest in time. |
| U.F.O. Scroll | Stage 1 | 
|
In the last area, Kirby will need to intercept Spinni to get this chest, being careful not to let it drop into the void below. |
| Emerald Spray Paint | Stage 2 | 
|
This chest is located in a side room accessible from the third main area, reachable by finding a door hidden behind a large Star Block. Kirby will need to solve a switch puzzle to get the chest. |
| Secret Map Piece | Stage 2 | 
|
In the fifth main area, Kirby needs to chase down a Gold Waddle Dee before it runs off the edge to get this chest. |
| Ghost Medal Piece | Stage 2 | 
|
In the last area, Kirby will need to outpace or defeat Storo and the Squeaks after he picks up the chest along the path. |
| Carbon Spray Paint | Stage 3 | 
|
This chest can be found tucked deep within the third area, in the lowermost of the dirt-choked tunnels. Kirby needs the Animal ability to reach it. |
| Secret Notes | Stage 3 | 
|
This chest is found in a side chamber accessible from the fifth main area. Kirby can access it by breaking the metal blocks in the way of the door, which can be done using U.F.O. |
| Vitality | Stage 3 | 
|
This chest can be found in the last area. Kirby needs to fight Doc and some UFOs for control of it. |
| Boss Battle Badge - Dark Nebula | Boss | 
|
This treasure is obtained by defeating Dark Daroach and Dark Nebula. |
| Shortcake | After the staff credits | 
|
This treasure is obtained after viewing the staff credits. |
Kirby's Epic Yarn / Kirby's Extra Epic Yarn[edit]

In Kirby's Epic Yarn and Kirby's Extra Epic Yarn, several pieces of furniture and music trakcs are collected as treasures in stages, with each non-boss stage containing two furniture pieces and one tune. They are typically found behind Treasure Patches, but may also be found out in the open or obtained by defeating certain enemies. Collecting certain treasure furniture pieces is necessary to invite the neighbors to Quilty Court and unlock their sub-games. Collecting all of them is necessary to obtain 100% completion.
The following table lists where to find each treasure in Kirby's Epic Yarn and Kirby's Extra Epic Yarn:
Quilty Square[edit]
Quilty Square is the first area Kirby starts in, with the only stage to collect Treasures in being Patch Castle.
| Patch Castle Treasures | ||
|---|---|---|
| Item | Description | How to obtain |
 Chandelier |
This chandelier is very simple and very elegant. You can’t go wrong here. | This treasure can be found up a short ladder just after the first patch Kirby is instructed to pull. |
 King's Throne |
You'll feel like a king when you sit on this gold-plated throne! | This treasure can be found on a high ledge on the left side of the swinging pendulum section. Additionally, the Yarn Whip can simply be used upwards after a jump to peel the patch. |
 Patch Castle |
This new music plays in Patch Castle. | This Treasure can be found when following the beads at the Car tutorial after jumping up to a platform at the end of the stage. |
Grass Land[edit]
| Grass Land Treasures | ||||
|---|---|---|---|---|
| Item | Stage | Description | How to obtain | Notes |
 Flower Sofa |
Fountain Gardens | This cute sofa will always smell like a fresh bouquet! | This treasure can be found in the tree where the Ooki is throwing beads around. Kirby needs to use the doorway to climb up the trunk, then pull the button on the right to move the canopy aside and reveal the Treasure Patch. | |
 Fountain |
This fountain is perfect for any room…that is big. Any room that is REALLY big. | This treasure is beneath the tower with the zipper on its top. Kirby can access it by unzipping the zipper to create an underground passageway leading to the Treasure Patch. | ||
Fountain Gardens |
This new music plays in Fountain Gardens. | This Treasure is located above the castle just prior to the Metamortex stretch, by the three water fountains. Kirby needs to stand on the third fountain in order to be launched into the sky, where the Treasure Patch can be found. | ||
 Flower Clock |
Flower Fields | It’s always time for a little sunshine with this timepiece! | This treasure can be found on a high platform just after the spinning flower wheels. Kirby can reach it by jumping along the wheels and using the pendulum buttons to get up. | One of the items needed to attract Zeke to Quilty Court. |
 Frog Umbrella Stand |
This umbrella stand uses its magic frog power to bring you all lost umbrellas! | This treasure can be found high up at the start of the rainy area. To reach it, Kirby needs to ride the dandelion seed buttons up in the previous area and then swing past the frog button to reach the Treasure Patch. | ||
Flower Fields |
This new music plays in Flower Fields. | In the rainy section of the stage, Kirby needs to jump off the two adjacent frogs using the Pendulum to reach a fabric patch. This reveals a magic tab, which attaches itself to a nearby fountain. Kirby can then pull the tab to reveal the treasure. | ||
 Rainbow Arch |
Rainbow Falls | With this arch, you can see a rainbow anytime! | This treasure can be found perched on a high ledge near the start of this stage. It can be reached by removing the Yarn Block in a stack so the Cloth Block on top can start sliding into position to give Kirby a way to reach it. | One of the items needed to attract Beadrix to Quilty Court. |
 Outdoor Bath |
This bath is nice for bringing the outdoors to the indoors! | This treasure is located in a large room above the main path through the tunnel section just before the Metamortex, guarded by three Gators that Kirby can use as platforms to reach. | One of the items needed to attract Buster to Quilty Court. | |
Rainbow Falls |
This new music plays in Rainbow Falls. | This treasure is located right before the Reel Gate. Kirby must successfully bounce off three Bronto Burts in a row by using the Spin Boarder's spin move at the right time. | ||
 Lattice |
Big-Bean Vine | This lattice is covered in sweet-pea vines. | This Treasure is located on the left side at the top of the first section, past a series of flying Parasol Waddle Dees that Kirby can be used as platforms. | |
 Cloud Pillow |
This fluffy cloud pillow is 99% comfy with a good chance of sleep in the evening. | This Treasure is located near the top on the right side, in a cloudy alcove shortly before the end of the stage. Kirby needs to make use of the Balloon Waddle Dees to reach it. | ||
Big-Bean Vine |
This new music plays in Big-Bean Vine. | This Treasure is located near the first set of Balloon Waddle Dees, on a high-up platform to the right of the vine. | ||
 Carrot Dresser |
Mole Hole | It’s full of vitamins, but it just might turn your clothes orange! | A short way down there is a background path with beads of many colors lining it, blocked by a crystal obstruction. Kirby needs to clear away the obstruction and then take the path to reach this Treasure. | |
 Tree-Stump Bed |
Squirrels and lumberjacks can relax here peacefully. Just not at the same time! | This Treasure can be found in a small pocket within the diggable fluff a few paces above the Reel Gate at the bottom of the stage. | ||
Mole Hole |
This new music plays in Mole Hole. | Later, Kirby encounters four Rock Blocks by a bead pop switch. Kirby must push the leftmost block and then dig left to reach this Treasure. | ||
 Telescope |
Weird Woods | This telescope is perfect for stargazing on a clear night. | During a section where the player heads down past rotating spikes, this Treasure is located at the bottom in the left corner. | |
 Log Cake |
This log cake looks like it has a cream center that probably tastes better than wood! | Immediately after the section where the player finds the Telescope Treasure, this Treasure is encased by Cloth Blocks that must be destroyed by the Saucer's Thunder Spark ability. | ||
Weird Woods |
This new music plays in Weird Woods. | After a section containing patrolling Spear Waddle Dees and Bronto Burts, this Treasure is blocked behind some Cloth Blocks that must be destroyed by the Saucer's Thunder Spark ability. Otherwise, the player can go around the other side and collect it before it scrolls off the screen. | ||
Hot Land[edit]
| Hot Land Treasures | ||||
|---|---|---|---|---|
| Furniture | Stage | Description | How to obtain | Notes |
 Camel Sofa |
Pyramid Sands | Sitting on this sofa will make you feel like a desert king of comfort! | This Treasure is accessible after pulling the first drawstring the player comes across, making access to an underground tomb there the Treasure Patch resides. | One of the items needed to attract Beadrix to Quilty Court. |
 Cactus Juice |
Cactus juice is an acquired taste. It has a kick to it! | Pulling the second drawstring, Kirby gains access to a tomb patrolled by Spear Waddle Dees, at the end of which is a Pull Patch that releases a magic tab. The magic tab will eventually attach itself to a pyramid in the background which reveals this Treasure after being peeled. | ||
Pyramid Sands Soundtrack |
This new music plays in Pyramid Sands. | During the Off-Roader section, where there are two tiers of platforms, the player must jump from the very top of the last platforms to obtain this Treasure. | ||
 Stone Lamp |
Lava Landing | Molten rocks emit a warm glow, but don’t hang your coat here! | A magic tab can be revealed hidden behind a Pull Patch where the player first encounters Magmotamus. The tab attaches to a piece of rock in the background behind a lava geyser, where this Treasure can be obtained after peeling. | |
 Cartoon Meat |
This meat is straight out of a caveman cartoon! Mmmm… Grog need fire! | This Treasure is located above where the player finds the Stone Lamp Treasure. It is located behind a wall of falling Cloth Blocks, where nearby Bombers can be used for destroying them. | ||
Lava Landing Soundtrack |
This new music plays in Lava Landing. | During the rising lava section of the stage, this Treasure can be found behind a row of Yarn Blocks. | ||
 Crystal |
Cool Cave | This coffee-table crystal would be perfect for the lobby of a psychic. | Right before the player encounters the Slobba, they must unfurl a rolled up piece of cloth on the ground by standing on it, in which Kirby will fall onto another cloth. Before this one unfurls, the player must use the Snake transformation to enter a gap to the right, where they will find this Treasure. | |
 Frog Mirror |
Your head is not being eaten by a frog. It’s just the mirror, trust me. Just relax. | At the end of the Metamortex section of the stage, there are two Reel Gates the player may choose to enter to end the section. This Treasure can be found behind the upper one. | ||
Cool Cave Soundtrack |
This new music plays in Cool Cave. | When the player encounters the giant Rolling Clod that blocks their path, there is a string on a pulley over a spike gap. If the player chooses to roll up the string, given it is timed properly before it unrolls, a path will be created for the Rolling Clod to break some Cloth Blocks which conceal this Treasure.
Optionally, the player may choose to skip the puzzle and break the Cloth Blocks with the use of Yarn balls. |
||
 Torch |
Dino Jungle | This flaming torch can really brighten up any dungeon, lair, or foyer. | This Treasure can be found during the fourth and last ride atop the plesiosaur's head through the rapid river currents, in a Treasure Patch above a series of four plesiosaurs bobbing up and down. | One of the items needed to attract Buster to Quilty Court. |
 Bronto Slide |
All this gentle dino wants is for kids to have fun sliding down its neck! | Below the two tyrannosaurs, a Pull Patch conceals a magic tab. This tab will make its way to an egg which reveals this Treasure when peeled. | One of the items needed to attract Carrie to Quilty Court. | |
Dino Jungle Soundtrack |
This new music plays in Dino Jungle. | After the cave section, where there are two platforms holding a Spear Waddle Dee and a Waddle Doo, there is a button on the player must pull to unfurl some fabric. In this hole, there is some jungle greeble in the foreground the player must pass through to collect this Treasure. | ||
 Pyramid |
Temper Temple | Some say that this decorative object has healing powers. | During the stop between the first and second sections, this Treasure is obtained when the player defeats the Embaconda. | |
 Camel Pillow |
This camel pillow has two humps. One for you and one for a friend! | During the second serpent raft ride, this Treasure is obtained when the player defeats the Embaconda emerging from the left wall during the vertical section. | ||
| This new music plays in Quilty Square. | When the two serpent rafts come back together after their split paths in the last section, this Treasure is obtained after defeating the Embaconda in this big open area. | |||
 Magic Carpet |
Dusk Dunes | This carpet has the power to fly! But it’s much safer on the floor. | After the second set of platforms encountered in the stage, Kirby must jump onto the first one, onto the rock pile, then onto the second platform. Grabbing the boost, the second boost should be grabbed after a jump to gain enough distance to grab the Treasure. | |
 Hourglass |
This hourglass uses stardust to tell you when the stars are out! | Atop the third set of platforms encountered in the stage, Kirby must jump onto the first platform to grab the boost. Between the two platforms is a spring on the ground. Touching the spring will launch Kirby into the air. In combination with the boost, the top of the pair of platforms can be reached, where this Treasure resides. | ||
Dusk Dunes Soundtrack |
This new music plays in Dusk Dunes. | When reaching the ramp that leads Kirby onto a platform, Kirby must jump after grabbing the boost onto the next platform. After grabbing the second boost, jumping off the platform into the third boost will give Kirby enough distance to grab this Treasure. | ||
Treat Land[edit]
| Treat Land Treasures | ||||
|---|---|---|---|---|
| Furniture | Stage | Description | How to obtain | Notes |
 Stuffed Bear |
Toy Tracks | This guard bear lost his post when he was caught napping on the job! | During the section where Block Waddle Dees are tossing a blue Denim Block up and down, riding atop the Denim Block Kirby can reach the top. From there, jumping up to a platform, the Treasure Patch concealing this Treasure can be found. | One of the items needed to attract Carrie to Quilty Court. |
 Tin Robot |
This tin robot is a very expensive vintage item sought by collectors. | Through the stage, three toy soldiers can be found standing in a row. Entering the door atop their legs, Kirby can enter the background, and sneak to the door on the right behind their legs to return to the foreground. In this area, a Pull Patch conceals a Pull Tab which, when revealed, will attach itself to one of the toy soldiers' bearskins. Peeling the bearskin away will reveal the soldier has dirty blond hair, as well as reward the player with this Treasure. | ||
Toy Tracks Soundtrack |
This new music plays in Toy Tracks. | During the Train Metamortex section, this Treasure is concealed behind colored Cloth Blocks. Grabbing a boost powerup, Kirby can break through the Cloth Blocks and collect the Treasure. | ||
 Mushroom Bed |
Mushroom Run | This bed is made of springy mushrooms that make for bouncy naps! | After Kirby is forced to use the Weight Transformation to bounce high on a yellow mushroom after reaching a wall, heading to the right will be a column of Cloth Blocks which can be broken with the Weight Transformation. At the bottom will be a Treasure Patch where this Treasure resides. | |
 Mushroom Lamp |
This novelty light looks like a big mushroom. Maybe it’ll grow on its own! | At the top of the swinging mushroom section, the Pendulum Transformation can be used to swing on a button up to a higher swinging mushroom. Jumping to the left will be a stretch of ground with a Treasure Patch, which will reward the player with this Treasure. | ||
Mushroom Run Soundtrack |
This new music plays in Mushroom Run. | During the final vertical section with many bouncy mushrooms, sticking to the left side, a stretch of ground can be found with a column of Cloth Blocks blocking of this Treasure Patch. A nearby Shelby can be rolled up and tossed to clear away these Cloth Blocks and grant access to this Treasure. | ||
 Donut Pillow |
Sweets Park | This delicious-looking cushion would be at home in a café. | At the top of the gelatin factory, Kirby can stand atop the gelatin moving left. Dashing and jumping to the left from the gelatin, Kirby can reach a stretch of ground with a Treasure Patch concealing this Treasure. | |
 Dessert Dresser |
This dresser will make you reach for a spoon…and your elastic-waistband pants! | Towards the end of the stage, atop a tall ladder, a portal can be unstitched and entered to lead Kirby onto a cotton cake with the Digger Metamortex. A staircase must be dug through the cake so, after passing through the Reel Gate, Kirby can enter the area again and jump to the top, peeling the Treasure Patch to collect this Treasure. | One of the items needed to attract Carrie to Quilty Court. | |
| This new music plays in Grass Land. | Towards the end of the stage, Kirby can enter a gap in a spinning donut and wait for the gap to spin around. Exiting the donut to the left, Kirby will access a small opening under the ground with a Treasure Patch concealing this Treasure. | |||
 Toy Piano |
Melody Town | This piano may look like a toy, but it really has a solid tone. | This treasure can be found in a small chamber under the main path across a bottomless pit, just after the Waddle Dees bouncing on cymbals. | |
 Clef Tree |
This tree plays a melody when you shake it. Just try not to overdo it, however. | Underneath the sheet music of the second horn after swinging across gaps from the harps, this Treasure resides under an overhang behind a lozenge pattern Kirby can traverse behind. | One of the items needed to attract Mara to Quilty Court. | |
Melody Town Soundtrack |
This new music plays in Melody Town. | Kirby can pull down an accordion with a snag button, in which, with the help of a timpani drum, Kirby can climb onto the accordion and lifted up to this Treasure. | ||
 Choco Ottoman |
Cocoa Station | This ottoman is great, but what is it filled with? | The first puzzle encountered in the stage is a simple reel that can be cranked by simply riding through it. This opens a door which grants access to this Treasure. | |
 Chocolate Bar |
This floor mat makes me wonder why there aren’t more giant chocolate bars! | Promptly after the 3 Bonus Star is a puzzle involving two switches. Flipping the accessible switch grants access to the second switch. Flipping the second switch grants access to this Treasure. | ||
| This new music plays in Hot Land. | At the end of the stage, a series of Yarn Block walls stand in Kirby's way. By collecting a boost and chaining it with other boosts while charging through the walls, Kirby can collect this Treasure by bursting through the final wall. | |||
 Ghost-in-a-Box |
Dark Manor | These toys can be pretty unpredictable…and scary! | At the end of the room just before the stairwell, jumping there Kirby can reveal a ladder. Climbing the ladder, this Treasure can be found on the left side of this room. | |
 Pumpkin |
This pumpkin looks great as a quaint decorative item. | After the third flight of stairs, a Cloth Block can be found in the upper right corner of the hallway. After clearing the block with a yarn ball, this Treasure can be found at the end of this path. | ||
Dark Manor Soundtrack |
This new music plays in Dark Manor. | During the last section of the manor, a swing button can be found in the dark. Swinging up to the left, Kirby can maneuver across some platforms to locate this Treasure. | ||
Water Land[edit]
| Water Land Treasures | ||||
|---|---|---|---|---|
| Furniture | Stage | Description | How to obtain | Notes |
 Sun Clock |
Splash Beach | This sunny clock gives off a warm glow. Ahhhh… | Early into the daytime section of the stage, this Treasure can be found after an enclave with two Bobber Clods, sitting in a corner where it will be periodically submerged as the tide changes. | |
 Moon Clock |
This moon clock gives off a gentle light and goes dark once a month. | During the section where Kirby must fall down into a pit, this Treasure can be reached by opening an umbrella when the tide rises to reach a ladder, where this Treasure resides at the top. | ||
| This new music plays in Secret Island. | At the end of the stage, the high tidal waves can be ridden to reach a platform where this Treasure resides. | |||
 Jellyfish Light |
Blub-Blub Ocean | This light has one switch for light and one for electric shocks! Guess which is which! | Located atop an island with a hollow space inside, this Treasure can be reached by destroying some Cloth Blocks underneath the island with the use of rolling up Sawgills for a way up. | One of the items needed to attract Mara to Quilty Court. |
 Aquarium |
I think all of the fish are hiding right now… scaredy-fish. | This Treasure is collected by tossing the dolphin ball with the star on it into the hoop during the Dolphin portion of the stage. | ||
Blub-Blub Ocean Soundtrack |
This new music plays in Blub-Blub Ocean. | After the waterfall section, the next access point of the surface features two dolphin hoops with this Treasure between them. It can be reached by jumping out of the water straight up. | ||
 Treasure Rug |
Secret Island | Feel like you inherited a fortune as you lie on this dazzling rug! | During the beginning background platforming section, Kirby can climb up in the background. A drawstring exists in the foreground that, when pulled, will move some scaffolding, granting access to this Treasure. | |
 Totem Pole |
This totem pole sports a few faces you may recognize! | After the ladder parkour, a line of Cloth Blocks can be found holding up some Denim Blocks. These blocks can be destroyed by grabbing a Spear Waddle Dee's spear—accessed via pulling a drawstring in the next section—after which will reveal a Pull Patch. This Pull Patch reveals a magic tab, which will float over to a giant fossil. Peeling the fossil will revive a prehistoric bird which will stand tall, granting Kirby with a platform to jump up and collect this Treasure. | One of the items needed to attract Buster to Quilty Court. | |
| This new music plays in Splash Beach. | Riding Balloon Waddle Dees up high, a platform to the right holds the Treasure Patch containing this Treasure. | |||
 Dangler Light |
Deep-Dive Deep | This thoughtful night-light goes out when you fall asleep. | This Treasure is located behind the second Danglerfish encountered in the stage. | |
 Mast |
Putting this in your room may lead to random bouts of swashbuckling! | This Treasure can be found during the Dolphin section inside the sunken ship by taking a partially obscured path in the lower-left corner of the ship. | ||
Deep-Dive Deep Soundtrack |
This new music plays in Deep-Dive Deep. | Some Cloth Blocks can be found at the end of the sunken ship supporting some Denim Blocks. By destroying them, the Denim Blocks will fall and clear way for this Treasure to be collected. | ||
 Pirate Ship |
Boom Boatyard | I hear that retired pirates make these all day long! | Climbing the masts of the second ship, this Treasure is collected when tearing down the flag with Yin-Yarn's face on it. | |
 Treasure Chest |
This is actually a piggy bank! Don’t let your pirate friends see it! | After the first Cloth Block bridge, this treasure can be found high up on a platform which is just out of reach. Kirby will need to wait a bit so he can use a cloth block platform to the right to get up, but needs to do so before the platform is destroyed by a missile. | ||
| This new music plays in Treat Land. | Climbing the masts of the first ship, this Treasure is collected when tearing down the flag with Yin-Yarn's face on it. | |||
 Anemone Sofa |
Fossil Reef | This anemone chair looks comfy, but it feels a bit strange… Go ahead, try it! | In the second chamber, this Treasure is located at the top left, where the player must leap from bubble to bubble to reach it. | |
 Fossil |
This astounding fossil was discovered in an ancient sea. Beautiful! | This Treasure is accessed by riding a water bubble up in the third chamber, then jumping out into a pool of water where this Treasure resides. | ||
| This new music plays in Water Land. | At the end of the stage in the fourth chamber, this Treasure resides in a pool of water at the upper left corner. | |||
Snow Land[edit]
| Snow Land Treasures | ||||
|---|---|---|---|---|
| Furniture | Stage | Description | How to obtain | Notes |
 Big Bear Bed |
Snowy Fields | This cuddly bed keeps your head cool and your body warm. | During the brief vertical climb, a Pendulum button can be swung from on the right side to access this Treasure. | |
 Penguin Mirror |
See yourself in this mirror that’s shaped like an igloo that’s shaped like a penguin. | In the middle of the stage, where Kirby must hide in gaps in the floor for giant snowballs to pass, a door can be entered into the background. Climbing up, jumping across some platforms to the left, then utilizing a Pendulum button, this Treasure can be found. | ||
Snowy Fields Soundtrack |
This new music plays in Snowy Fields. | At the end of the stage, Kirby can climb a building in the background. Exiting at the top, Kirby must stay atop a giant snowball to reach this Treasure up atop a high platform. | ||
 Fireplace |
Cozy Cabin | Keep this fireplace fed with logs, and you’ll be happy for the holidays. | In the first cabin, this Treasure is located on the second floor behind some Yarn Blocks. | |
 Chimney |
This chimney is stuffed with toys. Get a plunger and save this holiday! | At the end of the second cabin, a Cloth Block holding up a Denim Block can be destroyed to reveal a ladder. The ladder can be utilized to reach this Treasure. | One of the items needed to attract Buster to Quilty Court. | |
Cozy Cabin Soundtrack |
This new music plays in Cozy Cabin. | The last part of the third cabin has wind current in which Kirby rides up to reach the end of the stage. To the right, some Yarn Blocks can be removed to access this Treasure. | ||
 Knit-Cap Sofa |
Mt. Slide | This knit-cap sofa will tickle your head with warm fuzzies. | Located just before the second cave, this Treasure can be reached by taking the upper path beforehand, and using a Spin Attack on the Bronto Burt. | One of the items needed to attract Mara to Quilty Court. |
 Snowman |
This snowman won’t melt at room temperature. Go ahead, take him. | In the second cave, Kirby must jump across the icicles while grabbing the powerup. At the end of the cave, using the boosted Spin Attack enables Kirby to reach a much higher platform with another powerup. Jumping from here, Kirby can time the next Spin Attack to grab this Treasure. | ||
Mt. Slide Soundtrack |
This new music plays in Mt. Slide. | Holding onto a powerup after the first cave and taking the lower path, Kirby can use his boosted Spin Attack to reach this Treasure. | ||
 Snow Clock |
Frosty Wheel | This delicate clock plays a chiming melody that sounds like snow falling. | At the first pool of water, Kirby can sprint across the surface as the Sleigh and jump up to reach this Treasure. | |
 Snow Globe |
It never stops snowing inside this globe. Can you see any little shovels in there? | After encountering the first frosty wheels of Frosty Wheels, Kirby must remain on the wheel to jump into a small nook where this Treasure resides. | ||
Frosty Wheel Soundtrack |
This new music plays in Frosty Wheel. | While jumping across the spinning wheels above a chasm, this Treasure can be found behind some Cloth Blocks, which can be cleared by rolling up any Chilly found in the stage. | ||
 Penguin Chest |
Frigid Fjords | This sharp-dressed dresser can store all of your tuxedos! | Taking the upper path where the ramp is lined with red beads, this Treasure can be reached by jumping across a sinking ice platform and grabbing a boost. | |
 Sleigh |
Now this is a sleigh that is always ready for a snowy ride through the hills! | After jumping while grabbing a boost at the end of a small cliff, this Treasure can be reached by jumping across multiple sinking ice platforms in a row. | ||
| This new music plays in Snow Land. | Towards the end of the stage, by initially taking the lower path, Kirby can jump from the cliff to reach this Treasure. | |||
 Holiday Tree |
Evergreen Lift | Just looking at this tree is sure to bring back good memories. | This Treasure sits part-way up on the lift at the left side, behind two Cloth Blocks which must be destroyed to access it. | |
 Star Wreath |
This sparkling holiday wreath is shaped like a star. Pretty nice! | Found in the latter half of the lift ride, this Treasure is encased behind a bunch of Cloth Blocks on the right side. | ||
| This new music plays in Quilty Court. | At the end of the lift ride, this Treasure sits on the right side where the player must not a scent too quickly in order to collect this Treasure. | |||
Space Land[edit]
| Space Land Treasures | ||||
|---|---|---|---|---|
| Furniture | Stage | Description | How to obtain | Notes |
 Space Monitor |
Future City | This is the kind of TV we’ll watch in the future…right? | In the big building, this Treasure is found behind some Cloth Blocks which must be cleared in order to access it. | One of the items needed to attract Mara to Quilty Court. |
 Space Table |
This table from the future is rumored to make food automatically! | After the Saucer segment, a Denim Block puzzle can be found where a Cloth Block must be destroyed to move the Denim Block out of the way, behind which a tunnel can be slid through which leads to this Treasure. | ||
Future City Soundtrack |
This new music plays in Future City. | At the end of the second Rocket Coaster section, Kirby must switch to the higher coaster, then jump at the last downhill to make it onto a platform or catch a ladder, where this Treasure resides. | ||
 Digital Clock |
Tube Town | This digital clock is easy to read even when the lights are out! | At the beginning of the stage, before Kirby climbs up with the pendulum button, there is a Cloth Block to the left that can be destroyed, hiding another pendulum button behind it. Utilizing this one, Kirby can swing to the left where this Treasure can be found. | |
 Circuitry Rug |
Ever feel like you’re inside a computer? Then this is the rug for you. | After climbing all the way back to the top, utilizing the pendulum button Kirby can swing up to the left. By crouching under the electrified platform via the conveyor, this Treasure can be reached. | ||
Tube Town Soundtrack |
This new music plays in Tube Town. | When riding downward on the sinewaves, a Pull Patch can be peeled on the right next to a Dandan. This reveals a magic tab which will float to the left and attach to a circuit board on the background. Peeling said patch will grant this Treasure. | ||
 Communicator |
Mysterious UFO | You can talk to aliens on this. Just be sure that you can afford the roaming charges. | After toggling on the low gravity, at the top of the room to the left, this Treasure can be found behind a barrier of Yarn Blocks. | |
 Space Food |
These are replicas of real astronaut food! Space chefs must be really dry people. | After the second chamber, a platform can be rotated by pulling on a button, which will grant access to a Pull Patch. Peeling the Pull Patch will reveal a magic tab, which will float into the room above. Entering the room above with the use of the low gravity, the tab can be found attached to a window, in which will grant this Treasure when peeled. | ||
| This new music plays in Space Land. | At the end of the long hallway, the room extends upwards. Kirby can gain some height with the low gravity, in which he must Roll Up or unravel the Waddle Doos on either side, which will give him additional height to reach this Treasure. | |||
 Star Candy |
Stellar Way | This candy is imbued with the power of stars. It has an extremely intense flavor. | Inside the giant yellow planet, this Treasure can be reached through a Door in the upper left corner, where it resides just outside of the corridor. | |
 Rocket Bed |
Sleeping in this bed may cause dreams of being a space case. | By hanging onto some pendulum buttons on the second big magenta planet, Kirby can jump onto some spinning stars, at the end of which this Treasure resides. | ||
Stellar Way Soundtrack |
This new music plays in Stellar Way. | By jumping atop the extended spinning planets just after exiting the giant yellow one, Kirby can reach some scaffolding up high in which, after traversing across a moon and star, Kirby can reenter the yellow planet by unraveling the Yarn Blocks. By swinging on the now accessible pendulum button, this Treasure can be found on the other side. | ||
 Cosmic Bin |
Moon Base | This transports trash to a different dimension! The future is a great place! | On the platform with the nine falling Yarn Blocks, jumping backwards, the Tankbot can hover and grab this Treasure. | |
 Porthole |
This window shows you what it looks like outside…in the future! | During the section with the Bomber-Spawning Enemy Patch, the Tankbot can jump up and grab this Treasure. | ||
| This classic tune was in Kirby's Dream Land. Now it plays when Kirby is a Tankbot! | During the meteor shower, this Treasure can be collected by jumping up and grabbing it. | |||
 Saturn Stand |
Outer Rings | The rings around the planet on this stand glow only at night. | This Treasure is granted after defeating the group of Orbitflies on the right in the first formation. | |
 Saturn Donuts |
These mysterious donuts sure smell like they’re out of this world! | This Treasure is granted after defeating the Spore Jelly on the right in the wave of three. | ||
Outer Rings |
This new music plays in Outer Rings. | This Treasure is granted after defeating Space Kracko. | ||
Dream Land[edit]
| Dream Land Treasures | |||
|---|---|---|---|
| Furniture | Stage | Description | How to obtain |
 Whispy Woods |
Whispy's Forest | Someone has carved the face of Whispy Woods onto this large tree. | A Warp Door is hidden behind a 3x3 cluster of Star and Bomb Blocks with a Spear Waddle Dee sleeping atop them. This brings Kirby to a hidden room underneath the floor, where shooting out of a Cannon to the left will clear blocks to obtain this Treasure. |
 Apple Table |
This table has a nice apple scent. Beware if you’re allergic! | In the wooded section of the stage, a Cannon lies below a row of blocks that, when launching out upward, Kirby can reach a Warp Door on a platform. This takes Kirby to a new room, where platforming over a wall while avoiding Shotzo will allow This Treasure to be collected. | |
| This classic tune was in Kirby's Dream Land. Now you can hear it in Whispy's Forest! | When climbing the vertical room with many Waddle Dees, a Warp Door can be accessed on the left side by breaking some Star Blocks and climbing down some ladders. This takes Kirby to a room where many cannons are arranged in a grid. This Treasure can be collected by maneuvering Kirby to the upper middle cannon, and launching out downward. | ||
 Bookcase |
Tempest Towers | You can arrange your books in here any way you want! | Shortly up the tower, a Warp Door is hidden behind a cluster of blocks. This takes Kirby to a room where pulling on a drawstring can help him get to the other side. This Treasure resides up on a higher platform. |
 Pancakes |
These pancakes are piled dangerously, and deliciously, high. | After climbing up the ladder, a cluster of blocks resides above a floor. This area can be accessed with the help of utilizing the winds with the Parachute Transformation, where a Warp Door hides behind the cluster. This takes Kirby to a room where destroying some Bomb Blocks will cause pieces of the building to fall. This Treasure can be collected after climbing up the fallen pieces. | |
| This classic tune was in Kirby's Dream Land. Now you can hear it in Tempest Towers! | In the vertical gale stretch, two Waddle Dees throwing missiles can be found. A Warp Door is hidden behind the cluster of Bomb Blocks under the Waddle Dee on the left. This takes Kirby to a room where a single unstable platform exists. By utilizing the upward draft while avoiding Gordos, this Treasure can be collected in the upper left corner. | ||
 Cloud Rug |
Cloud Palace | Lie down on this fluffy rug to feel like you’re on cloud nine. | After the second chasm, some Boingers can be found. Utilizing their bounciness, Kirby can reach some pendulum buttons up above, which will carry Kirby to this Treasure. |
 Bubbly Soda |
This bubbly soda looks like it’s filled with flavors! Try displaying it on a table. | After encountering Kracko for the first time, a tangle of pendulum buttons can be found. Riding them up to the left, Kirby can find this Treasure. | |
| This classic tune was in Kirby's Dream Land. Now you can hear it in Cloud Palace! | During the Star Shooter section, a split in the path can be found. This Treasure resides on the lower path. | ||
 Castle Dedede |
 Someone put a lot of effort into this model of Castle Dedede. | In the room with three stacked Pullcloth Cannons, riding the top cannonball to the left will lead Kirby to a Warp Door. This takes Kirby to a room where defeating two Bow Waddle Dees will reveal a Magic Tab. This tab will attach to a Waddle Dee patch, in which peeling will grant this Treasure. |
 Dedede's Robe |
This luxurious robe is amazingly comfy, even if it is a little big. | After pulling on a drawstring to make a staircase upwards, a Warp Door will also be revealed. This takes Kirby to a room where defeating all the UFOs will reveal a Magic Tab. This tab will attach to a UFO patch, in which peeling will grant this Treasure. | |
| This classic tune was in Kirby's Dream Land. Now you can hear it in Castle Dedede! | At the set of four stacked Pullcloth Cannons, riding the top cannonball to the left will lead Kirby to a Warp Door. This takes Kirby to a room where defeating all Bombers will reveal a Magic Tab. This tab will attach to a Bomber patch, in which peeling will grant this Treasure. | ||
 Palm Chair |
Meta Melon Isle | The coconut on this chair is actually a very comfortable cushion for your head! | During the Fire Engine section, this Treasure can be collected after defeating the second Embaconda. |
 Ice Cream |
This is an ice-cream sculpture from another tropical paradise I have yet to visit… | During the Train section, this Treasure can be found along the floor. | |
| This classic tune was in Kirby's Dream Land. Now you can hear it in Meta Melon Isle. | During the Spin Boarder section, remaining high in the air by tricking off of Bronto Burts at the end, Kirby can reach this Treasure. | ||
 Galaxia Sword |
Battleship Halberd | Keeping this sword around will make you dashing and decorative. | This Treasure is granted after destroying the second large cannon. |
 Knight Helmet |
Putting on this mask gives one a sense of mystery…and a sense of sitting in the dark. | This Treasure is granted after destroying the third large cannon. | |
| This classic tune was in Kirby's Dream Land. Now you can hear it on the battleship Halberd! | This Treasure is granted after destroying the bottom of the last two large cannons. | ||
Kirby and the Rainbow Curse[edit]

Each non-boss stage has five treasure chests to collect (with the exceptions of Deploy the Kirby Tank! and Kirby + Kirby, which both only have four). These may either be out in the open, hidden behind gates and side-chambers, or split into pieces, which must be reassembled within a short time limit. Some treasure chests can move on their own, which need to be collided with to collect. At the end of the stage, all collected chests are opened to reveal their contents, which contain Figurines or Music Tracks.
There are a total of 103 treasures to collect in the main stages of Story Mode. In addition to the items they contain, collecting these chests is also a requirement to unlock certain Challenge Mode stages.
Green Valley[edit]
| Green Valley Treasures | ||||
|---|---|---|---|---|
| Treasure | Image | Stage | Location | How to obtain |
| Kirby Figurine |  |
The Adventure Begins (1-1) | 
|
The chest can be found in the second area, on the main path at the top of a ledge just before the first green Kirby-stopper pole. |
| Elline Figurine |  |

|
This chest can be found in an alcove in the third area just after Kirby obtains the Star Dash ability. | |
| Red Waddle Dee Figurine |  |

|
This chest is located up high in the fourth area, above the Gray Zone within some gray blocks that require Kirby's Star Dash to break. | |
| Green Greens Track |  |

|
In the fourth area, Kirby must roll through the multi-colored Pop Flowers along the lower path and then collect all the food to unlock a challenge door. Completing the challenge inside yields the treasure. | |
| Cotta Figurine |  |

|
In the fourth area, Kirby must use a Launch Cannon to reach above the Gray Zone. He must then roll through all the flowers until a chain of point stars and a treasure chest appear attached to balloons. | |
| Cannon Cotta Figurine |  |
Up the Big Ol' Tree (1-2) | 
|
In the second area near the top of the tree, Kirby should use a Star Dash to get past the Gray Zone. |
| Cotta Knight Figurine |  |

|
Kirby must Star Dash through the Cotta Knights and Cotta General in the third area and move upwards towards the treasure. | |
| The Adventure Begins (Arrangement) Track |  |

|
In the third area, just before jumping into the Launch Cannon, Kirby should enter the time-challenge door. In the challenge, maneuvering around the bumpers will net Kirby the treasure. | |
| Bouncy Figurine |  |

|
In the fourth area, Kirby should time the cannon fire just right to snag the treasure being tugged behind the Soarar. | |
| King Dedede's Theme Track |  |

|
In the fifth area, Kirby must collect all the glowing puzzle pieces before time runs out to reveal the treasure. | |
| Gordo Figurine |  |
Great Cave Escape (1-3) | 
|
At the leftmost side of area two, use Star Dash to break the metal blocks guarding this treasure. |
| Bronto Burt Figurine |  |

|
This is the treasure that the player sees upon entering area two, access to it is blocked by barrier blocks. Entering the cannon at the leftmost side of this area will blast Kirby all the way to the other side and expose this treasure. | |
| Through the Sky Track |  |

|
In area three, break the metal blocks using Kirby's Star Dash to access the time-challenge door. Defeat the Cottas within the time limit to get the treasure. | |
| Carpa Figurine |  |

|
Near the left side of area three, a Carpa carrying this treasure chest slowly climbs a waterfall. Use the Rainbow Rope to stop the flow and then grab the treasure. | |
| Vegetable Valley Track |  |

|
Using Star Dash to get past the Gray Zone in area three will launch Kirby into a bell. Lead Kirby into the gray zone at a high angle to have him fall onto the treasure, or try and guide him while he's star dashing. | |
Yellow Dunes[edit]
| Yellow Dunes Treasures | ||||
|---|---|---|---|---|
| Treasure | Image | Stage | Location | How to obtain |
| Mega Grindarr Figurine |  |
Dig and Dash (2-1) | 
|
Just past the locked gate leading downward in the second area, there is a large room filled with sand, where several puzzle pieces must be quickly collected by Kirby to obtain the Treasure Chest. |
| Top Ride Medley Track |  |

|
In the third area, a door to a challenge room can be found furthest to the right inside a block of sand. Kirby must complete the aforementioned time-challenge in this area to obtain the treasure chest. | |
| Grindarr Figurine |  |

|
Shortly after Mega Grindarr starts his descent, the path splits in two, with Gray Zones and food found on either side. Taking the path on the right here leads to a room with two Grindarrs poised over sand at differing height. The player will need to erase some of the sand holding the right Grindarr up, then move Kirby around past the key and then quickly slide him under the Grindarrs before they fall to get the chest. | |
| Drill Cotta Figurine |  |

|
This chest is locked away by three separate gates that require keys to open. To get all three, Kirby will need to have visited both of the paths mentioned in the previous treasure guide, likely needing to use a Star Dash to rocket back up after completing one side to get to the other. The third key is obtained in a hidden chamber nearer to the doors on the left side. Here, a small puzzle involving a marble needs to be solved to get the third key. | |
| Space Area Track |  |

|
Near the end of the fifth area, after disembarking from Mega Grindarr, a batch of sand in a ceiling alcove can be cleared away to reveal a hidden doorway. Entering this door leads to a puzzle room involving a marble, which the player needs to impart enough momentum to in order to hit the switch and open the way to this chest. | |
| Kirby Tank Figurine |  |
Deploy the Kirby Tank! (2-2) | 
|
This treasure is sitting in a cache of metal blocks in the air on Kirby's path at the start of the tank section. A bunch of Point Stars are conjured in advance of this formation, and the game gives the player a hint to use the Mega Kirby Tank barrage to blast the metal blocks, so it is hard to miss. |
| Waddle Dee Figurine (cannon) |  |

|
Shortly after Bouncy Sis, a spring appears on Kirby's path which he can use to bounce to a series of high decks. He'll have to maneuver past some Gordos on balloons to get to another spring that bounces him up to a star spinner. From here, the chest appears ahead of him attached to two balloons, and will slowly rise unless Kirby shoots it down. He should take care that it does not fall to the ground, however, if he wants to also collect the third treasure chest up ahead. | |
| Bombzway Figurine |  |

|
This chest is located inside a challenge room, which can be accessed shortly after obtaining the second chest if Kirby stayed high in the air to reach the platform the door is sitting on. This challenge tasks Kirby with shooting all the Bouncies within 15 seconds, though this can be easily accomplished using the Mega Kirby Tank barrage. After emerging from the door, Kirby should ignore the trail of point stars that appears in the sky to his right and drop straight down if he wants to get the fourth chest. | |
| Bouncy Sis Figurine |  |

|
Right before leaving the main Kirby Tank area, a giant Star Block appears on the path in front of the door. This needs to be destroyed with multiple tank shots. This done, five Bombzways will appear, with the uppermost one carrying the chest. Kirby will need to shoot it down before it flies away or he gets too far ahead. | |
| Blado Figurine |  |
The Long-Lost Ruins (2-3) | 
|
Shortly into the ruins, Kirby will stumble across a Cotta and Cotta Knight guarding a treasure chest behind a metal block barrier. Kirby will need to use a Star Dash to get in there. |
| Grinkey Figurine |  |

|
This treasure chest comes into view on the main path further into the ruins, nestled behind a shutter that will only open when four light panels have been activated. Two of these panels are guarded by lasers. | |
| Boss Theme Track | |

|
A door to a challenge room can be found high up behind some soft clay in an alcove in the open space just prior to the Mecha Cotta fight. In this challenge room, Kirby has 15 seconds to light up a bunch of wall panels to make the chest appear and then collect it. | |
| Mecha Cotta Figurine |  |

|
This treasure chest is located inside a hidden room accessible to the left in the hall just after the Mecha Cotta fight. Kirby will need to use a Star Dash to break through the metal blocks guarding the chest. | |
| Reflected Laughter Track |  |

|
This last chest can be found in a secret area above the very last room in the stage containing the Goal Game. To reach it, Kirby needs to Star Dash upward, then aim for the chest. | |
Indigo Ocean[edit]
| Indigo Ocean Treasures | ||||
|---|---|---|---|---|
| Treasure | Image | Stage | Location | How to obtain |
| Underwater Kirby Figurine |  |
Swept Out to Sea (3-1) | 
|
After ascending the first long vertical channel, this treasure chest can be found in a small nook on the left, guarded by metal blocks. Kirby will need to use a Star Dash to get in. |
| Blipper Figurine |  |

|
After ascending the second long vertical tunnel, this chest can be found in another nook on the left, this time unguarded by blocks, but a water current will push Kirby away from it. Another Star Dash may be needed to fight the current and get the chest. | |
| Milky Way Wishes Track | |

|
This chest is found inside a challenge room which is accessed at the start of the third vertical ascent. It tasks Kirby to travel across water currents in a winding tunnel in 15 seconds to grab the chest. | |
| Green Waddle Dee Figurine |  |

|
This chest is located out in the open between two lines of Gordos while ascending the third long vertical tunnel. | |
| Ripple Field track |  |

|
After exiting the water, this chest can be found nestled behind a metal block barrier in the cliff just before the end of the stage. A Star Dash is needed to get in. | |
| Kirby in the Cannon Figurine |  |
The Haunted Ship (3-2) | 
|
This chest can be found in the very first part of the stage, just to the left of where Kirby starts. It is tucked in a small underwater alcove. |
| Dethskullk Figurine |  |

|
Underneath the door forward in the first part of the ship, this chest can be found in a small chamber blocked off by Star Blocks. | |
| Dethskullk King Figurine |  |

|
This treasure chest is tucked away in the upper-left corner of the large area in the ship where the Dethskullk King can be found. It is partially hidden by foreground elements. | |
| Snowball Scuffle Track |  |

|
In the large area of the ship where the Dethskullk King can be found, this chest can be obtained by collecting all the puzzle pieces that appear after collecting the first one in the lower-left corner, along with a key. | |
| Ice Cream Island Track | |

|
This chest is hidden in a room accessible in the last area of the stage through a door at the top of the waterfall. It can only be accessed using a Star Dash. | |
| Crabbo Figurine |  |
Kirby Submarine's Torpedo Time (3-3) | 
|
Toward the bottom of the first auto-scrolling area, this chest can be found behind some metal blocks, which can be broken using a Star Torpedo. |
| Sawgill Figurine |  |

|
One of the Clam Shells in the second auto-scrolling area contains a puzzle piece. Collecting all the pieces quickly enough will award this chest. | |
| Mini Deepsee Figurine |  |

|
Further along the second auto-scrolling area, this chest can be seen moving along with a Blipper school. Kirby will need to grab it before it slips away with the Blippers. | |
| Deepsee Figurine |  |

|
During the third auto-scrolling area, this chest can be found behind some metal blocks, which can be broken using a Star Torpedo. | |
| Boss Battle Track | |

|
This chest is inside a challenge room, which can be accessed along the third auto-scrolling area. Kirby needs to guide his torpedoes toward the switch in the room to get the chest. | |
Blue Sky Palace[edit]
| Blue Sky Palace Treasures | ||||
|---|---|---|---|---|
| Treasure | Image | Stage | Location | How to obtain |
| Bzztbulb Figurine |  |
Rainbow Across the Skies (4-1) | 
|
This chest can be found encased in a metal block formation near the top of the second area. Kirby will need to Star Dash to get in. |
| Trakker Figurine |  |

|
This treasure chest appears near the middle of the third area's auto-scrolling section just after the Candy on balloons passes by. It rises up quickly on two balloons on the right side, so Kirby will need to get it quick and not accidentally pop the balloons from above. | |
| Bronto Knight Figurine |  |

|
Shortly after the second chest flies by, a Launch Cannon will fly by on balloons on the left side, and shortly collide with a cloud and fall back down if not interacted with. This cannon takes Kirby to a separate area, where he has to launch through cannons with the right timing to grab the chest. Note that a Soarar comes in and pops the balloon attached to the chest, which may throw Kirby's timing off. | |
| Sky Tower Track | |

|
At the beginning of the fourth area, the door to a challenge room can be found to the left. Kirby will need to be quick to get in before the screen scrolls away. Inside the room, Kirby needs to collect three formations of Point Stars in 15 seconds to make the chest appear. | |
| The Asteroid Track | |

|
Near the end of the stage, a giant Star Block goes flying upward on several balloons. Kirby needs to break this block (easily done with a Star Dash) to get the chest inside. | |
| Bastron Figurine |  |
The Wild Red Yonder (4-2) | 
|
While traversing the first area, this chest can be found in a ceiling cache blocked off by a shutter that can be opened by hitting a nearby switch. |
| Yellow Waddle Dee Figurine |  |

|
In the second area, this chest can be found in a small nook on the upper-left of a larger room, guarded by a Cotta General. | |
| Spear Cotta Figurine |  |

|
In the second area, this chest can be found in a small nook on the upper-right of a larger room, guarded by a Cotta General. | |
| Spear Cotta Knight Figurine |  |

|
In the third area, this chest is locked away in a metal block formation on the main path. Kirby can get in there using a Star Dash or with Bastron's help. | |
| Butter Building Track | |

|
In the third area, a door to a challenge room can be seen blocked off by a Bomb Block barrier, with the Bomb Blocks themselves tucked in the inside. Kirby needs Bastron to aim at these blocks and hit them to gain access. Once inside, Kirby has 15 seconds to defeat a Mecha Cotta to get the chest. | |
| Kirby Rocket Figurine |  |
Kirby Rocket's Big Blastoff (4-3) | 
|
During the great escape sequence, this chest can be found tucked in the room to the furthest right, past a bunch of clay blocks. |
| Shotzo Figurine |  |

|
During the great escape sequence, this chest can be found near the middle of the main room in a small niche accessible from below. | |
| Kirby's Feast Figurine |  |

|
During the great escape sequence, this chest can be found out in the open near the left side of the main room. | |
| Rainbow Resort Track | |

|
During the great escape sequence, this chest can be found up in the upper-left corner of the main room. | |
| The Beginner's Room Track | |

|
During the great escape sequence, this chest can be found just before the exit in a small ceiling cache blocked off by metal blocks. Kirby will need to use a Star Dash to get it. | |
Orange Woodland[edit]
| Orange Woodland Treasures | ||||
|---|---|---|---|---|
| Treasure | Image | Stage | Location | How to reach |
| Mega Kirby Tank Figurine |  |
Woodland Battle (5-1) | 
|
Near the end of the first Kirby Tank scrolling area, a big formation of blocks appears in Kirby's way. On top of this formation is a chest surrounded by metal blocks. The Mega Kirby Tank attack is needed to break these blocks. |
| Sportle Figurine |  |

|
This chest can be found along the second scrolling area, guarded by two Cotta Generals. | |
| Forest Stage Track | |

|
Shortly after getting the second chest, a door to a challenge room can be found blocked away by metal blocks. Kirby these need to be cleared out, then Kirby needs to drive up to the door using a Rainbow Rope. Inside the room, Kirby has 15 seconds to make a log roll up a hill to hit a switch, granting him access to the chest. | |
| Explortle Figurine |  |

|
Shortly into the third scrolling section, a Bombzway will fly in carrying this chest. Shooting it down will yield the chest to Kirby. | |
| Sportletini Figurine |  |

|
Further along in the third scrolling area, this chest can be seen underneath the main bridge, guarded by Cannon Cottas. | |
| Mountain Stage Track | |
Gondola Ride (5-2) | 
|
In the second area of the stage, this chest can be found near the door forward, attached to a gondola line. When Kirby approaches it, it will ride the line upward and stay in a high niche behind a Gray Zone. Kirby can reach the chest using a Star Dash. |
| Treasure Found Figurine |  |

|
Just past the Gondola Bzztbulb, this chest can be found in a hidden chamber on the left behind some metal blocks. A Star Dash is needed to get in. | |
| Grab Hand Figurine |  |

|
Obtaining this chest is a fairly complicated process, performed while Kirby is riding a gondola. First, a marble needs to be moved to hit a switch, allowing the chest to fall down until it hits another set of shutters. From there, two more marbles need to be guided to switches to open these shutters. Lastly, some soft clay needs to be dug out underneath the chest to allow it to fall the rest of the way down, to an area where Kirby can pick it up. | |
| Coo's Theme Track |  |

|
Just after the third chest's pickup point, a door to a challenge room can be accessed by digging it out of some soft clay. In this room, Kirby has 15 seconds to launch himself up past a Gray Zone to get into a gondola, then ride it to the chest. | |
| Gondola Bzztbulb Figurine |  |

|
In the last area, this chest can be obtained at the termination point of a gondola line. Kirby will have to swoop near the abyss below to get it. | |
| Kirby Submarine Figurine |  |
Deep-Divin' Kirby Submarine (5-3) | 
|
While traveling along the first auto-scrolling area, this chest can be found high up, supported by a long Star Block along with some Gordos. Breaking the block will cause these items to fall. The chest sinks more slowly than the Gordos, but it should still be collected quickly before it becomes unreachable. |
| Bubbly Clouds Track | |

|
Further along the river, this chest can be found held up by some metal blocks. Kirby will need to fire a Star Torpedo to access it. | |
| Dangle Sloth Figurine |  |

|
Even further along the river, a puzzle piece can be seen past a waterfall. Kirby will need to collect all the puzzle pieces that appear to get the chest. | |
| Big Forest Track | |

|
At the start of the vertical scrolling area, a door to a challenge room can be found to the right. In this room, Kirby needs to steer some torpedoes to hit some switches out of water to make the chest accessible. | |
| Waddle Dee (submarine) Figurine |  |

|
This chest can be found in a separate room which can be reached through a doorway to the left near the top of the vertical scrolling area. Kirby will need a Star Torpedo to access this chest. | |
Red Volcano[edit]
| Red Volcano Treasures | ||||
|---|---|---|---|---|
| Treasure | Image | Stage | Location | How to reach |
| Kirby Figurine (standing) |  |
Burning Secrets (6-1) | 
|
Near the end of the first area, this chest can be found in a small niche in a cave blocked off by metal blocks. A Star Dash is needed to get inside. |
| Revenge of the Enemy Track | |

|
At the end of the third area, a lavafall can be blocked to reveal a hidden door to a challenge room. In this room, Kirby has 15 seconds to defeat 4 Bzztbulbs to make the chest appear. | |
| Hot Head Figurine |  |

|
This chest is hidden behind the lavafall in the fourth area, up near the top. It is easier to reach when the lavafall is briefly replaced with falling stars. | |
| Kirby Medley Track | |

|
After avoiding the falling pieces of ceiling, Kirby can use a Star Dash to rocket up toward the open ceiling of the area past a Gray Zone. This will take him to another room where a treasure chest on balloons can be snagged, but it has to be retrieved quickly, or the balloons will pop and the chest will fall into the lava below. | |
| Cappy Figurine |  |

|
In the last gondola area, where Bastron appears, Kirby will need to collect a series of puzzle pieces to obtain the last chest. Getting these pieces requires deft gondola-jumping skills. | |
| Rest Area Track | |
Back to the Battleship (6-2) | 
|
This treasure is located in the lower-left room of the main timed area, inside a Gray Zone. |
| Painting with Elline Figurine |  |

|
This treasure can be found in the upper-left portion of the timed area, inside a circular Gray Zone. | |
| Waddle Doo Figurine |  |

|
This treasure can be found in the upper-right portion of the timed area, up against the wall. | |
| Iceberg Ocean Track |  |

|
This treasure can be found in the long corridor to the right in the timed area. | |
| Soarar Figurine |  |

|
This treasure can be found in the lower-right of the timed area, nestled in a niche created by metal blocks. It can be grabbed without a Star Dash, but some time will be lost in the process in that case. | |
| Thornsby Figurine |  |
Volcanic Panic (6-3) | 
|
While ascending the first rising lava area, this chest can be found over to the right off the main path above a bed of springs. |
| Cotta General Figurine |  |

|
Near the top of the first rising lava area, this chest can be collected after breaking a Bomb Block barrier on the main path, though Kirby will need to be quick to grab it before it falls into the lava below. | |
| Revenge of Meta Knight: Ending Track | |

|
In the intermission zone between the two rising lava areas, this chest can be found through a challenge room door blocked off by a Thornsby. In this challenge, Kirby has to quickly defeat the Thornsbys in the way of the chest. | |
| Broom Hatter Figurine |  |

|
Near the start of the second rising lava area, this chest can be obtained by breaking a Bomb Block barrier below it. Doing this causes some Thornsbys to drop around Kirby though, so he will need to deal with them afterward. | |
| Heavy Lobster Track | |

|
Near the end of the second rising lava area, this chest can be obtained by using a Star Dash to power through some metal blocks. | |
Purple Fortress[edit]
| Purple Fortress Treasures | ||||
|---|---|---|---|---|
| Treasure | Image | Stage | Location | How to obtain |
| Fearful Grab Hand Figurine |  |
Infiltrate the Junk Factory! (7-1) | 
|
In the first area, this chest can be found in a big metal block formation in the middle of the large room. Kirby will need to Star Dash to get it. |
| Gulpy Ghost Track | |

|
A door to a challenge room can be accessed in the second area, with some Shockcreepas opening the gate leading to it. In this room, Kirby needs to activate the shutters using the scanner fields to drop the chest down. | |
| Shockcreepa Figurine |  |

|
In the room where many Shockcreepas crawl and the Candy can be found, this chest is situated inside one of the interior squares, blocked off by Star Blocks. | |
| Chef Kawasaki Figurine |  |

|
In the second-to-last area, this chest can be seen guarded by Cotta Knights and a metal block barrier behind a movable wall. Kirby will need to Star Dash at the right moment as the wall comes down to get in. | |
| Studying the Factory Track |  |

|
In the last open area, Kirby will need to collect several puzzle pieces to obtain this chest. | |
| Kirby and Kirby Figurine |  |
Kirby + Kirby (7-2) | 
|
In the horizontal auto-scrolling hallway, a puzzle piece can be collected on the lower path. The remaining pieces will appear in both halls, and will need to be collected quickly to get the chest. |
| Moonlight Capital Track | |

|
In the horizontal auto-scrolling hallway, a chest can be seen encased in metal blocks on the upper path, guarded by a Cotta Knight. The upper Kirby will need to use a Star Dash to get the chest. | |
| Meta Knight Figurine |  |

|
During the elevator ride upward, a giant metal block appears on the path. A Star Dash can be used to bust it open and get the chest inside. | |
| The Legendary Halberd Track |  |

|
In the last area, a hidden door to a challenge room can be found in the cliffside on the left. In this room, there are five Kirbys to control, and they need to bound up through a gray zone to reach the chest up near the ceiling past several blocks. | |
| Milky Way Wishes: Shooting Track | |
Wonder Space (7-3) | 
|
A door to a challenge room can be accessed right after passing the Shieldster and Warpspace halls. In this room, Kirby has to navigate past several Warpspaces and a bumper to reach the chest on the left side. |
| King Dedede Figurine |  |

|
While being launched up to a room with three Warpspaces in it, the game will briefly pause to show the player where the chest is in relation to the other items. Up in the Warpspace room, Kirby should pick the one on the right to shoot down the middle and get the chest. | |
| Warpspace Figurine |  |

|
While riding the gondola up the tall vertical passage, Kirby will need to switch tracks a few times to collect stars and avoid a Gordo. The chest can be found on the left after another track crossing, and Kirby should not switch tracks if he had been following the cues up to this point to get the chest. | |
| Shieldster Figurine |  |

|
After riding the long fast gondola track to the end of the area, Kirby should Star Dash up the hole in the ceiling in the room at the end to reach a different area. In this area, Kirby has to steer up a chute full of Warpspaces in order to reach the top and hit a bell in the process. This done, a bunch of stars will rain down, along with the chest to the right. | |
| C-R-O-W-N-E-D Track | |

|
In the last area where Kirby is being swept by a wind current past big Warpspaces, the chest can be found nestled underneath a bunch of Warpspaces. Kirby will need to use a Star Dash to get the chest without being eaten. | |
Gallery[edit]
-
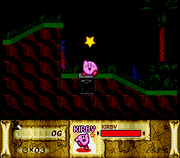 Kirby collecting the first treasure in The Great Cave Offensive in Kirby Super Star
 -
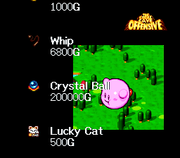 The end cutscene for The Great Cave Offensive lists all of the treasures that Kirby collected.
 -
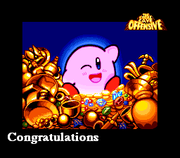 Perfect ending for The Great Cave Offensive in Kirby Super Star, showing Kirby with his treasure
 -
 Equivalent perfect ending scene for Kirby Super Star Ultra
 -
 The Star Stone candy in Kirby: The Strange Sweets Island
 -
 Illustration from the Kirby JP Twitter commemorating Christmas in 2017, featuring four treasures from The Great Cave Offensive on Kirby's fireplace: the Phanto Mask, the Seasons Heart, the Cell Phone, and the Lucky Cat
 -
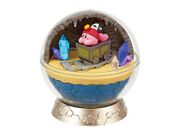 "The Great Cave Offensive" figure from the "Kirby Terrarium Collection DX Memories" merchandise line, manufactured by Re-ment. The Phanto Mask and Springtime treasures are visible.


In the Find Kirby!! series[edit]
-
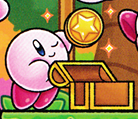 Kirby with the Gold Medal in Find Kirby!!
 -
 The Broken Bowl in Find Kirby!!
 -
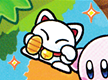 The Lucky Cat in Find Kirby!!
 -
 The Echigo Candy in Find Kirby!!
 -
 The Gold Coin in Find Kirby!!
 -
 The Crystal Ball in Find Kirby!!
 -
 The Whip in Find Kirby!!
 -
 Kirby with the Phanto Mask in Find Kirby!!
 -
 The Ancient Gem in Find Kirby!!
 -
 The Beast Fossil in Find Kirby!!
 -
 The Fish Fossil in Find Kirby!!
 -
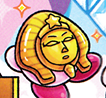 Kirby with the Tut's Mask in Find Kirby!!
 -
 The Unicorn's Horn in Find Kirby!!
 -
 The Amber Rose in Find Kirby!!
 -
 The Glass Slipper in Find Kirby!!
 -
 The Dime in Find Kirby!!
 -
 The Orichalcum in Find Kirby!!
 -
 The Raccoon Doll in Find Kirby!!
 -
 The Shell Whistle in Find Kirby!!
 -
 The Pegasus Wing in Find Kirby!!
 -
 The Sun Ring in Find Kirby!!
 -
 The Model Ship in Find Kirby!!
 -
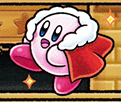 Kirby with the King's Cape in Find Kirby!!
 -
 The Springtime in Find Kirby!!
 -
 The Summertime in Find Kirby!!
 -
 The Autumntime in Find Kirby!!
 -
 The Wintertime in Find Kirby!!
 -
 The Phanto Mask in Find Kirby!! Full of Kirby


Names in other languages[edit]
| Language | Name | Meaning |
|---|---|---|
| Japanese | たから takara |
Treasure |
| French | Trésor | Treasure |
| German | Schatz | Treasure |
| Italian | Tesoro | Treasure |
| Korean | 보물 bomul |
Treasure |
| Brazilian Portuguese | Tesouro[2] | Treasure |
| Spanish | Tesoro | Treasure |
| Kirby Super Star (Ultra) treasure names in other languages | ||||||
|---|---|---|---|---|---|---|
| Japanese | English | French | German | Italian | Spanish | Korean |
| Sub-Tree | ||||||
| きんメダル Gold Medal |
Gold Medal | Médaille d'Or | Goldmedaille | Medaglione d'oro | Medalla de oro | 금메달 Gold Medal |
| こばん Koban |
Gold Coin | Pièce d'Or | Goldmünze | Moneta d'oro | Moneda de oro | 금화 Gold Coin |
| インディウィップ Indy Whip |
Whip | Fouet | Peitsche | Frusta | Látigo | 채찍 Whip |
| クリスタルオーブ Crystal Orb |
Crystal Ball | Boule de Cristal | Kristallkugel | Sfera di cristallo | Bola de cristal | 크리스탈오브 Crystal Orb |
| まねきねこ Maneki-neko |
Lucky Cat | Chat Fétiche | Glückskatze | Gatto fortuna | Gato de la suerte | 복고양이 Lucky Cat |
| せいりゅうとう Seiryū Sword |
Seiryu Sword | Epée Dragon | Seiryu-Schwert | Spada del drago | Espada Seiryu | 청룡도 Blue Dragon |
| スクリューボール Screw Ball |
Screw Attack | Attaque en Vrille | Kreisel-Mine | Attacco a vite | Ataque Espiral | 스크류 어택 Screw Attack |
| えちごやのおかし Echigoya's Sweets |
Echigo Candy | Boîte de Bonbons | Bonbon | Caramella mou | Caramelo Echigo | 특별한 선물 Special Gift |
| しろくろマスク White/Black Mask |
Phanto Mask | Masque du Phanto | Phanto-Maske | Maschera spettro | Máscara fantasma | 흑백마스크 Black and White Mask |
| ほしのしずく Star Droplet |
Star Stone | Pierre Etoile | Sternenstein | Pietra stella | Piedra Estelar | 별의 눈물 Tears of the Stars |
| まじゅうのきば Monster's Fang |
Beast's Fang | Croc de Félin | Reißzahn | Zanna di belva | Colmillo de bestia | 괴물의 송곳니 Monster's Fang |
| コマンドバンダナ Commando Bandana |
Bandanna | Bandana | Bandana | Bandana | Pañuelo | 반다나 Bandana |
| はるのおもいで Memories of Spring |
Springtime | |||||
| しきのおもいで Seasonal Memories |
Seasons Heart | Cœur en Sucre | Valentinsherz | Cuorbaleno | Carazón estaciones | 계절의 추억 Seasonal Memories |
| Crystal | ||||||
| じゅうえんだま Ten-Yen Coin |
Dime | Piécette | Kupfermünze | Monetina | Calderilla | 10원짜리 동전 10-Won Coin |
| ガラスのくつ Glass Slipper |
Glass Slipper | Soulier de Verre | Glasschuh | Vetroscarpe | Zapato de cristal | 유리구두 Glass Slipper |
| ゴブレット Goblet |
Goblet | Coupe | Kelch | Calice | Copa | 잔 Goblet |
| じょうぶなおなべ Durable Pan |
Saucepan | Marmite | Kochtopf | Pentola | Cacerola | 튼튼한 냄비 Sturdy Pot |
| ボンバーナックル Brass Knuckle |
Brass Knuckle | Poing | Schlagring | Tirapugni | Puño americano | 봄버 너클 Bomber Knuckle |
| こはくのバラ Amber Rose |
Amber Rose | Rose d'Ambre | Bernsteinrose | Rosa ambrata | Rosa de ámbar | 호박장미 Amber Rose |
| さかなのかせき Fish Fossil |
Fish Fossil | Fossile Marin | Fischfossil | Pesce fossile | Pez fosilizado | 물고기화석 Fish Fossil |
| けもののかせき Animal Fossil |
Beast Fossil | Fossile Dino | Tierfossil | Belva fossile | Bestia fosilizada | 동물화석 Animal Fossil |
| リーのヌンチャク Lee's Nunchucks |
Nunchuks | |||||
| マシンのパーツ Machine's Parts |
Machine Parts | Pièces de Hydra | Machinenstück | Parti di Hydra | Piezas Hydra | 기계부품 Machine Parts |
| バケツ Bucket |
Bucket | Seau | Eimer | Secchio | Cubo | 양동이 Bucket |
| なつのおもいで Memories of Summer |
Summertime | |||||
| まほうのえふで Magical Paintbrush |
Power Paintbrush | Pinceau du Pouvoir | Power-Malpinsel | Oscuro disegno | Pincel del Poder | 마법의 붓 Magical Brush |
| いちまんえんだま 10,000-Yen Coin |
100-Dollar Coin | Pièce Ancienne | Golddukaten | Vecchia moneta | Moneda antigua | 10000원짜리 동전 10,000-Won Coin |
| ほのおのまがたま Magatama of Flame |
Ancient Gem | Pierre Précieuse | Uraltes Juwel | Gemma antica | Gema antigua | 불꽃 옥돌 Flame Jade Stone |
| ファルコンメット Falcon Helmet |
Falcon Helmet | Casque Falcon | Falcons Helm | Casco di Falcon | Casco de Falcon | 팔큰 헬멧 Falcon Helmet |
| ふはつだん Dud |
Dud | |||||
| けいたいつうしんき Mobile Communication Device |
Cell Phone | Téléphone Mobile | Walkie Talkie | Cellulare | Móvil | 휴대용통신기 Portable Communication Device |
| しんじつのかがみ Mirror of Truth |
Truth Mirror | Miroir Magique | Zauberspiegel | Specchio della verità | Espejo de la verdad | 진실의 거울 Mirror of Truth |
| Old Tower | ||||||
| スターティアラ Star Tiara |
Star Tiara | Tiare Etoilée | Sternen-Diadem | Diadema stella | Diadema estelar | 스타티아라 Star Tiara |
| かめこうら Turtle Shell |
Koopa Shell | Carapace Koopa | Koopa-Panzer | Guscio Koopa | Caparazón Koopa | 등껍질 Turtle Shell |
| ファルシオン Falchion |
Falchion | Falchion | Falchion | Falchion | Falchion | 팰시온 Falchion |
| せんしのたて Warrior's Shield |
Warrior Shield | Bouclier | Schild | Scudo del guerriero | Escudo de guerrero | 전사의 방패 Shield of the Warrior |
| ユニコーンのつの Unicorn's Horn |
Unicorn's Horn | Corne de Licorne | Horn des Einhorns | Corno d'Unicorno | Cuerno de unicornio | 유니콘의 뿔 Unicorn's Horn |
| あきのおもいで Memories of Autumn |
Autumntime | |||||
| みつぼしのつえ Triple Star Cane |
Three-Star Cane | Sceptre Etoile | 3-Sterne-Zepter | Bacchetta stellare | Vara de 3 estrellas | 세별지팡이 Three-Star Rod |
| かけたおちゃわん Chipped Rice Bowl |
Broken Bowl | Bol Ebréché | Porzellanschüssel | Scodella rotta | Tazón roto | 깨진 그릇 Broken Bowl |
| ツタンカーム Tutankham |
Tut's Mask | Masque Pharaon | Pharaomaske | Maschera egizia | Máscara egipcia | 투탄마스크 Tutan Mask |
| どせいさんのぞう Mr. Saturn Statue |
Mr. Saturn | Mr Saturn | Mr. Saturn | Mr. Saturn | Mr. Saturn | 토성씨의 동상 Statue of Mr. Saturn |
| ミスリルよろい Mithril Armor |
Armor | Armure | Rüstung | Armatura | Armadura | 미스릴 갑옷 Mithril Armor |
| せんりょうばこ Senryōbako |
Treasure Box | Coffre au Trésor | Schatzkiste | Scrigno | Cofre del tesoro | 보물상자 Treasure Box |
| マネキン Mannequin |
Mannequin | Mannequin | Mannequin | Statuina | Maniquí | 마네킹 Mannequin |
| クイーンクラウン Queen Crown |
Gold Crown | Coronne Royale | Goldkrone | Corona d'oro | Corona de oro | 여왕의 왕관 Queen's Crown |
| はおうのマント Lord's Cloak |
King's Cape | Cape Royale | Königsmantel | Mantello regale | Capa del rey | 패왕의 망토 King's Cloak |
| つきのうきふね Moon Model Ship |
Model Ship | Modèle Réduit | Mondschiff | Modellino di nave | Maqueta de barco | 달의 조각배 Moon Boat |
| たいようのゆびわ Sun Ring |
Sun Ring | Anneau Solaire | Sonnenring | Anello solare | Anillo solar | 태양의 반지 Sun Ring |
| Garden | ||||||
| ふゆのおもいで Memories of Winter |
Wintertime | |||||
| きんのジョウロ Golden Watering Can |
Gold Watering Can | Arrosoir Doré | Goldene Gießkanne | Innaffiatoio d'oro | Regadera dorada | 금물뿌리개 Gold Watering Can |
| めいとうサムライ Legendary Sword "Samurai" |
Katana | Katana | Katana | Katana | Katana | 전설의 명검 Legendary Sword |
| アミュレット Amulet |
Charm | Amulette | Amulett | Ciondolo | Amuleto | 부적 Charm |
| クリスマスツリー Christmas Tree |
Xmas Tree | Sapin Décoré | Tannenbaum | Alberello | Abeto | 크리스마스 트리 Christmas Tree |
| コングのたる Kong's Barrel |
Kong's Barrel | Tonneau DK | DK-Fass | Barile di Donkey Kong | Barril DK | DK 나무통 DK Wooden Barrel |
| ラミアのうろこ Lamia's Scale |
Ramia's Scale[sic] | Ecaille de Dragon | Lamias Schuppe | Scaglia di Lamia | Escama de Lamia | 라미아의 비늘 Lamia's Scale |
| たけとりのむすめ Taketori's Daughter |
Shiny Bamboo | Bambou Luisant | Märchen-Bambus | Bambù lucente | Bambú brillante | 빛나는 대나무 Shiny Bamboo |
| カートのタイヤ Kart Tire |
Tire | Roue de Kart | Reifen | Gomma Kart | Rueda de kart | 타이어 Tire |
| たましいのうでわ Spirit Bracelet |
Spirit Charm | Porte-Bonheur | Zauberschmuck | Talismano | Amuleto espiritual | 영특의 팔찌 Special Charm |
| ペガサスのはね Pegasus' Feather |
Pegasus Wing | Aile de Pégase | Pegasus' Flügel | Ala di Pegaso | Ala de pegaso | 페가수스의 깃털 Pegasus' Feather |
| たぬきのおきもの Raccoon Figurine |
Raccoon Doll | Peluche Tanuki | Tanuki-Puppe | Procione di ceramica | Mapache de peluche | 너구리 인형 Raccoon Doll |
| さざなみのふえ Ripple Whistle |
Shell Whistle | Conque | Scheckenhorn | Corno dei mari | Caracola | 물결의 호각 Whistle of the Waves |
| オリハルコン Orichalcum |
Orichalcum | Orichalque | Orichalkum | Orichalcum | Orichalcum | 오리할콘 Orichalcum |
| プラチナリング Platinum Ring |
Platinum Ring | Anneau de Platine | Platin-Ring | Anello di platino | Anillo de platino | 플래티넘링 Platinum Ring |
| トライフォース Triforce |
Triforce | Triforce | Triforce | Triforza | Trifuerza | 트라이포스 Triforce |
References
- ↑ "Hunt treasure as you explore this huge cave!" --In-game text from the Beginner's Room for The Great Cave Offensive from Kirby Super Star Ultra
- ↑ Kirby Super Star Brazilian manual
| |||||||||||||||||||||||||||||
| |||||||||||||||||||||||||||||||||||
| |||||||||||||||||||||||||||||
| |||||||||||||||||||||||