

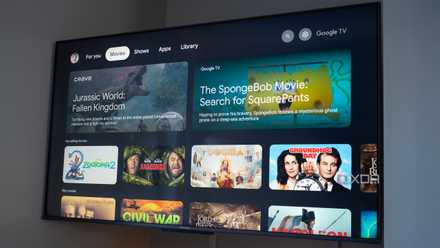
Contrary to what you might think, most TVs don't look great out of the box. Even if you buy a premium QLED, Mini-LED, or OLED TV, chances are you'll need to spend some time dialing in the right settings to enjoy the panel to the fullest.
Thankfully, you only need to change a handful of settings to make any TV look way more premium. Whether it's image quality, brightness, network performance, or motion clarity, you can quickly tweak a few settings to improve each metric. Manufacturers do their bit to tune the panel, but they still leave some default settings that can ruin your experience. You may know some of the settings on this list, but you still may have missed changing them on your current TV.
6 TV settings I turned off to instantly improve picture quality
Your TV isn't bad, its just not set up correctly
HDMI format
Enhanced format should be enabled by default

To ensure maximum compatibility between the source and your TV and avoid HDMI handshake issues, manufacturers set the HDMI format on modern TVs to the Standard setting. In case you were wondering why your PS5 or Xbox Series X/S doesn't look great on your TV, this setting could be the culprit.
The HDMI standard format ensures stability but limits signal strength, degrading image quality and gaming performance. This is why I toggle the HDMI format to Enhanced on a new TV the moment I set it up. This setting prioritizes image quality and performance by allowing the full strength of the HDMI signal to pass from the source to the TV. What you get is better colors, maximum frame rates, and the best HDR performance possible on your panel.
You can find this setting in the TV's input settings. Different manufacturers call it by different names, such as HDMI Ultra HD Deep Color, Input Signal Plus, HDMI UHD Color, or simply HDMI Enhanced Format. You'll need to toggle this for every HDMI port individually, depending on which ones are currently in use.
Ethernet
Switch to a more reliable connection

You may be using Wi-Fi on your smart TV for years, streaming 4K content and even games from your PC. After all, Wi-Fi is more convenient than running a cable to your TV, and most of the time, it works without issues. However, switching to Ethernet offers real advantages that everyone should consider.
For starters, you'll get rid of the occasional drop in bitrate when Netflix adjusts the video quality based on the Wi-Fi signal strength. Ethernet will ensure a consistent, high-speed connection, eliminating video quality issues and disconnections. By moving your TV off the wireless network, you'll also skip the interference on the 2.4GHz band if your TV is an older model with limited 5GHz capabilities.
The history of televisions
Trivia challenge
From fuzzy black-and-white screens to razor-sharp OLED panels — how well do you know the story of TV?
Who is widely credited with inventing the first fully electronic television system?
In what year did the BBC launch the world's first regular high-definition television service?
What does the acronym 'CRT' stand for in the context of older television technology?
Which color television broadcasting standard was adopted in the United States in 1953?
What historic event became the first live television broadcast watched by a global audience of over 600 million people in 1969?
Which display technology uses organic compounds that emit light when an electric current is applied, offering superior contrast to LED-LCD panels?
Which company released the first commercially available plasma television in 1997?
In what decade did television sets first surpass radio sets in numbers found inside American homes?
Your Score
Thanks for playing!
Lastly, streaming uncompressed media files from your local Plex or Jellyfin library can result in a stuttering mess on Wi-Fi. Ethernet can play your high-quality files in lossless quality instead. You might need an Ethernet adapter to bypass the 100Mbps cap on your TV's built-in port, but that's a small price to pay for a significantly improved experience.

Your smart TV may be holding your entire Wi-Fi hostage
Make your Wi-Fi great again by removing your smart TV from it
Color depth
Go deep into your TV's color settings

Color depth refers to the number of shades of color your panel can display. For instance, 8-bit panels can display 16.7 million colors, while 10-bit models can display 1.07 billion colors. If your TV supports a higher bit depth, switching to it can minimize "banding," significantly improving the gradient and image quality.
This setting is especially important for TVs that support true HDR and should be changed during initial setup. You can find it in the Display or Advanced Picture settings of your TV, under Color Depth or Bit Depth. Choose the highest setting available, and you'll notice better image quality, depending on your panel and its HDR capabilities.
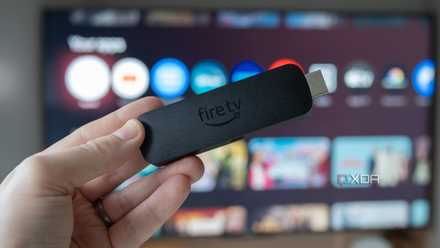
4 settings I changed right away on my new Fire TV Stick 4K Max
Amazon's relatively cheap streaming stick has several settings turned on by default that can be frustrating.
Sharpness
No longer needed

You may have seen sharpness settings on older TVs. These models belonged to a time when the content needed assistance to appear palatable on the screen. The sharpness slider was used to enhance object edges, making 480p and 720p content appear sharper on a higher-resolution screen. This setting is no longer relevant today when 4K content is widely available, but the sharpness slider remains embedded in the settings of modern TVs.
Given that most content is already pretty sharp on modern 4K TVs, leaving sharpness enabled can actually degrade image quality by making faces and text appear unnatural. You should either set the sharpness slider to 0 or look for a neutral setting that doesn't apply any artificial sharpness to the content. You'll be able to view the image as intended, not through an artificial sharpness filter.

Most 4K TVs upscale 1080p badly, and nobody checks the settings that fix it
Your TV's default image processing settings might be ruining upscaling
Motion smoothing
The bane of modern smart TVs
Manufacturers intended motion smoothing to be a fix for low framerates, improving motion smoothness with a simple toggle. While this can be great for sports content, it arguably ruins the experience when watching anything else. Motion smoothing gives the content an artificially fluid look that immediately breaks the immersion. Adding fake frames to 24 FPS or 30 FPS content doesn't "improve" anything; it just takes away from the intended viewing experience. The problem is that most TVs have this setting enabled by default. It is usually called TruMotion, Motionflow, Auto Motion Plus, or Smooth Motion Effect, depending on the manufacturer.
If you want to view content at its original frame rate and hate the "soap opera" look of motion smoothing, I recommend toggling it off for everything except sports content. You can also adjust the degree of the effect based on your preference rather than turning it off completely.

This one setting was ruining my TV — turning it off fixed everything
In most cases, Auto Brightness makes your TV look worse.
Picture calibration
A rite of passage

A big reason your TV's image quality looks "off" out of the box is that it requires calibration. If the content appears too dim, too bright, or washed out, you should be ready to spend some time in the video settings to tune the TV exactly to your liking. Most people can start with the Filmmaker Mode present on almost every TV these days. This mode disables all image enhancements and presents the image as close as possible to what the content creator intended. If it appears too warm or too different from what you want, you can manually adjust the panel's brightness, contrast, gamma, saturation, and other color settings.
For washed-out colors specifically, you should check your TV's RGB Range settings to ensure its black level matches the source device's. Different devices implement different RGB ranges. Full RGB (0-255) is often seen on gaming consoles, with 0 representing black. Limited RGB (16-235) is used by streaming apps, broadcast TV, and Blu-ray, with black set to 16.
Usually, the Auto setting ensures the TV and the source device use the same RGB range, but you may need to set it manually if you see washed-out colors. Your TV will have this setting in the Picture or Video section, under RGB Range, HDMI Black Level, or Contrast Enhancer. On a console such as PS5, you'll find it in the Screen and Video settings under RGB Range. You can set both to Full or High to ensure the same RGB coverage. For movies, you may see better results with the Low setting. In that case, ensure the source device reflects the same.
4 settings that instantly improved HDR on my TV
Default picture settings are the biggest reason HDR looks bad
Almost any TV can look great if you know which settings to change
Even if your TV is a few years old and the panel doesn't have the best local dimming, brightness, or refresh rate, there's always room to extract more out of it. Maybe you never calibrated it properly and suffered from inferior image quality as a result. Maybe you still have motion smoothing or sharpness settings set too high, ruining your immersion. You could also switch from Wi-Fi to Ethernet and enjoy more reliable streaming. It's all about knowing where to look.