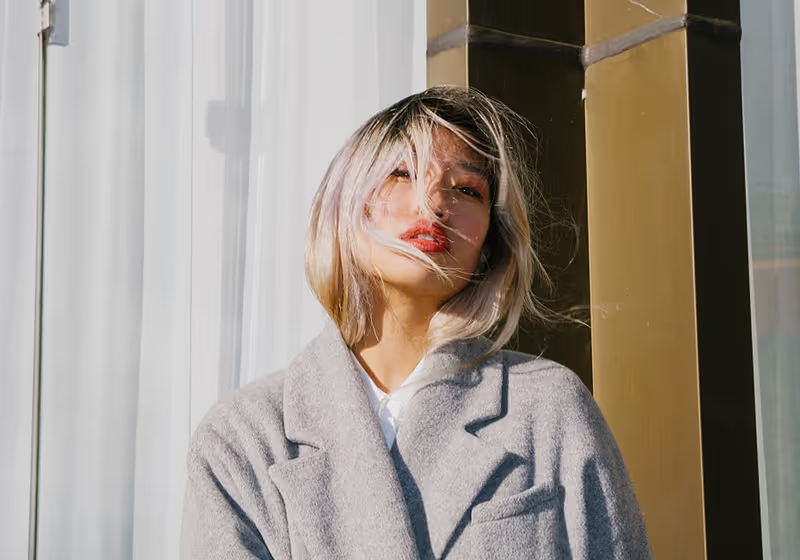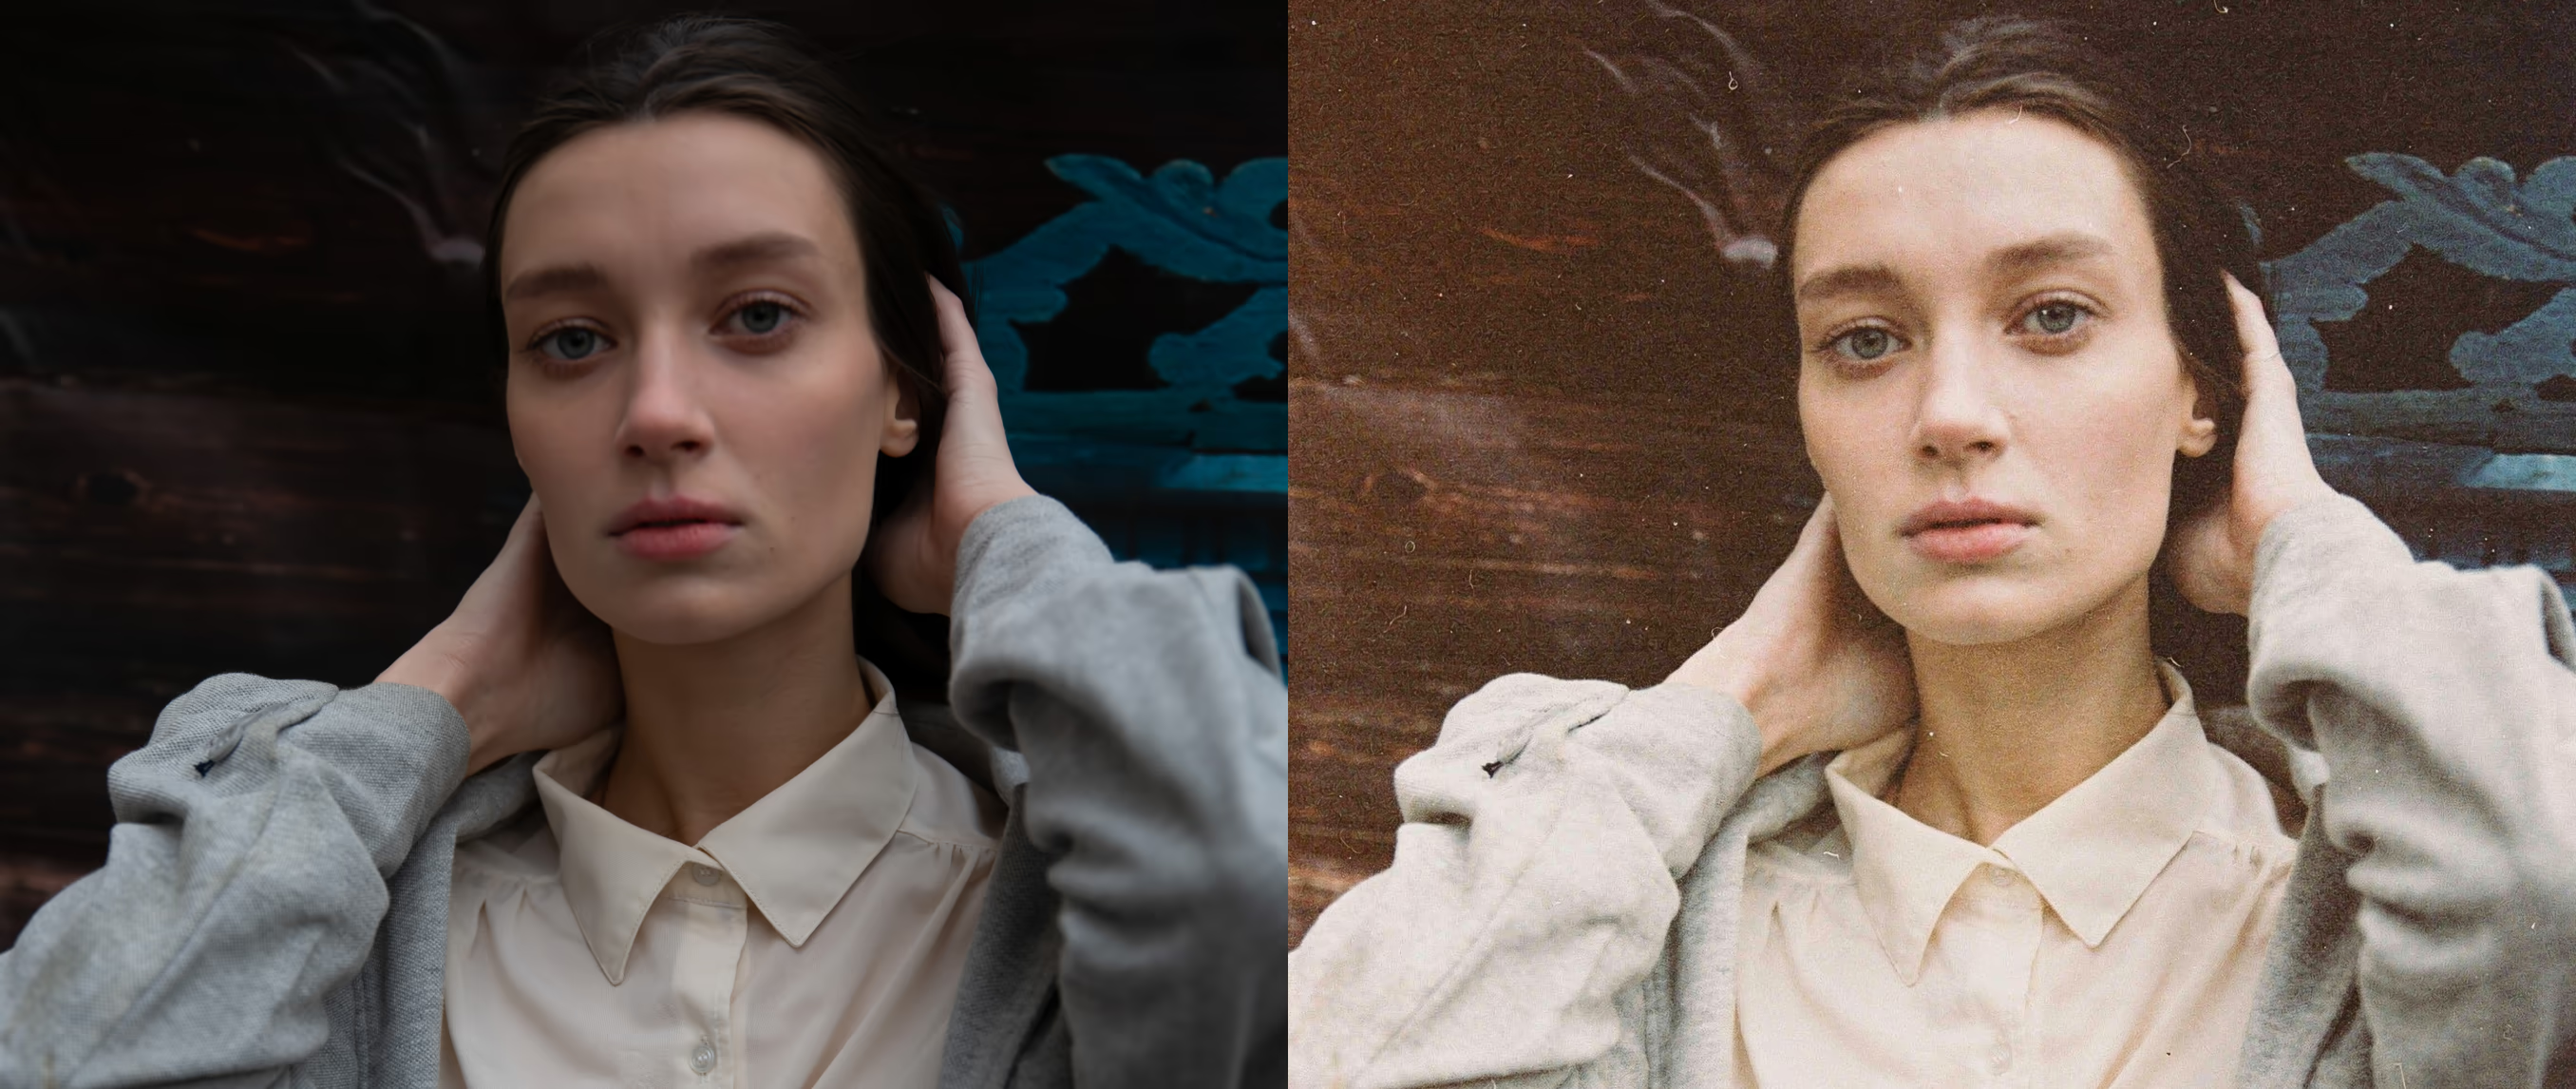
There's something irresistible about a photo that looks like it came from an old Canon PowerShot or a Sony Cybershot point-and-shoot camera. Warm tones. Direct flash. A little grain. The kind of image that doesn't just document a moment, but captures how it felt.
The digicam aesthetic isn't just a trend. It's become the visual language of a generation that grew up between analog and digital. But you don't need to buy a vintage digital camera or spend hours stacking filters to get the look. With AI photo editors like VSCO's AI Lab, you can describe the digital camera effect you want in plain language and watch the transformation happen in seconds.
This guide breaks down what makes the point-and-shoot look work, how to write AI photo prompts that authentically recreate it, and how to refine the result until it feels just right.
This article covers:
- Why the digicam aesthetic is so popular
- What defines the point-and-shoot look
- Step-by-step: how to create a digital camera effect using AI
- Prompt examples you can use right now
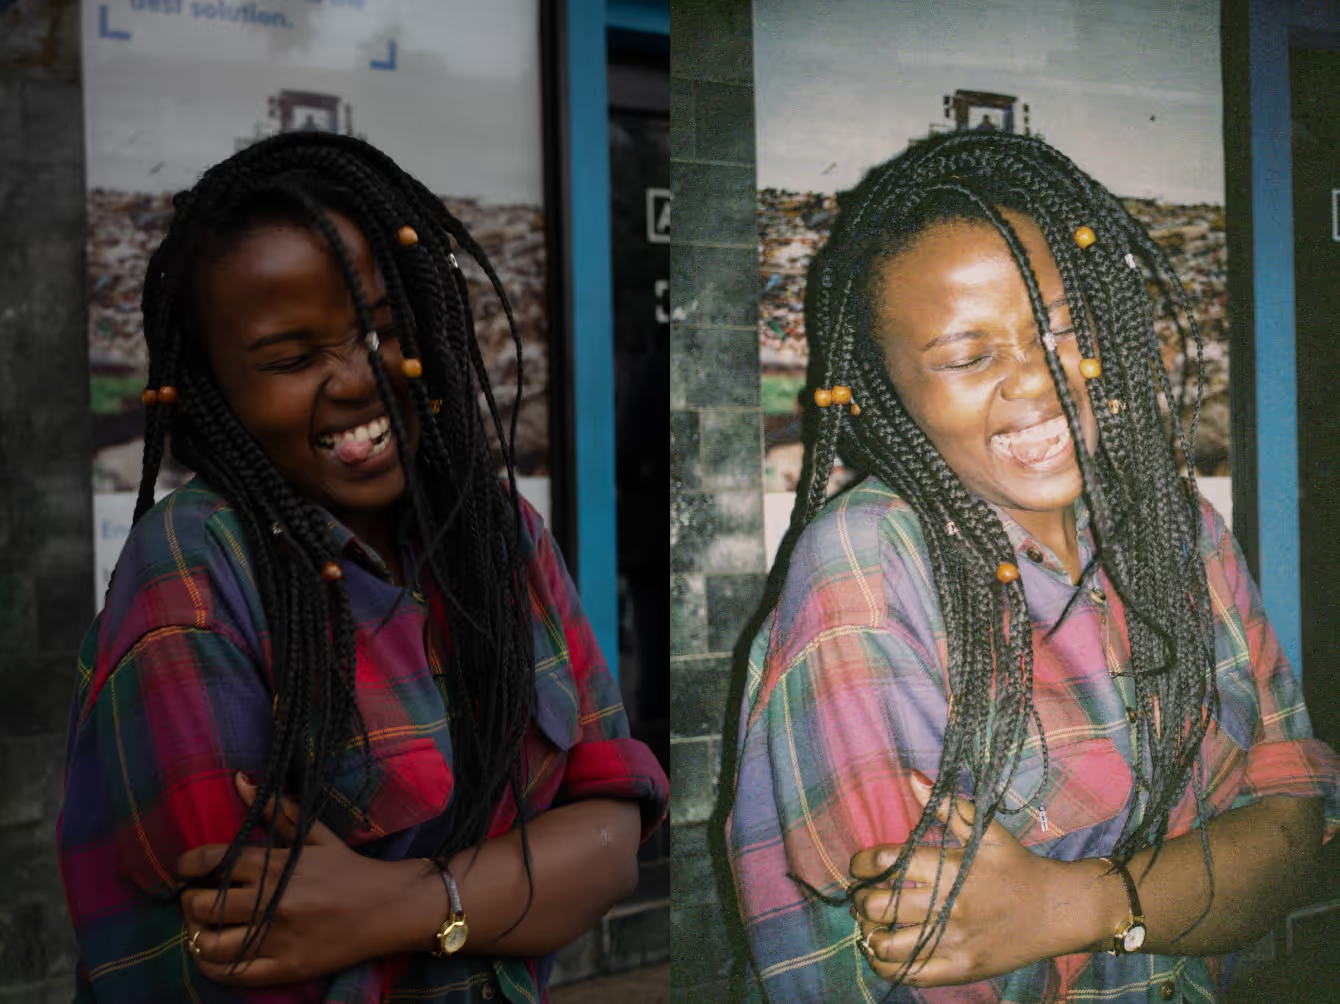
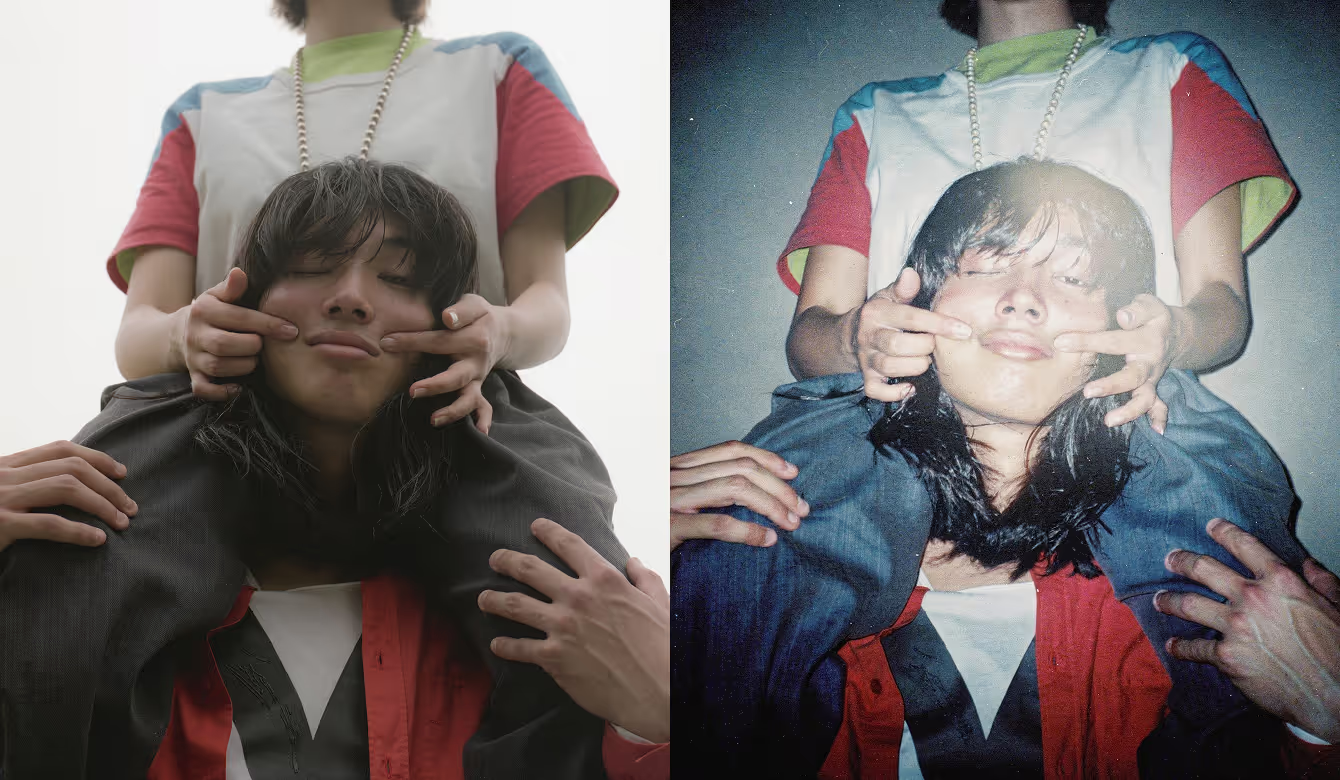
- Before and after: what to look for
- AI vs filters: what’s the difference
- FAQs
Point-and-shoot cameras were never meant to be elevated. They were built for convenience and designed for birthday parties, beach vacations, and school hallways. But that accidental, unpolished quality is exactly what makes their images feel so real.
In a world full of hyper-processed, AI-smoothed smartphone photos, the point-and-shoot digital camera pushes back. Warm tones, blown highlights, soft focus, visible noise. Photos that feel like they were taken by a person, not optimized by an algorithm. The Y2K nostalgia wave only accelerated its popularity.
The irony is that one of the best ways to recreate that accidental, pre-algorithm look is with AI.
Before you write a prompt, you need to know what you’re asking for. The digicam aesthetic isn’t one thing. It’s a combination of visual characteristics that come together to create that unmistakable nostalgic feel.
Unpredictable white balance and color shifts
Early-2000s point-and-shoot cameras weren’t consistent with white balance, especially in mixed or artificial lighting. Instead of reliably neutral colors, you’d get shifts—sometimes warm, sometimes cool, sometimes slightly green or magenta. Skin tones could skew in unexpected ways, and the overall color cast often depended on the environment more than the intent. That inconsistency is a big part of the aesthetic, especially compared to the highly corrected, uniform look of modern cameras.
Visible noise, smoothed detail, and digital artifacts
Noise wasn’t just present, it was often heavily processed. Many digital cameras applied strong noise reduction that tried to smooth out grain but ended up removing fine detail and introducing new artifacts. The result is a mix of soft, smeared textures alongside subtle digital noise patterns. It’s less about clean grain (like film) and more about this slightly “processed” look where detail and noise both feel imperfect.
Direct flash and blown highlights
On-camera flash creates overexposed foregrounds, darker backgrounds, and sometimes a faint greenish cast from fluorescent lighting bouncing through the frame.
Crushed shadows and clipped highlights
Dynamic range was limited, but more importantly, exposure systems weren’t very forgiving. Highlights could blow out completely, turning skies into flat white or clouds into featureless patches. While shadows often got crushed into deep blacks with little detail. Auto-exposure could also misjudge scenes, producing images that feel noticeably too dark or too bright. That lack of balance, rather than a gentle fade, is what gives the look its character.
Slight softness
Old lenses and slower processors don’t resolve the kind of edge-to-edge sharpness you get from a modern smartphone camera. Faces are softened, details may be out of focus, and motion blur is more common.
Muted, slightly washed colors
Colors feel approximate rather than exact, and more muted than vibrant. Especially in conditions where auto white balance struggles.
When recreating the point-and-shoot effect, these aren’t imperfections to correct for. They’re the building blocks. Your AI prompt needs to describe them clearly.
Step 1: Choose the right starting photo
AI transformations work best from a clean, relatively unedited base. Look for images that:
- Have natural or direct lighting, not heavy HDR processing
- Feature a clear subject like a person, candid scene, or moment
- Haven’t already been heavily filtered or stylized
Modern smartphone photos are ideal candidates. They’re technically clean, which gives the AI room to add texture and imperfection. If your original already looks heavily processed, the AI has less to work with.
Step 2: Open Prompt in AI Lab
In the VSCO app, open your image and select AI Lab from bottom navigation. Choose Prompt. You’ll see a text field, this is where the transformation happens.
Step 3: Write a specific, visual prompt
This is where most people go wrong. Vague prompts produce vague results.
Don’t write:
“Make this look vintage”
Do write:
“Point-and-shoot digital camera photo. Warm, slightly golden tones. Subtle digital noise. Soft focus. Direct flash with overexposed foreground and darker background. Muted colors.”
Or for a flash-heavy indoor scene:
“Point-and-shoot party photo. On-camera flash. Bright highlights. Warm tones with slight yellow cast. Soft edges.”
The more specific your visual language, the more accurate the result. Think like a photographer describing a photo to a camera enthusiast, not like someone searching a hashtag.
Descriptors to try:
- Time period and aesthetic: “90s,” “2000s,” “point-and-shoot”
- Lighting: “direct flash,” “on-camera flash,” “natural outdoor light”
- Texture: “digital noise,” “subtle grain”
- Color: “warm tones,” “muted saturation,” “slight yellow cast,” “washed-out”
- Imperfection: “soft focus,” “slight motion blur,” “bright highlights,” “limited dynamic range,” “low-resolution”
- Overall strength: subtle, moderate, visible, heavy
Step 4: Iterate and refine
AI Lab is built for experimentation. If the first result isn’t quite right, adjust your wording rather than starting over.
Too sharp and modern: “reduced sharpness,” “soft focus,” “slightly blurry”
Oversaturated: “muted colors,” “desaturated,” “washed-out palette”
Missing texture: “visible digital noise,” “low-resolution grain”
Flash effect is too subtle: “overexposed foreground,” “strong on-camera flash,” “bright flash pop”
Small language changes can produce meaningfully different results. Make some adjustments and reroll your edit in just a few seconds.
Step 5: Fine-tune with editing tools
Once you have a base AI edit you like, standard editing tools let you dial in the details:
- Exposure and Tone: adjust overall exposure, balance shadows and highlights
- Grain: layer in additional grain for a more texture
- Fade: add a gentle fade to flatten the tonal range
- Vignette: darken edges for a more retro look
- White Balance: nudge Temperature to lean more golden if the AI stopped short
Using a hybrid approach can help maintain authenticity without over-processing.
90s flash party photography
Point-and-shoot party photo. Direct on-camera flash. Darker background. Slight green tint from fluorescent lighting. Visible digital noise.
Early 2000s digital camera
Early 2000s digital camera snapshot. Slightly cool-to-neutral tones. Muted, slightly washed-out colors.
Summer day
Overexposed summer photo shot on a point-and-shoot compact camera. Washed-out highlights. Warm yellowy tones. Slight softness. Grainy texture. Casual, candid feel.
Lo-fi indoor portrait
Indoor portrait shot on a cheap digital camera. Direct flash. Warm tones. Visible noise. Soft focus.
Disposable camera
Disposable camera aesthetic with some grain. Slightly warm and washed-out colors. Natural light. Slightly underexposed shadows. Candid, snapshot quality.
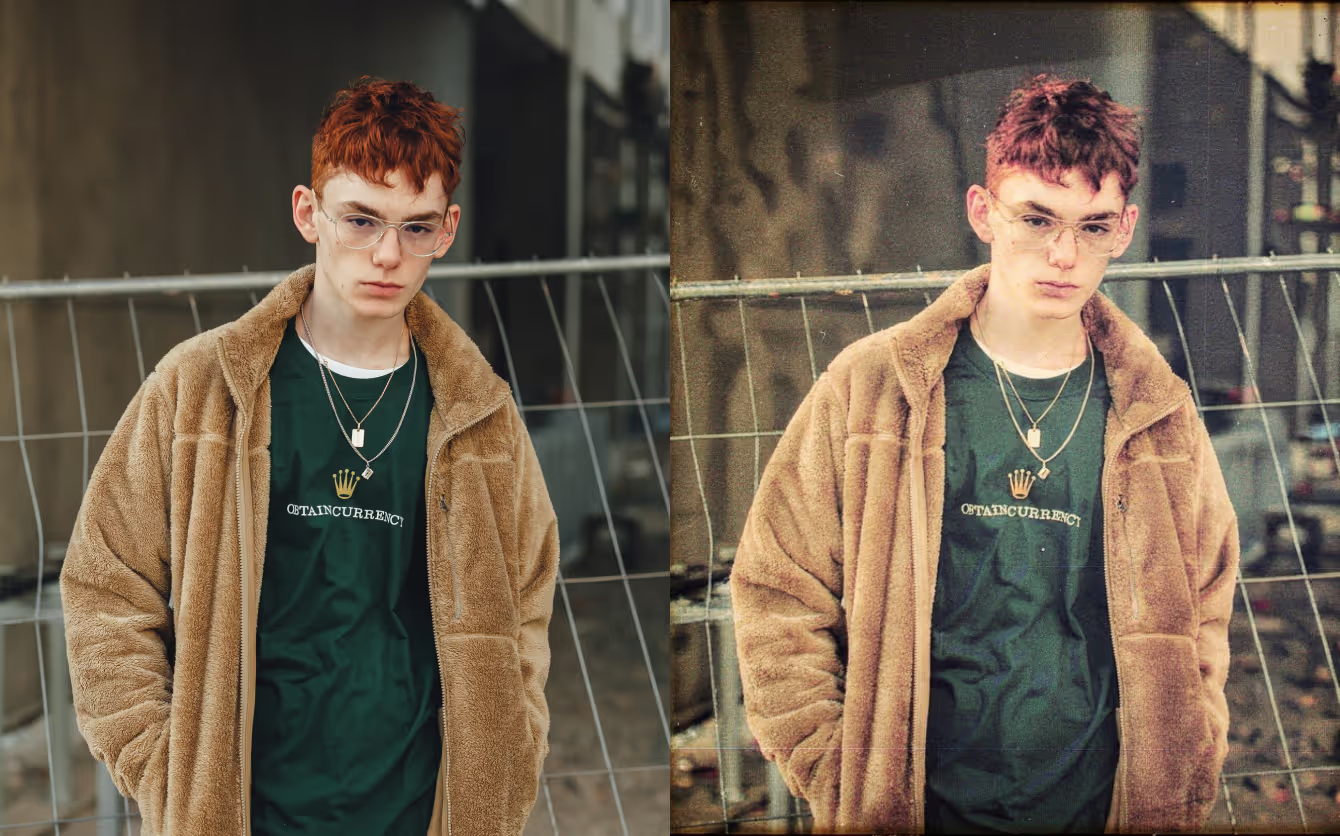
When comparing the original to the AI-edited version, check for:
- Softer highlights
- Warmer tones
- Added texture
- Reduced digital crispness
- Slight tonal imperfection
The final image should feel authentic and nostalgic, not overly filtered.
Presets and filters are one of the fastest ways to apply a consistent look across your photos. They’re ideal when you want a defined, repeatable style. Apply once, copy, batch edit across a shoot, and you’re done. A good photo filter is already tuned to a specific aesthetic.
VSCO presets are based on real color science and vintage film stocks, so you don’t have to describe a look because it’s already been carefully defined.
AI prompting is a different kind of tool. Instead of applying a fixed adjustment, it interprets your description and generates a transformation specific to your image and your wording. That means you’re not locked into a single look. You can vary the aesthetic by adjusting your language, and describe nuances that no preset captures exactly. More flash pop. Less saturation. Cooler shadows. Softer edges.
They work well together. Use AI to create the overall look, then refine with traditional editing tools or presets.

Can AI really recreate a digital camera look?
Yes. When you use specific visual language. Vague prompts like “make this look old” produce inconsistent results. Prompts that describe the actual characteristics of digicam photography like flash behavior, color temperature, noise texture, and dynamic range, give the AI clear direction and tend to produce much more authentic results.
What words work best in AI prompts for retro photos?
Think in terms of visual building blocks and combining them to make a complete prompt. Use descriptive phrases like “digital camera”, “point-and-shoot effect”, “soft flash,” “muted nostalgic colors,” and “slightly overexposed highlights.”
Is AI better than using a preset?
They serve different purposes. Presets give you a defined, consistent look that’s fast to apply and easy to replicate across a shoot. AI lets you describe a look in your own words and iterate toward something specific. For experimenting with digital camera effects, AI often gives you more flexibility; for applying a dialed-in style, presets are faster.
Can you create a point-and-shoot effect from a smartphone photo?
Absolutely, and it’s one of the best use cases. Modern smartphone photos are technically clean and slightly over-processed, which makes them ideal canvases for the digicam transformation. The AI has clear material to work with and room to add texture, warmth, and imperfection.
Create your own retro digital camera aesthetic with AI
The point-and-shoot photo doesn’t belong to any one decade, any one camera, or any one filter. It belongs to a feeling. Warm, a little imperfect, and completely human.
VSCO’s AI Lab lets you describe the look you want, iterate until it’s right, and refine with the editing tools that have always made VSCO the go-to app for serious photographers.
Your next edit is one prompt away. Try AI Lab today.