Setting Up Raspberry Pi Servers: A Complete Guide
Many people think that servers cost a lot of money and are only for big companies. But honestly, a Raspberry Pi can do way more than you’d expect. I use mine for everything from storing files to hosting games. Even after 20+ years working with (real) servers, I’m still amazed at what it can do.
Simply put, a Raspberry Pi server is no more than a small computer that operates discreetly on your network to provide services such as file sharing, streaming, or remote access to users on the same network.
This guide will show you the different types of servers you can run, what you need to get started, and how to choose your first project without stressing out. You don’t need to be an expert; you need to be curious and motivated enough to try something new.
If you’re new to Raspberry Pi or Linux, I’ve got something that can help you right away!
Download my free Linux commands cheat sheet – it’s a quick reference guide with all the essential commands you’ll need to get things done on your Raspberry Pi. Click here to get it for free!
What Is a Raspberry Pi Server, Really?
Even if it seems like I’m boasting about being a sysadmin for years, that’s not how I am. I’ve taught myself most of what I know about computers, so I don’t use the same words as other experts. I keep things simple and don’t make things more complicated than necessary, and that’s why so many read this website.
While explaining what a server is, most sources will elaborate on client-server architecture, processes, and services, I’ll just tell you that a server is simply a computer with certain applications installed that can be used by other devices.
It’s not more complicated than that.

When we talk about a Raspberry Pi acting as a server at home, it just means you’re using your Pi to share something with other devices on your network (like your phone, tablet, or laptop). It can be just files, web pages or a service like an ad blocker.
And it’s the same Raspberry Pi you might already be using for other purposes, it’s not more complicated than that.
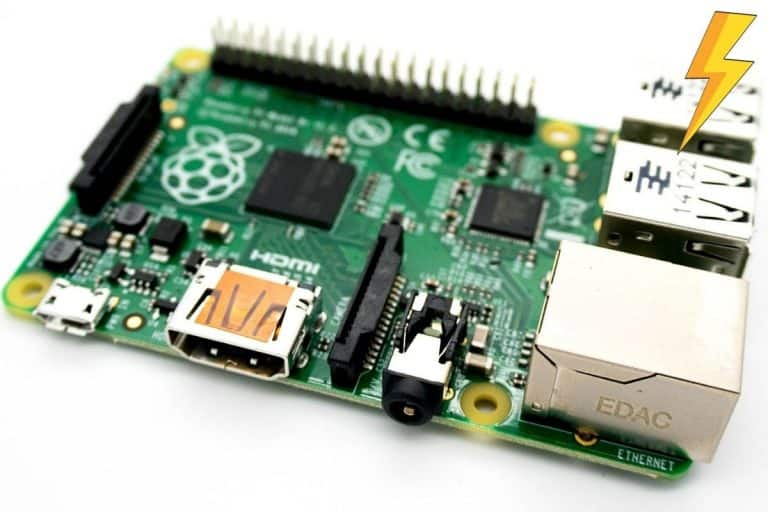
The picture above shows one of my “servers” at home, running VPN services and light automation on a Raspberry Pi Zero. That’s all you need to start tinkering with this topic, so don’t worry, it’s nothing crazy.
In general, we don’t install a graphical user interface (GUI) for it, because it will consume resources for no reason (a server usually runs in the background without a monitor). But if you are not comfortable with command lines, you can use one. Your server, your rules.
What You Need to Get Started
As shown in my previous image, you really don’t need much to run a Raspberry Pi server at home, but let’s talk about the recommendations before listing some project ideas for your new server.
Recommended Raspberry Pi Models
Of course, the model you use will depend a lot on the type of project and the number of users you’ll have. A Raspberry Pi Zero might be fine for running a Python script to monitor your internet connection, but it’s not enough for a Minecraft server or anything heavy.
Download the free PDF, keep it open, and stop wasting time on Google.
Download now
For most projects, I recommend using a Raspberry Pi 4 or Pi 5 as your server’s base (if you can afford one). They are good enough in most cases, and not much more expensive than older versions, so you don’t waste time guessing whether problems and lags are hardware-related or not.

These models also come with an Ethernet port, which is especially useful for servers (generally faster and more stable than Wi-Fi), and enough RAM for most projects (4GB is a good start in many cases).
Only consider lower-end models if you are on a tight budget and for minimal server projects with few users where you think it might be enough (typically scripts, print server or download server, occasional access, etc.).
Essential Hardware Checklist
Now that you have your base model, what do you need to build a server with it? Let me suggest a few add-ons:
- A good power supply: You don’t want your Raspberry Pi server rebooting every time it gets CPU load, or you plug something in. You need an official power supply that works. Check out my resources page for recommendations for each model (if you have one for the latest model, it should work with all Raspberry Pis).
- The right storage for your project: In most cases, a good SD card is all you need, depending on your project’s size. Consider SSD for projects where you need fast response times (hosting code, cloud servers, web applications in general) or just a lot of extra space (media centers, file servers, etc.).
- A good case: For servers, it’s almost mandatory to handle a Raspberry Pi running 24/7 without overheating or collecting dust. My favorite is the Pironman 5, but any case is better than nothing.

A UPS (Uninterruptible Power Supply) might be something to consider for critical servers or unstable setups, but it’s probably overkill in most cases. I’ve reviewed a good one here if you want to use one.
See? Nothing crazy for your server setup, just a solid foundation, and then you add accessories based on the exact project you are building. Now let’s talk a bit about software before getting into what to build.
Choosing the Right Operating System
Stability is key for a server, whether it’s a tiny server at home or a large server in a data center (in different measures, of course, but it’s always something to keep in mind). It comes from using reliable hardware, but also from having stable systems and applications.
With Raspberry Pi, we’ll mostly use trusted Linux operating systems, which limits our options. But even among Linux distributions, they are better known for their stability than others:
- Raspberry Pi OS: Based on Debian (see below), it just had this extra layer of compatibility from the Raspberry Pi manufacturer itself, making it the perfect choice for 95% of projects.
- Debian-based distributions: Because of its slow update cycle, Debian has always been the go-to for servers that need to run reliably for a long time. It’s true on Raspberry Pi too. You can either install Debian directly or one of its minimal sisters, made for Raspberry Pi (like DietPi or Armbian).
- Ubuntu: I tend to avoid Ubuntu for servers, because of its fast pace for updates, you can get more bugs than when using Debian. On the other hand, it has the advantage of including more recent versions than Debian and is now well-supported for Raspberry Pi devices, which makes it a decent choice anyway. So you can safely consider it if you need to.
Each of these systems has different versions or flavors. For servers, you should always consider using the lighter option, such as Raspberry Pi OS Lite, Ubuntu Server or Debian without GUI, as in most cases you won’t need anything more than a few command lines.
Note: If you are used to non-Debian-based systems like Arch or Red Hat, feel free to explore other options like Manjaro, Fedora, FreeBSD or even Alpine Linux. But don’t bother if you’re not really familiar with these systems, most tutorials are written for Debian-based distributions, so you’ll probably waste time if you have to “translate” them for these systems.
The Best Raspberry Pi Server Projects to Try
Now that the minimum requirements are clear, there are many ways to build a Raspberry Pi server (this website is full of tutorials), but I’d like to give you a head start with a few projects I recommend you start with.
Download the free PDF, keep it open, and stop wasting time on Google.
Download now
File Sharing & Backups
It’s possible to use a Raspberry Pi as a shared folder on your network. If you have multiple devices (computers or even phones/tablets), you can access your files from any of them. In the fancy world of tech experts, it’s called a NAS (Network Attached Storage).
But it’s also a great way to keep a safe copy of your important files on another device, so you can easily recover them even if your computer burns.
To run this kind of server, the resources you’ll need depend on two factors: how much space you need, and how many concurrent users you’ll have. For most people, a few tens of gigabytes is enough, and you’ll rarely have more than one user at a time, so any Raspberry Pi model will do.
Having said that, the hard part is to pick the right software stack, but hopefully, I’ve covered most of the options on RaspberryTips already:
- A simple shared folder for backups or temporary files: using the Samba service, which is natively available on all Linux distributions, is probably good enough. Check out this tutorial on how to set it up. A bit of configuration files and command lines, but I give you everything.
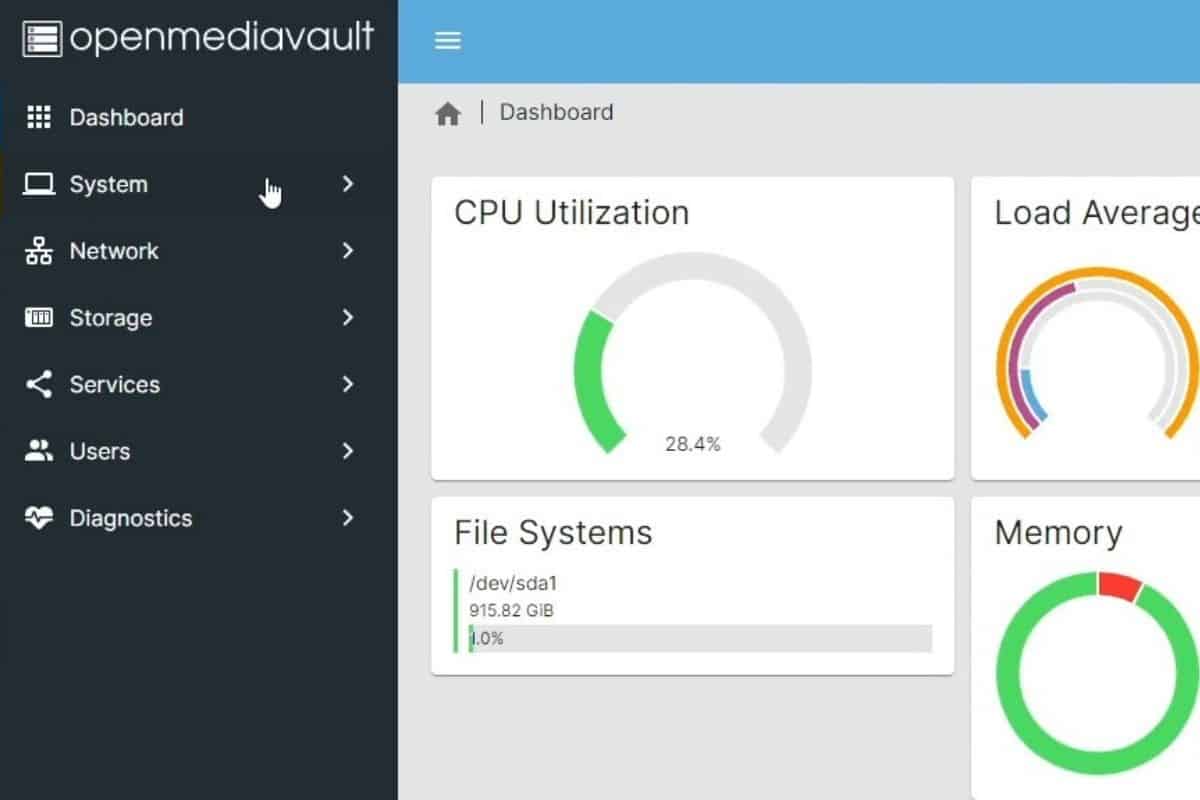
- A more advanced NAS setup: If you plan to dedicate a Raspberry Pi to file sharing, I recommend upgrading the previous suggestion to OpenMediaVault, so you get a web interface to manage everything, and can have different folders, permissions, etc. It’s a robust setup (I’ve used it at work).
- Your cloud server: This is the kind of buzzword I avoid using, but it’s how most people understand it better. In this case, I’m referring to a tool like Nextcloud that allows you to sync all your files in real-time with the Raspberry Pi. I’m currently using it on all my computers with a Raspberry Pi server, I highly recommend giving it a try (for backups or just for the convenience of having all your files synchronized on all your devices, smartphones included).
If you pick one of the first two options, configure backups to send your most important files to this shared folder regularly (I generally use rsync for this, but other backup tools can be used).
Note: If you want to see how to set up a file server, I have a video on this topic just for community members. Join here to watch, and get access to 30+ other lessons for Raspberry Pi along with many other benefits!
Media Streaming at Home
A Raspberry Pi is the perfect accessory for your TV setup. It’s small, quiet, and easily connects to an HDMI input. That’s why there are so many projects that use it as a media center for your home.

Maybe it’s just storing your media files (like with the projects mentioned earlier) so you can play them on your TV, but it can do way more than that.
Here are some popular projects that use a Raspberry Pi as a media center:
- Turn an old TV into a smart TV: Kodi is a great application that can be used directly on your TV once the Raspberry Pi is connected to make it look like a smart TV interface. It can be installed on Raspberry Pi OS, but we usually use a lightweight OS like LibreElec or OSMC. By default, it allows you to play all kinds of media files, but think of it more like Android, where you can install apps to do even more than that (ex: Spotify, YouTube, Netflix, etc.).
- Host your own Plex server: Plex is an amazing media server that can play movies & TV shows, integrate online streaming services, and even access live TV channels. What I like is that you can access it from anywhere, unlike Kodi which only works when connected to the current screen.
- Your music player: If you are more into music than movies, your Raspberry Pi can also play a role in your home setup. Using tools like MoOde or Volumio are a great starting point.
We have a special tutorial for using a Raspberry Pi as a media center. I highly recommend checking it out if you are interested in this option, it mentions tips and projects I haven’t listed here.
Hosting Websites & Apps
I started my career as a web developer, so hosting and building websites has always been a passion of mine. That’s one of the first things I used my Raspberry Pis for. And it’s pretty good at it.
Download the free PDF, keep it open, and stop wasting time on Google.
Download now
You might also like: I've tested hundreds of Linux apps, here are the ones I recommend.
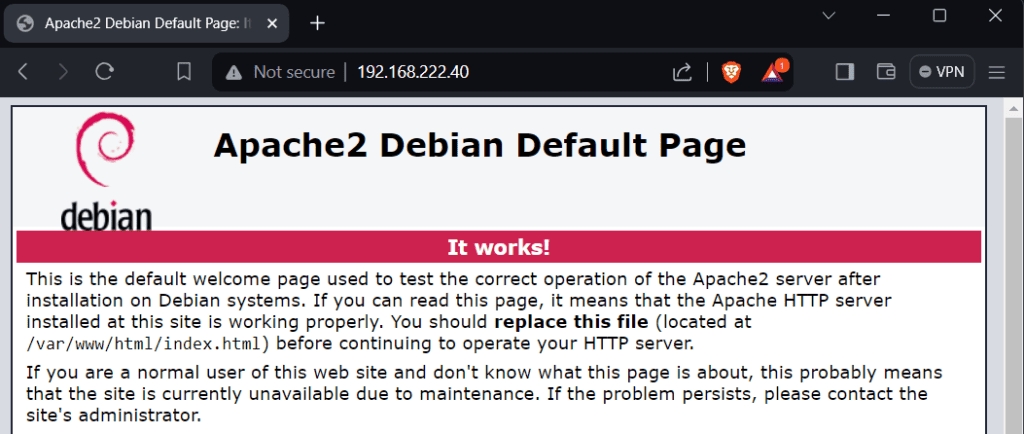
Creating web pages is also something that techies like to overcomplicate, but these days you don’t need much to get started. Most web servers still start with a tech stack called LAMP (Linux + Apache + MySQL + PHP), and then you can create HTML or PHP pages in the web server’s directory.
Other options include using NGINX (an alternative to Apache), or directly building a web server for Python scripts (like Flask).
Once you’ve got a web server up and running, you can write your own code (AI chatbots can be helpful with speeding up the process) or install web apps to use their features directly without any code. Here are some examples:
- WordPress: what most websites are built on (including RaspberryTips). It allows you to create web pages from an editor (basically like Word) instead of typing code.
- Webmin: a systems management tool perfect for a Raspberry Pi server, allowing you to monitor and manage all your services from a simple web interface.
- Zabbix or Nagios: great tools to keep an eye on your Raspberry Pi and other devices on the network that rely on a web server to provide a web interface with everything you need.
There are many other applications like this, but these are a good starting point. The process is always the same, you start with a web server, download a zip file for the application and put it in the root directory of your web server. Once done, you can access the new tool via a web browser (like http://IP/tool).
We have a complete guide to hosting a website at home that you should check out if you’re interested.
Privacy & Remote Access
Another great use for a Raspberry Pi running 24/7 at home is VPN (Virtual Private Network). It’s something I use a lot to access my home network from anywhere.
You know, once you’ve set up some of the projects mentioned above (typically having your work or media files on the Raspberry Pi), you’ll want to be able to access them when you’re not at home. This is where a VPN comes in.
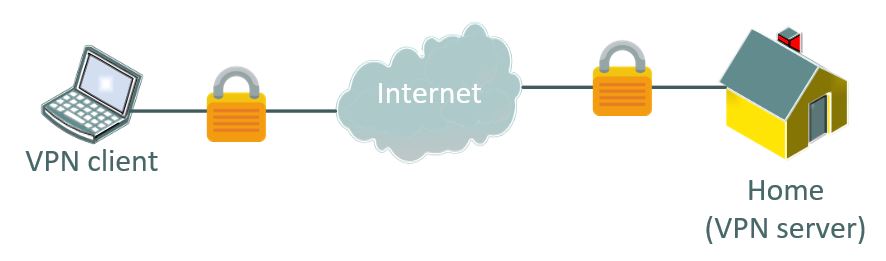
VPN is a buzzword commonly used in the mainstream media to protect your privacy by encapsulating your outgoing Internet traffic in a secure tunnel. Typically, you’ll use a third-party service like NordVPN, ExpressVPN, or ProtonVPN. That’s great, but that’s not what I’m talking about here.
I recommend setting up a free service like WireGuard, Tailscale or OpenVPN that allows you to access your home network from your laptop or cell phone without any subscription or fees. Once you connect to it from outside your home, you’ll basically have access to your entire home network as if you were there.
I have it on my phone and laptop, allowing me to access my NextCloud files from anywhere, manage my Minecraft server or keep an eye on all my Python scripts that run locally.
If you’re interested in doing it the other way around (protecting your outgoing traffic), I recommend setting up a VPN gateway on your Raspberry Pi so you don’t have to worry about configuring each device separately.
Download the free PDF, keep it open, and stop wasting time on Google.
Download now
Must read: Differences between OpenVPN and WireGuard.
Home Automation
Last but not least, Raspberry Pi servers are often used in home automation setups, or for some fun projects that require a server to run.
From a Raspberry Pi server’s point of view, the goal of home automation is to connect to your smart devices and make them execute routines (based on dates, times, or triggers), often linking them together in different sequences.
It is much easier to do this with a tool or system designed to help you connect to all these devices and make them work together, rather than writing scripts to do it. Here are some great starting points:
- Getting Started With Home Assistant on Raspberry Pi (2 Ways)
- How To Install Domoticz on Raspberry Pi (Step-by-step guide)
- How To Install & Use Grafana On Raspberry Pi
We have a dedicated article on getting started with home automation on Raspberry Pi, so I won’t repeat myself here. Check it out if you are interested in this topic.

Now, the tool you use is just the starting point, not the real project that will be useful in your home. If you’re looking for examples of how Raspberry Pi can make your home smarter, safer, and better, here are some ideas:
- 11 Easy Home Automation Projects with Raspberry Pi
- 12 Affordable Smart Home Upgrades Using Raspberry Pi
- Top 25 Raspberry Pi Home Projects to Try (+Links)
If this project doesn’t work as expected on your setup, don’t worry. You can get help directly from me and other Pi users inside the RaspberryTips Community. Try it for $1 and fix it together.
Start Simple and Grow From There
As you may have begun to understand if you’ve read the entire article up to this point, building a Raspberry Pi server doesn’t have to be complicated, as long as you break it down into small, actionable steps:
- Choose a simple project to start with that will be useful and motivate you to progress at your own pace.
- Make sure you have the right hardware for this project (use my recommended product pages if necessary).
- Install a simple operating system (Raspberry Pi OS is recommended in 95% of cases unless you’re more familiar with another).
- Get one of my tutorials for this project and follow the instructions in the letter.
- Build from there, try things, break things, experiment, have fun!
Things are much easier when you break them down like this and try to make progress one step at a time. That’s how I built all my books (like Master Raspberry Pi in 30 Days) and how I learn everything new.
Related: 15 Tweaks to Get the Most Out of Your Raspberry Pi Server
Now, this won’t always be as easy as the tutorials, there are often undocumented cases, problems and headaches with technical stuff, and that’s life. If you need an extra hand, you can join our community. Once inside this support group, you can ask any question to me and other members so you don’t waste too much time on these hiccups.
Anyway, I hope this article clarifies things, and that you’re now more motivated than ever to build this next project. Let me know how it goes!
Whenever you’re ready, here are other ways I can help you:
Test Your Raspberry Pi Level (Free): Not sure why everything takes so long on your Raspberry Pi? Take this free 3-minute assessment and see what’s causing the problems.
The RaspberryTips Community: Need help or want to discuss your Raspberry Pi projects with others who actually get it? Join the RaspberryTips Community and get access to private forums, exclusive lessons, and direct help (try it for just $1).
Master your Raspberry Pi in 30 days: If you are looking for the best tips to become an expert on Raspberry Pi, this book is for you. Learn useful Linux skills and practice multiple projects with step-by-step guides.
Master Python on Raspberry Pi: Create, understand, and improve any Python script for your Raspberry Pi. Learn the essentials step-by-step without losing time understanding useless concepts.
You can also find all my recommendations for tools and hardware on this page.