
The Raspberry Pi GPIO Pinout: Diagram & Explanation
The GPIO pins, found on each Raspberry Pi, are one of the best features to expand the device’s capabilities. But it’s not easy to get started because the pins seem to be numbered randomly, and it isn’t even the same as what’s used in your code. Don’t worry, that’s why I created this article.
On a Raspberry Pi, the GPIO pinout refers to the map of pins on the board that can be used to connect and control external devices. Each pin can be set as an input or output, allowing interaction with various sensors and accessories.
With the diagram I show you, you’ll have all the pin numbers, and the equivalent IDs to use in your Python scripts. By the end of this article, you’ll be able to use this as a foundation for any electronics project you have in mind.
If you’re like me and sometimes mix up syntax between programming languages, I’ve got just the thing for you. I’ve put together a Python cheat sheet with all the essential syntax in one place, so you can keep it handy and avoid any confusion. Download it here for free!
The Raspberry Pi Pinout Diagram
Introduction
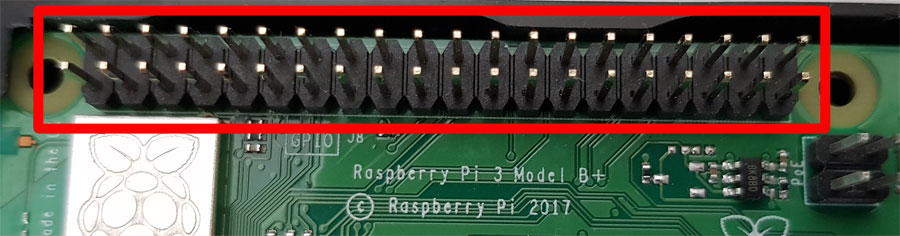
All Raspberry Pi models come with 40 GPIO pins on the main board (except for the Pico, which I’ve written a separate guide for here). The Raspberry Pi Zero (and Zero 2) exist in two versions (with or without the pins pre-soldered), but you can use them too.
The good news is that all models use the same numbering and the same pinout.
The bad news is that this numbering isn’t intuitive at all. Not all pins can be used the same way, and the numbers you’ll use in your code are not necessarily the ones you see (or can guess) on the board.
That’s why you most likely need the diagram below (or this kind of adapter on Amazon) to make sure you’re using the correct IDs in your project. Feel free to print this diagram, or part of this page, to have it with you when needed.
Check this: Want to install Windows 11 on your Pi? Here's how
If like me, you always mix the languages syntax, download my cheat sheet for Python here!
Download now
Simplified Diagram
When you place the Raspberry Pi board in front of you with the USB ports at the bottom, GPIO pin 1 is in the top-left corner. Number 2 is in the top-right corner next to it. And from there, it goes from left to right, line by line, as if you were reading a book.
There are two lines of 20 pins, so 40 pins total. The one in the bottom-right corner is number 40.
Well, the main issue is that you won’t be using these numbers in your scripts. Instead, you need to use their “equivalent” names, which are listed on the sides of the diagram below:
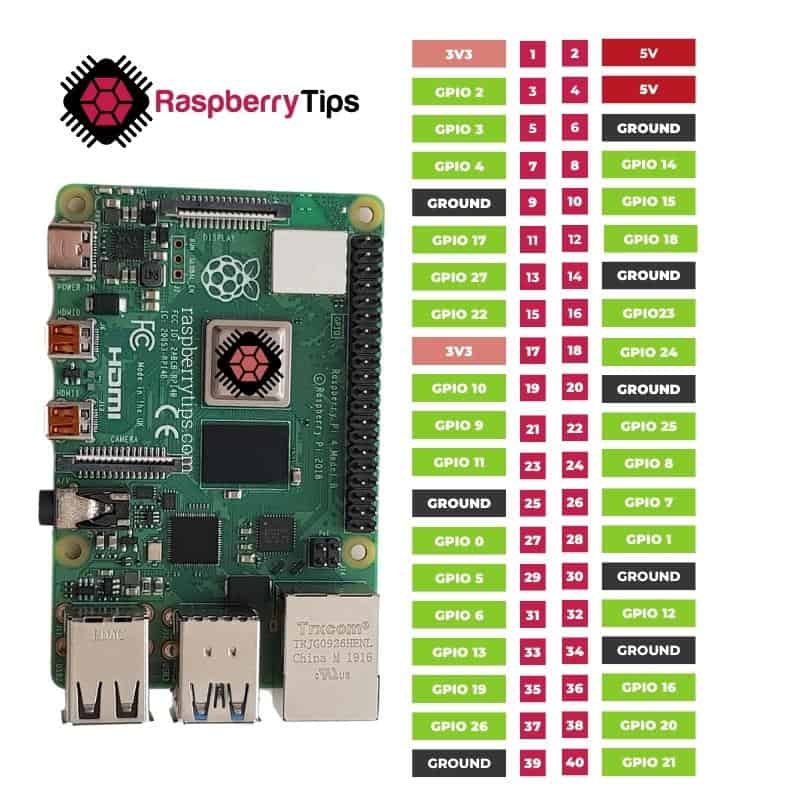
The red ports on this diagram are used for power input. There are two options: 3V or 5V. Make sure to use something compatible with your electronic circuit.
The black ports are for grounding. That’s explicit enough I think, you’ll typically plug one on the blue line of your breadboard if you use one (as explained here).
The remaining ports are all programmable. They can be used for input (sensor) or output (LED, servo, etc.). However, as noted earlier, their names do not follow the pin IDs; for example, port 28 is named “GPIO 1” while port 3 is “GPIO 2″—this is why you’ll need this diagram ready at all times.
In the example I give you later, I will light a LED on pin 37, but use “GPIO 26” in my code. So, you’ll have to do this mental exercise each time.
Read next: I tried to replace my main PC with a Pi 5, here's what happened.
If like me, you always mix the languages syntax, download my cheat sheet for Python here!
Download now
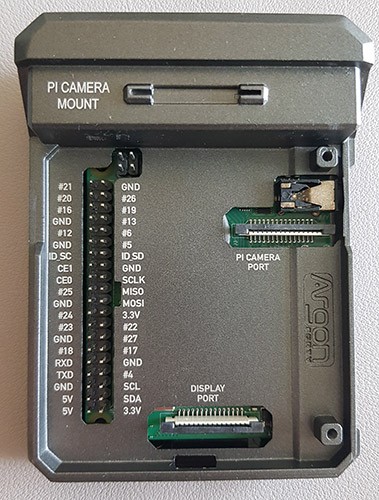
If you use the Argon NEO as your Raspberry Pi case (read my review here), the Argon ONE (review), or something similar, you may get some guidance on it, which is really useful. Here’s what it looks like on the Argon NEO, for example:
Full Diagram
I only gave you the simplified version of the GPIO pinout diagram because I think it’s what you’ll need most of the time. But if you play with advanced accessories—especially using the SPI or I2C interfaces—you may need more information, as each port can have several names.
You’ll find all the defaults in the official datasheet (here on page 10), or you can check the graphical version on this website.
You might also like: Enabling UART on Raspberry Pi: A Step-by-Step Guide
How to Use the GPIO Pinout With Python
Each GPIO pin has a number and a name. In Python, the number is mentioned in the name. For example, port 37 is GPIO 26, so we’ll use “26” in the Python script.
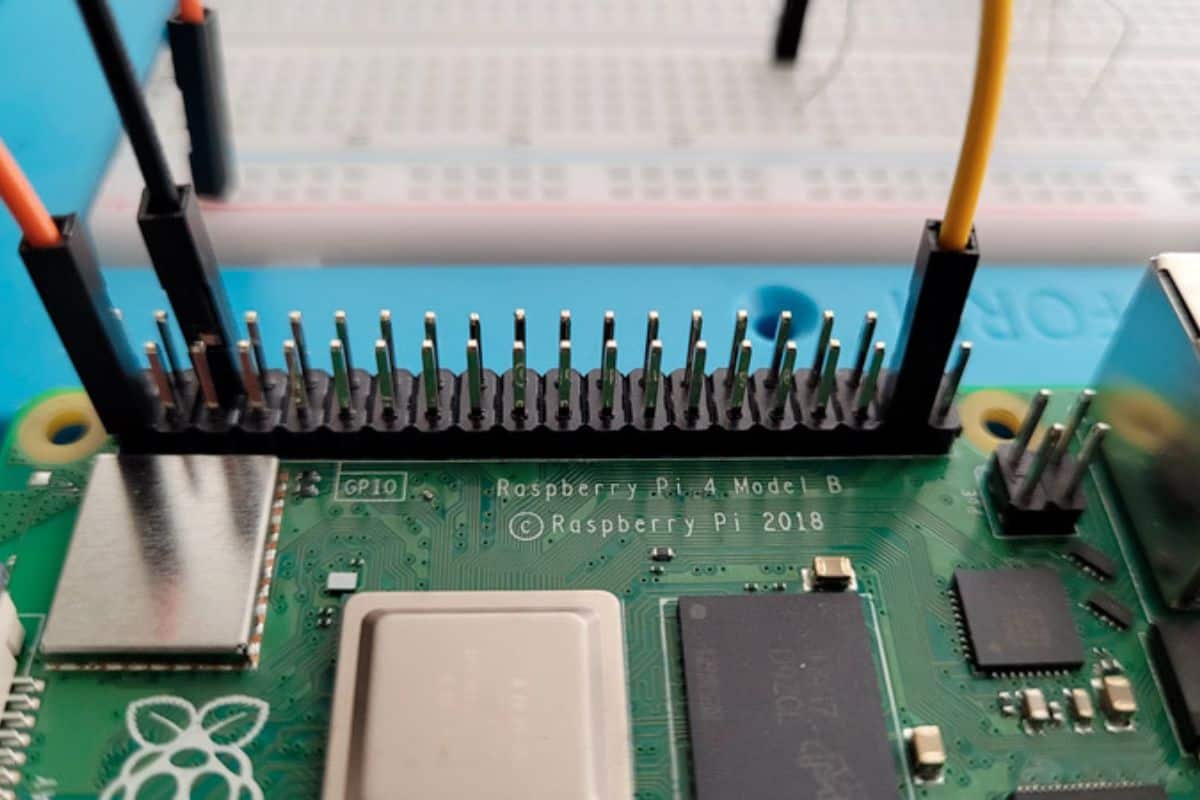
I created a simple circuit as an example, with just an LED and a resistor, using three wires that plug into three GPIO pins:
- Port 9: ground
- Port 37: GPIO26, to control the LED

Download the free PDF, keep it open, and stop wasting time on Google.
Download now
If you want to try this simple circuit on your own, read my GPIO guide for beginners. I think I use something very similar in it (maybe not the same pins, but it’s a good exercise anyway).
Warning: The Python library, RPi.GPIO, has been deprecated. As a result, it’s recommend to use another library for interacting with GPIO pins, gpiozero for example.
In Python, the full script will look like this:
from gpiozero import LED
from time import sleep

led = LED(26)

while True:
    led.on()
    sleep(1)
    led.off()
    sleep(1)
Here are a few takeaways:
- I use gpiozero (a pre-installed Python library).
Other solutions are possible, but let’s use this one as an example. - I also import the sleep function from the time library, which allows us to make the LED flash (on for one second, off for one second, etc.).
- The only thing you need to change in this script is the port number (17 in my example) to fit your circuit.
Remember, if reading this Python script feels like deciphering hieroglyphs, you will benefit from reading my book, Master Python on Raspberry Pi. I explain everything you need (and only that), to use it for any project. In a few weeks, you’ll be ready, and this example will be easy to read for you.
Anyway, this was just a basic example to get you started and show you how to use the previous diagram. I hope this will be useful.
If you want to go further, SunFounder has the perfect kit for your Raspberry Pi, including all the components you might need (sensors, wires, etc.). You can find it here on Amazon, or directly on their website. There are more than 150 projects you can do, all documented, in Python, C++, Java and more. Don’t miss out!
Download the free PDF, keep it open, and stop wasting time on Google.
Download now
Once you get some parts, check out our guide to figure out how to use them: Raspberry Pi GPIO Basics: Components You Need to Know.
If this project doesn’t work as expected on your setup, don’t worry. You can get help directly from me and other Pi users inside the RaspberryTips Community. Try it for $1 and fix it together.
Related Questions
What does GPIO mean?
GPIO stands for “General Purpose Input/Output.” It’s an interface used to plug other electronic devices into the Raspberry Pi.
What are GPIO pins used for?
GPIO pins are used to connect additional devices, sensors, and wires to the Raspberry Pi, and use it as the brain of any electronic circuit—for example, as a weather station, a robot, or an expansion card (named “HAT”).
You can find some concrete examples on this website:
- The 11 Best Raspberry Pi Robots Kits for Beginners
- Top 13 Raspberry Pi HATs You Need to Try
- All the Best Raspberry Pi Project Ideas (With Links)
Which GPIO pin should I use?
Each pin has a different role. Some of them provide power, others are ground, and others can be used in programming. Each pin can be used as input (for a thermometer, for example) or output (for an LED).
Use the diagram provided above to know which pin to use. But basically, any green pins on my diagram are free to use. Follow the script given previously as a template to make sure the port is properly initialized before use.
Whenever you’re ready, here are other ways I can help you:
Test Your Raspberry Pi Level (Free): Not sure why everything takes so long on your Raspberry Pi? Take this free 3-minute assessment and see what’s causing the problems.
The RaspberryTips Community: Need help or want to discuss your Raspberry Pi projects with others who actually get it? Join the RaspberryTips Community and get access to private forums, exclusive lessons, and direct help (try it for just $1).
Master your Raspberry Pi in 30 days: If you are looking for the best tips to become an expert on Raspberry Pi, this book is for you. Learn useful Linux skills and practice multiple projects with step-by-step guides.
Master Python on Raspberry Pi: Create, understand, and improve any Python script for your Raspberry Pi. Learn the essentials step-by-step without losing time understanding useless concepts.
You can also find all my recommendations for tools and hardware on this page.


