
Ever wanted your Discord bot to instantly respond to events like new messages, alerts, or commands? That’s where webhooks shine. In this guide, we’ll walk through setting up a Discord bot webhook using the Discord API, a simple Python server with Flask, and Pinggy to expose your local server to the internet.
This setup is perfect for developers who want to:
- Send real-time notifications to Discord
- Test webhooks without deploying
- Create smarter bots and integrations
What Are Discord Webhooks?
Discord webhooks are special URLs that allow external services or your applications to post messages directly into a Discord channel. They don’t require a persistent bot connection or full OAuth2 flows and are perfect for:
- Sending real-time alerts (e.g., error logs, build statuses, new tweets)
- Posting automated messages (e.g., reminders, news, analytics)
- Building lightweight integrations with external APIs or services
Why Use Pinggy?
Since webhooks need to hit your server via the internet, you need a public URL for local development. Instead of deploying to a remote server every time you make a change, Pinggy gives you a public tunnel to your local machine instantly.
Step-by-Step: Setting Up a Discord Webhook with a Local Python Server
Step 1: Create a Discord Server and Channel
Open Discord.

Click the "+" on the sidebar to create a new server.

Choose "Create My Own".

Name your server and hit "Create".

Add a new text channel (e.g.,
#webhooks-channel).


To retrieve the Channel ID (required for the webhook), enable developer mode:
- Go to User Settings → Advanced → Enable Developer Mode

- Right-click on your new channel → Copy ID


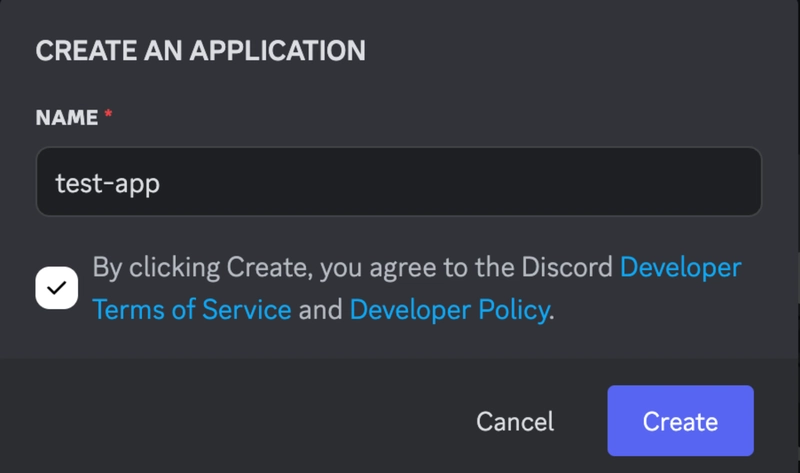
Step 2: Create a Discord Application and Bot
- Visit the Discord Developer Portal.
- Click New Application → Give it a name.

- Go to the Bot tab → Click Add Bot → Confirm.

- Copy the Bot Token and save it securely.

- Under OAuth2 → URL Generator, select:

- Scope:
bot - Bot Permissions:
Manage Webhooks
- Copy the generated URL, paste it into your browser, and authorize the bot to join your server.

Step 3: Create a Webhook via the Discord API
Use the following curl command to create a webhook for your channel:
curl -X POST "https://discord.com/api/channels/<CHANNEL_ID>/webhooks" \
  -H "Authorization: Bot <BOT_TOKEN>" \
  -H "Content-Type: application/json" \
  -d '{"name": "My Webhook"}'
Replace <CHANNEL_ID> and <BOT_TOKEN> with your actual values.
You’ll receive a JSON response containing the id and token. Construct your webhook URL as:
https://discord.com/api/webhooks/<WEBHOOK_ID>/<WEBHOOK_TOKEN>

Step 4: Build a Local Webhook Server with Flask
Create a file named discord_webhook.py and paste the following code:
from flask import Flask, request, jsonify
import requests
import logging

app = Flask(__name__)
logging.basicConfig(level=logging.INFO)

WEBHOOK_URL = "https://discord.com/api/webhooks/WEBHOOK_ID/WEBHOOK_TOKEN"

@app.route('/send', methods=['POST'])
def send_message():
    data = request.get_json()
    if not data or 'content' not in data:
        return jsonify({'error': 'Missing content'}), 400

    payload = {
        "content": data['content'],
        "username": data.get('username', 'Webhook Bot'),
        "avatar_url": data.get('avatar_url', '')
    }

    response = requests.post(WEBHOOK_URL, json=payload)
    logging.info(f"Discord response: {response.status_code}")

    return jsonify({'status': 'success' if response.status_code == 204 else 'error'}), response.status_code

@app.route('/health', methods=['GET'])
def health():
    return jsonify({'status': 'ok'})

if __name__ == '__main__':
    app.run(host='0.0.0.0', port=8000)
Install dependencies:
pip install flask requests
Then run the server:
python discord_webhook.py

Step 5: Expose Your Localhost Using Pinggy
To make your Flask server accessible over the internet:
ssh -p 443 -R0:localhost:8000 a.pinggy.io
Pinggy will output a public URL like:
https://your-subdomain.a.pinggy.link
This now points to your local server!

Step 6: Test the Webhook
Use curl or Postman to test sending a message to your server:
curl -X POST "https://your-subdomain.a.pinggy.link/send" \
  -H "Content-Type: application/json" \
  -d '{"content": "Hello Discord!", "username": "PinggyBot"}'

If everything is set up correctly, your message should appear in your Discord channel.

Handling Outgoing Webhooks (Discord → Your App)
Besides sending messages to Discord, you can also receive messages from Discord using interaction webhooks (e.g., slash commands).
Here's a simplified example of handling Discord interactions:
@app.route('/discord-interactions', methods=['POST'])
def handle_interaction():
    data = request.get_json()

    if data.get("type") == 1:
        return jsonify({"type": 1})  # PING → PONG

    if data.get("type") == 2:
        command = data['data']['name']
        return jsonify({
            "type": 4,
            "data": {
                "content": f"You used the /{command} command!"
            }
        })

    return jsonify({'error': 'Unhandled interaction'}), 400
To use this:
- In the Discord Developer Portal, set the Interactions Endpoint URL to your Pinggy public link (e.g.,
https://your-subdomain.a.pinggy.link/discord-interactions). - Discord will send a test
PING, and your server must respond with aPONG.
Verifying Webhook Signatures (Security)
Discord signs outgoing requests for security. Here's how to verify them:
import nacl.signing
from nacl.exceptions import BadSignatureError

@app.route('/discord-interactions', methods=['POST'])
def verify_request():
    signature = request.headers['X-Signature-Ed25519']
    timestamp = request.headers['X-Signature-Timestamp']
    body = request.data.decode('utf-8')

    public_key = "YOUR_DISCORD_PUBLIC_KEY"
    verify_key = nacl.signing.VerifyKey(bytes.fromhex(public_key))

    try:
        verify_key.verify(f"{timestamp}{body}".encode(), bytes.fromhex(signature))
    except BadSignatureError:
        return jsonify({"error": "Invalid signature"}), 401

    # Continue handling the request...
Final Thoughts
Webhooks provide a clean, efficient way to communicate between your application and Discord. Whether you're sending updates, alerts, or listening for interactions, webhooks reduce the overhead and let you focus on building cool things.
Using tools like Pinggy, you can fully test your webhook integrations without deploying to a production server. This makes it ideal for rapid development, debugging, and demoing your bot features in real-time.

Top comments (0)