Close
0%
0%

Alternative to Zehnder ComfoAir Q controller

Alternative to ComfoSense and ComfoConnect Lan, much cheaper and more user friendly

Similar projects worth following
69 views
0 followers
This project is inspired by the work of many others who successfully managed to replace the hardware bridge from Zehnder called "Comfoconnect LAN C" by an ESP32 + CAN transceiver, namely this one in particular : https://github.com/dardhal/comfoair-esp32 and leveraging the excellent work from Michael Arnauts on mapping the CAN frames : https://github.com/michaelarnauts/aiocomfoconnect. This new device is meant to not only replace the ComfoConnect LAN (300$+) but also the ComfoSense controller display which is the default display typically installed in the house to interact with the ComfoAir. It's based on a Waveshare ESP32-S3 LCD 4 with minor HW changes. On top of having a much better UI, it's been optimized to be very snappy and responsive ... and cost only 35$

Zehnder ComfoAir serie is a very popular MVHR which has a few flaws: for once, one needs to purchase a 300$ device in order to get some connectivity via a proprietary app. Secondly,  the control panel that comes with it is quite outdated: a small LCD screen with button forcing the user to scroll trough endless menus

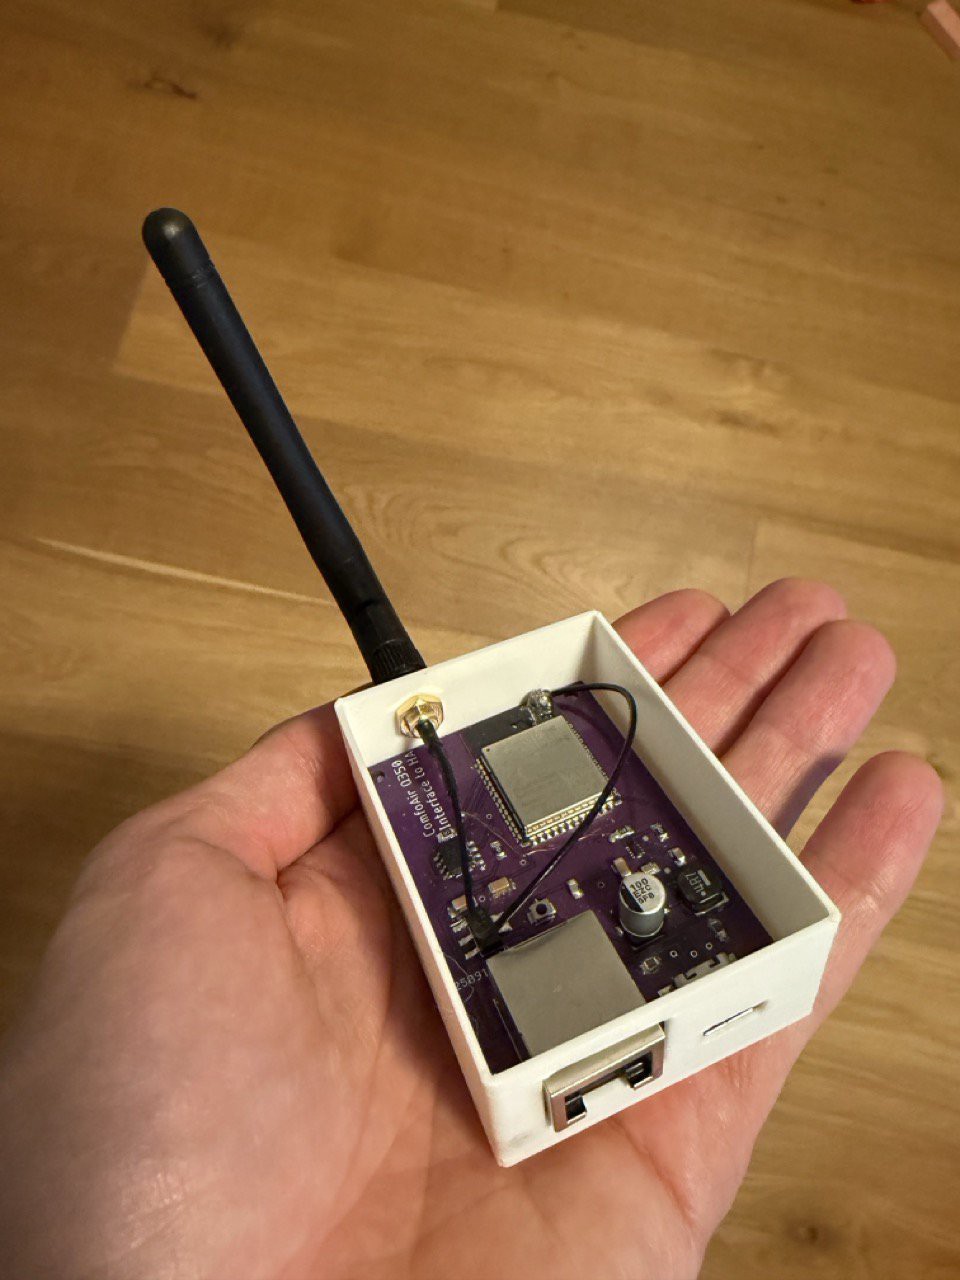
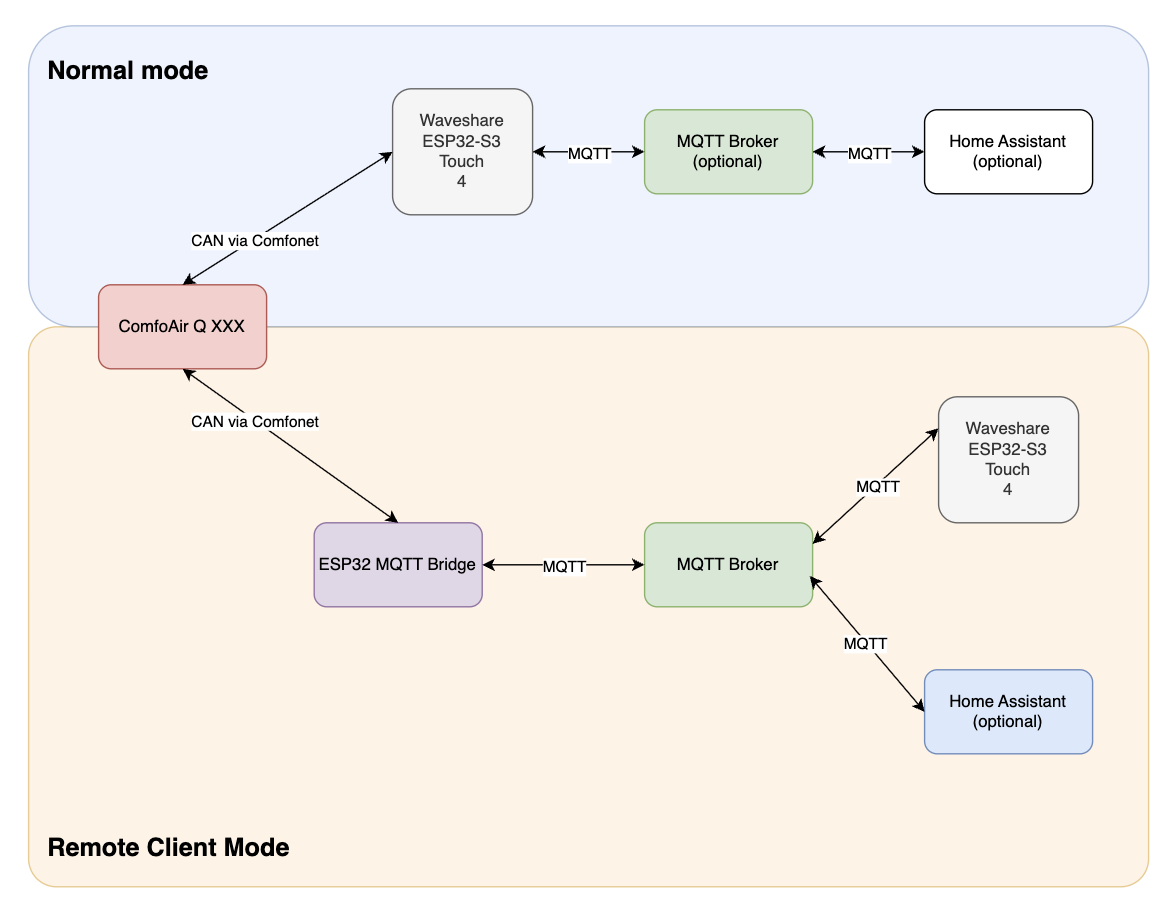
The first problem has been tackled over the last years by a very active community: from reverse engineering the CAN signals to building a simple ESP32 based device - one can now get full integration of the MVHR with HomeAssistant for less than 20$


It works wonders, but I wanted to take it to the next level: MVHR sits in attics or cellar where the wifi connectivity can be limited. Also this ESP32 brings benefits only for flaired users of Home Assistant

I wanted to tackle the control panel UX/UI, as well as the connectivity but in a way Zehnder should have designed it from the start: modern, seamless, integrable, and fairly priced.

It brings additional data in a single view as well as the most common commands. Fully open source, no extra appendage to the MVHR - just upload the firmware, replace the controller and enjoy 

More details, source code and 3d files in the Github repo : https://github.com/vincentmakes/ComfoSense-Touch


imageimage

  • 1 × Waveshare ESP32 S3 Touch LCD 4in
  • 1 × 0402 R 0R
  • 1 × 0402 R 100K

  • Time Synced !

    vincentmakes3 days ago 0 comments

    Sniffing the time CAN commands was fairly difficult but it works now: the time of the MVHR can now be synced on a regular basis with NTP servers.

    This is useful since the time on the device tends to deviate quickly

  • New Feature: Remote Client Mode

    vincentmakes4 days ago 0 comments

    This mode can be enabled in secrets.h. When set to true, the device is no longer a MQTT bridge but requires another MQTT bridge and MQTT broker. Check this repo for implementation of the bridge :https://github.com/dardhal/comfoair-esp32

    I will also publish my own version in a single board which can be hooked up via the RJ45 port directly but here's a preview in the meantime


    The benefit of this mode is the display doesn't have to be hooked up to the Comfonet and can be installed anywhere in the house, as a secondary controller.

    The diagram below illustrates the architecture in the two different modes

  • Demo of the unit

    vincentmakes6 days ago 0 comments

View all 3 project logs

  • 1
    Step 1

    What to use : Hardware Components


    Prerequisites:

    See Power section for more details, but tldr; the device can be installed in place of the ComfoSense controller using the 3d printed bracket.

    For dimming the device, check the detailed instruction on the Github repo: this is a not so easy modifications due to the size of the two resistors to solder.

    How to use : Flashing the firmware in the ESP32 development board


    First, rename the "secrets_template.h" file at the top of this repository into "secrets.h" and fill in the configuration: Wifi, MQTT config, Night Time Mode, Dimming.

    Then compile the code using PlatformIO:

    pio run -t clean
    pio run -e esp32s3
    pio run -t upload -e esp32s3
    pio device monitor -b 115200

    That's it ! Check further below for the mounting bracket to install it on the wall and options for dimming the screen (requires hardware changes)

    Physical Mounting on the wall


    The mounting consists of 3 main part : two oversized (150%) Garmin style mount (male and female) and a decorative frame fixed by friction fit (to be improved) There are also 4 spacers which I couldn't print in one block with the rest.

    It will fit into the existing standard junction box (Swiss size, 81mm diam / 57mm in between mounting screws, 4 sides). Fusion files are included as well as ready to print 3mf files with a Bambulab profile

View all instructions

Enjoy this project?

Share

Discussions

Similar Projects

Does this project spark your interest?

Become a member to follow this project and never miss any updates