Building a Drone With Raspberry Pi – What You Need to Know
I’m excited that aerial drones have become accessible to the average hobbyist like me. Although I could purchase one off-the-shelf, the DIYer in me is interested in programming unique use cases or upgrading something I’ve built over time. So my first question was: Can I put a Raspberry Pi into a drone?
It is possible to build a drone using a Raspberry Pi. The Raspberry Pi acts as the brain and integrates data from the flight controller to the sensors. Adding a Raspberry Pi to a drone allows it to be customized for different missions.
The Pi drone guides out there often dive into detailed steps without explaining the why. Instead, I want to share big-picture ideas, so whether you buy a kit or DIY it all from scratch, you can take this knowledge on your journey into the skies.
If you’re looking for inspiration for your next Raspberry Pi project, I’ve put together a list of 75+ ideas with full descriptions, difficulty ratings, and links to tutorials. Whether you’re a beginner or more advanced, there’s something here for you. Grab the list for free here!
Overview: Why Build a Raspberry Pi Drone?

If you only wanted to pilot a drone, you could buy an off-the-shelf model from DJI. But if you are interested in building your own machine and customizing it to any function you desire, and have fun learning while doing it, building a Pi drone is an excellent challenge.
You can experience what it’s like to be a pioneer, like the Wright Brothers, and use your ingenuity to achieve flight. It’s a beautiful thing.
Benefits of a Raspberry Pi Drone
Drones can already fly without a Raspberry Pi, so what are the benefits of adding a Pi into the mix?
You might also like: I've tested hundreds of Linux apps, here are the ones I recommend.
Adding a Raspberry Pi to a drone lets you:
- Stream video in real-time.
- Capture data like GPS coordinates or infrared imaging.
- Connect and control all sorts of sensors, USB devices, cameras, or other hardware.
- Program autonomous flight, like attaching LIDAR modules to detect and avoid obstacles.
- Apply computer vision to real objects during flight with a regular camera or the more powerful Raspberry Pi AI Camera.
- Coordinate swarms of drones to fly and perform tasks together.

Adding a Raspberry Pi allows your drone to do much more than fly.
Buying drones with specialized functions can be expensive, but you can customize a DIY one for your intended use case.
This knowledge will teach you how to repair your drone for less when something goes wrong, and it lets you reconfigure what your drone can do when you feel like changing its purpose.
Important Decisions to Make for Your Drone
Before you shop for parts, decide what kind of drone you want to make.
Below are a few key questions to ask yourself.
What mission do I want my drone to carry out?
There isn’t one design that’s best for all scenarios. Different drones are built to spec for different functions. Will your drone record FPV (first-person video), race in competitions, or perform search-and-rescue? This decision will inform all other choices you make.
What drone design will I use?
A quadcopter design is a popular choice because it’s less complex to build and is easier to control. But there are other possibilities, like a helicopter or a heavy-duty octocopter.
How much range do you need?
Obviously, the more time you can stay airborne, the better! But in the real world, there are tradeoffs: you have to balance the drone’s function, weight, battery life, and cost to build.
Hardware Parts for a Raspberry Pi Drone
Okay, now that you’ve decided upon your goals, let’s cover what hardware to buy.
In this section, I’ll cover the key parts and purpose each serves in our build.
Need some inspiration for your next Raspberry Pi project? Get access to my personal list here!
Download now

The table below summarizes common hardware components for a Raspberry Pi drone:
| Component | Function |
|---|---|
| Frame | The physical body of the drone. |
| Raspberry Pi | The brain that ties all hardware and software components together. |
| Flight Controller | Controls motors, acceleration, and balance. |
| Motors | Sends rotational power to the blades. |
| ESCs | Regulates motor speed and direction. |
| Propellers | The spinning blades that generate lift. |
| Battery | The power reservoir. |
| Power distribution board | Supplies power to different parts. |
| Transmitter | The remote control method. |
| Sensors | Modules to carry out specialized tasks, such as a camera or infrared sensor. |
I’ve provided notes for each part below. They’re grouped into categories that you might want to consider together.
Body Components
The frame and the Raspberry Pi make up the body and mind of your drone.
They determine the specific purpose that your drone will carry out.

Frame – You want the lightest body you can afford within reason.
It’s easiest to buy a frame that’s premade. Here’s an inexpensive one for an all-around quadcopter: F450 Drone Quadcopter Frame Kit. Or, if you want a speedy flyer, here’s a carbon fiber frame made for quadcopter racing: Racing Drone Carbon Fiber Quadcopter Frame Kit.
Can you 3D print a frame at home instead? Yes, you could. But I would call this pro-level and not something beginners should try unless they want to test aerodynamics and fit.
You might also like: 7 Surprising Uses for a Raspberry Pi
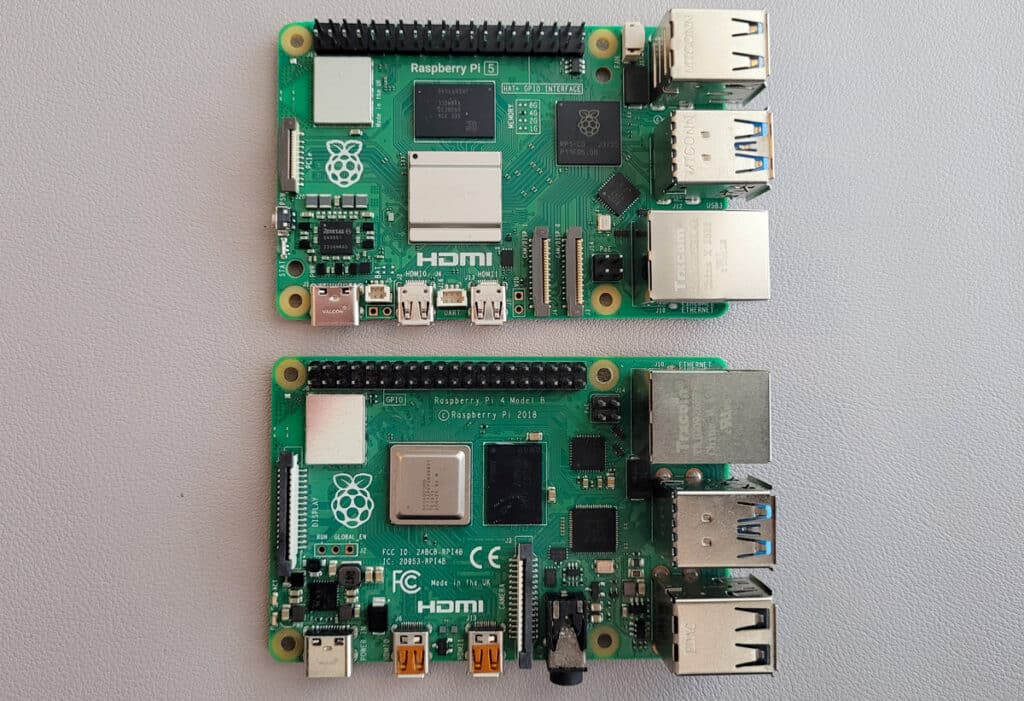
Raspberry Pi – The Raspberry Pi is the brain that gets all the different parts of your drone to work together.
You might think the Raspberry Pi 5 is always the best choice, as it’s the most powerful board as of this writing. That last part is true, but it also consumes the most power and costs the most.
Some builders use the Pi 4 or Pi 3B+ as a compromise for power usage and cost.
However, if we’re talking about ultra-light, consider the Raspberry Pi Zero 2 W. The Pi Zero is enough to handle some quadcopter designs and takes up much less weight and volume.
The table below summarizes different factors to consider for which Raspberry Pi to use:
| Model | Weight | Dimensions | Power Draw | Price |
|---|---|---|---|---|
| Raspberry Pi Zero 2 W | 10 g | 65mm × 30mm x 5mm | ~ 0.5 W to 3 W | $15 |
| Raspberry Pi 3B+ | 45 g | 85mm x 56mm x 17mm | ~ 1.9 W to 5 W | $35 |
| Raspberry Pi 4 | 46 g | 85mm x 56mm x 17mm | ~ 2.7 W to 6.4 W | $35 – $75 |
| Raspberry Pi 5 | 46 g | 85mm x 56mm x 17mm | ~ 2.7 W to 7 W | $50 – $120 |
Keep in mind that if you have a goal involving high memory usage, you’ll have to choose the Raspberry Pi 4 or Pi 5 to have access to 4GB, 8GB, or 16GB RAM.
For a more detailed look at specs, check out our Raspberry Pi Comparison Table.
Flight Components
Your drone’s flight capabilities will directly depend on the flight controller, motors, electronic speed controllers, and propellers.

Flight Controller – The FC controls the motors, propellers, and anything related to maneuvering. Some popular all-in-one FCs include the Pixhawk PX4 or the Navio2. These FCs often include GPS or gyroscopes to handle autopilot.
But there are also more affordable flight controllers without all the bells and whistles, such as the SpeedyBee F405 or the Matek F405.
Need some inspiration for your next Raspberry Pi project? Get access to my personal list here!
Download now
You might be wondering: why can’t I use my Raspberry Pi as the FC? Technically, you could, and there are projects out there for this. But it’s a gigantic hurdle and best left for when you become an expert on the topic.
For most hobbyists, it’s better to use a dedicated flight controller to be in charge of flying, while the Raspberry Pi handles functions like sensing, comms, or data processing.

Motors – The motors are the drone’s engines. The number of motors you need will depend on your chosen design. For a typical quadcopter, you’ll want 4 motors, and it’s common to get brushless DC motors (like this one).

ESC – The electronic speed controllers (ESCs) accept signals from the FC and translate them into variable motor speeds. You’ll want the same number of ESCs as motors you have (e.g., a quadcopter will have 4 ESCs for 4 motors).
A lot of builds these days simplify things by using a 4-in-1 ESC, which puts all ESCs on a single board, along with an integrated power distribution solution. I think a 4-in-1 ESC would be my go-to route for first-timers.

Propellers – The motors spin the propellers which make your drone take off. A common design for quadcopters is to attach 4 pairs of props.
In addition to deciding on how many props to use, you should also decide what size blades you want. 5-inch blades are a balanced choice for beginners, but props also come in 7-inch blades for long-range drones or can be as small as 2-inch blades for micro builds.
Purchasing each part separately will let you select higher-quality components, but this takes research and costs more. If you want an easier, cost-effective route, consider buying the motors, ESCs and propellers in a bundle. At least you’ll know they’ve been tested to work together.
Power Components
Flying takes energy, so you’ll need to power your motors, Raspberry Pi, and other parts.
A good battery is key, and it will be managed by a power distribution board.

Battery – The battery determines how much juice you have for flying and performing tasks like video recording. But the bigger the battery, the heavier and more expensive it is, so there’s an important calculation to be made here.
A popular choice here is to use rechargeable lithium polymer (LiPo) batteries, like the kind found in this 1550 mAh cell. You’ll probably also need a LiPo charger for recharging.
How long you can stay in the air depends on the other parts of your build and your intended use case. There are a lot of options here if you’re DIYing it, and there’s a good article here on the difference between 6S vs 4S LiPo batteries.
Power Distribution Board – The PDB manages the appropriate amount of power to send to different components. That being said, you might not need a standalone PDB.
Download the free PDF, keep it open, and stop wasting time on Google.
Download now
Note: Some drone designs no longer require a separate PDB. Many popular builds use a 4-in-1 ESC that already offers this functionality integrated.
However, if you’re building something like an octocopter, where there are two separate 4-in-1 ESCs, you’ll need to add a PDB to coordinate the power output between them.
Remote Control & Functional Components
Lastly, how do you tell your drone what to do from the ground?
You’ll use a transmitter to send signals to your drone, either using Wi-Fi or RC.

Transmitter – This is the handheld remote that you’ll use to control your drone. You’ll want to be able to communicate with your FC to handle flying and your Raspberry Pi to carry out tasks.
There are a few options here. You can use:
- Wi-Fi for both.
- Radio (RC) for both.
- RC for the flight controller + Wi-Fi for the Raspberry Pi.
Wi-Fi is more convenient because the Raspberry Pi already supports Wi-Fi, and you can use an app on your smartphone as the transmitter. Although Wi-Fi is easier, be prepared for challenges here in terms of limited range and higher latency.
Using radio control (RC) will give you superior range and reliability. The downside is that it’s more complex to set up, and you’ll have to buy an RC transmitter. You can get a simple one like this from BETAFPV or a more complex one like this RadioMaster.
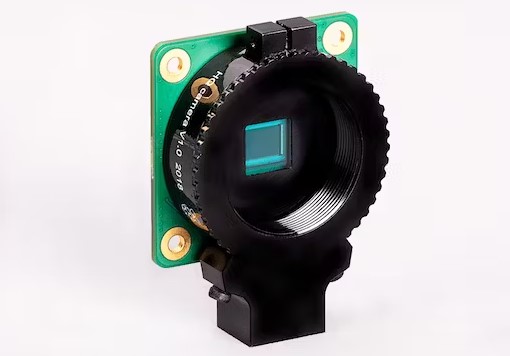
Sensors & Other Modules – The extra sensors you’ll want to add to your drone depends entirely on what task you want your drone to perform. For example, you can install a Raspberry Pi camera to record a bird’s eye view. Or maybe you want your drone to fly autonomously, and in that case, you might attach a GPS HAT.
Software for a Raspberry Pi Drone

OK, so we’ve covered the hardware you need for a Raspberry Pi drone, but what about the software? Here’s a brief list to get you started.
Operating System for Raspberry Pi. I recommend Raspberry Pi OS Lite because it’s stable, requires less RAM since there’s no GUI, and has lots of tutorials. If you’re an experienced drone operator, consider installing Ubuntu with ROS (Robot Operating System) instead.
FC Firmware. Unlike the other software on this list, this one isn’t for the Raspberry Pi but is meant to be flashed onto the flight controller. Some possibilities include PX4, ArduPilot, or MultiWii, depending on what works best with your chosen FC.
Pi to FC Communication – DroneKit. Your Raspberry Pi needs to exchange data with the flight controller to tie everything together. The Python library, DroneKit, is good at the job and lets you write custom automations.
Task Scheduler – crontab. When you power your drone on, you’ll want the Raspberry Pi to autostart the programs it needs. Luckily, most Linux systems include crontab to schedule tasks.
The above covers the bare-bones stuff. The software packages below are optional, and you’ll probably need others depending on what else you want your drone to do.
Video Streaming – GStreamer. If you want an FPV drone, the GStreamer framework will let you stream what the camera sees to your smart device.
Download the free PDF, keep it open, and stop wasting time on Google.
Download now
Image Recognition – OpenCV. If you want to do image processing, check out our guide to installing OpenCV.
Wi-Fi hotspot – hostapd. This package is only necessary if you want to control your drone using Wi-Fi. You’ll use hostapd to turn your Raspberry Pi into a hotspot, and then connect to it from your smartphone or tablet.
Best Drone Kits for Raspberry Pi

Researching, shopping for hardware, and installing software is a ton of work. I think that’s the fun of DIY: buying parts from scratch and learning as you go.
But make no mistake: Building a DIY Pi drone is challenging. If you find that too stressful or risky, I recommend purchasing a drone kit instead.
With a retail drone kit, all the parts have already been confirmed to lead to a working build.
Below are some kits I’ve found at different price ranges.
Budget Kits
- HolyBro S500 V2 Drone Kit – You’ll need to add an FC and battery, and program everything on your own.
- HolyBro X500 V2 Kit – Comes with a good base of hardware. You have to add an FC and install your own software.
- HAWK’S WORK F450 Drone Kit C – You’ll have to add some parts. I like that they sell varying levels of this kit (A through E), so you can scale up or down as needed to customize your build.
Medium Range Kits
- HAWK’S WORK F450 Drone Kit A – Includes a nice Pixhawk flight controller, Pi mounting holes, and a newbie-friendly guide.
- Duckiedrone Kit – Comes with all the parts and instructions, and you get to put everything together from scratch.
- Drone Dojo Pi Zero Drone Kit – Comes with full parts, instructions, and build support for beginners.
- HolyBro X500 V2 Drone PX4 Development Kit – Comes with almost everything and a few extra sensors. Meant for somewhat advanced users.
Premium Kits
- Drone Dojo Raspberry PiHawk Drone Kit – A more powerful drone, including 40+ parts, instructions, and build support for beginners.
- Holybro X650 Drone Development Kit – A hefty drone that comes with everything and extra sensors as well. Meant for somewhat advanced users.
If you enjoy learning about Raspberry Pi, you’ll feel right at home in the RaspberryTips Community. It’s a friendly group of makers helping each other grow. Join us today for $1 and see what it’s like inside.
Going Further With Guided Tutorials
Now that you’ve got all the parts, it’s time to build your drone. This article isn’t meant to be a full tutorial, so let me point you in the right direction by linking you to some guides.
Big Picture Steps
Here’s a general idea of the steps involved in building a Raspberry Pi drone:
- Assemble the drone frame and attach components.
- Wire the ESCs and/or power distribution board to control power.
- Configure the flight controller.
- Attach sensors to the Raspberry Pi.
- Install software and libraries on the Raspberry Pi and FC.
- Connect the transmitter to the drone via Wi-Fi or RC.
- Test flight and calibrate.
Detailed Step by Step Guides
For more details and step-by-step instructions on how to build a Raspberry Pi drone, check out the tutorials below:
- Build A DIY Pi Zero Drone
- The Drone Pi – 7 Steps with Pictures
- Building a Drone – Terrence Li
- Taking Flight with the Raspberry Pi Pico & MicroPython: DIY Quadcopter Drone
Video Guides
Would you rather learn by watching someone else build one?
If so, check out the video guides below.
The build guide below is a more recent tutorial that uses the Raspberry Pi Zero:
For a longer and more detailed guide, check out the playlist below. Be aware that this is an older tutorial (so you’ll probably find better parts today), but the key principles are still solid.
The first part of this series is below:
And you can find the rest of the series on this YouTube playlist.
Building your drone is a serious undertaking, but it’s a project that will instill in you that pioneering spirit. One day, you’ll take to the skies, and remember that it all started with a Raspberry Pi.
Whenever you’re ready, here are other ways I can help you:
Test Your Raspberry Pi Level (Free): Not sure why everything takes so long on your Raspberry Pi? Take this free 3-minute assessment and see what’s causing the problems.
The RaspberryTips Community: Need help or want to discuss your Raspberry Pi projects with others who actually get it? Join the RaspberryTips Community and get access to private forums, exclusive lessons, and direct help (try it for just $1).
Master your Raspberry Pi in 30 days: If you are looking for the best tips to become an expert on Raspberry Pi, this book is for you. Learn useful Linux skills and practice multiple projects with step-by-step guides.
Master Python on Raspberry Pi: Create, understand, and improve any Python script for your Raspberry Pi. Learn the essentials step-by-step without losing time understanding useless concepts.
You can also find all my recommendations for tools and hardware on this page.