How to Install MotionEye on Raspberry Pi (Video Surveillance)
MotionEye is a web interface for the Motion service, which is commonly used on Raspberry Pi to connect, manage, and monitor all kinds of cameras. It’s not directly available in the official Raspberry Pi OS repository, so I’ll guide you through the process of installing everything on your Pi in this step-by-step tutorial.
MotionEye can be installed on any Linux distribution by using PIP (the Python package manager). All the dependencies, including Motion and a web server, will be automatically added to the system.
I’ll start with the prerequisites (hardware and software), and then I’ll give you all the commands to install it on your Raspberry Pi in a few minutes.
If you’re new to Raspberry Pi or Linux, I’ve got something that can help you right away!
Download my free Linux commands cheat sheet – it’s a quick reference guide with all the essential commands you’ll need to get things done on your Raspberry Pi. Click here to get it for free!
Prerequisites to run MotionEye on Raspberry Pi
MotionEye can be used in many ways, but here are my recommendations to get started properly with it on Raspberry Pi.
Hardware requirements
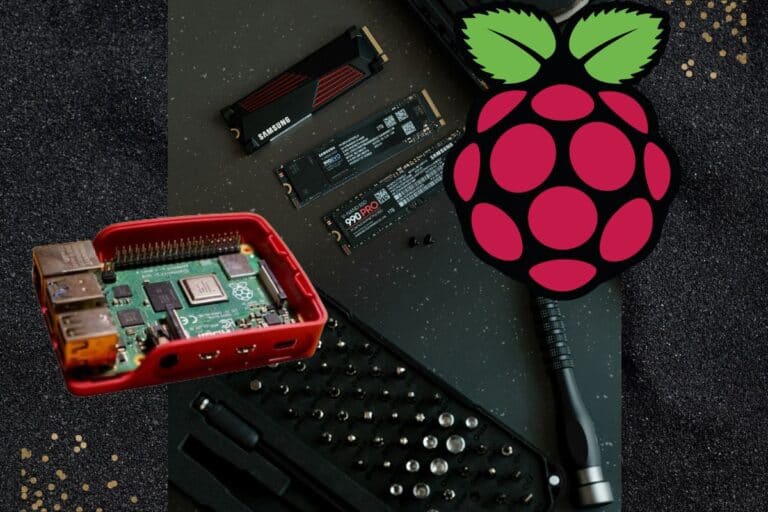
- Any Raspberry Pi model: I’m testing this on my Raspberry Pi 4, but it doesn’t really matter. The services are light enough to run on any model and they are all supported.
A Raspberry Pi Zero 2W could be a good fit if you plan to plug a camera directly into it (small and discreet but powerful enough). - SD card or USB stick for the system: we’ll use Raspberry Pi OS, so both are supported. I tested with my standard SanDisk USB key.
You may need an additional drive if you plan to record the camera flow, or add movement detection later on (this would be my go-to drive for this, same dimensions as your Pi with tons of disk space). - Keyboard and mouse (optional): I’m using my new favorite Rii keyboard for all my projects now. But you can use a headless setup and follow this tutorial from your computer if you prefer.
A camera module is optional. You can use motion eye in two main ways:
- As the control center just for the web interface. You’ll connect it to various IP cameras, or another Raspberry Pi (running Motion or MotionEye themselves if needed).
- As a standalone security camera, with only one device. In this case, you’ll need a camera module on the same Pi as MotionEye.
I recommend using the official camera module for this (or the NoIR alternative). They are perfectly supported by Raspberry Pi OS and MotionEye, so it would be the easiest way.
You might also like: Looking for a fun challenge? Start building your first Raspberry Pi robot!
Operating system
MotionEye relies on Python, so it should work on any operating system as soon as you have Python 3 available (and installed).
I recently updated this article using Raspberry Pi OS Bookworm, the Lite version, so I recommend using the same if you are trying this from scratch. There have been many changes to the way the system handles camera modules in the latest versions, so you may notice some differences if you use something else.
If you need some guidance to install Raspberry Pi OS, you can click on this link to follow my tutorial. Get your system set up with network access and move on.
Download the free PDF, keep it open, and stop wasting time on Google.
Download now
Note: There is a MotionEyeOS image available somewhere, but it hasn’t been updated for several years. I’m not using it because it’s probably safer to start with Raspberry Pi OS and install the application on it “manually”.
Optional: Camera installation
MotionEye can connect to any kind of camera, local camera (USB, camera module, …), or any model on your network (or even remote cameras). Once the interface is installed, you can add as many cameras as you want.
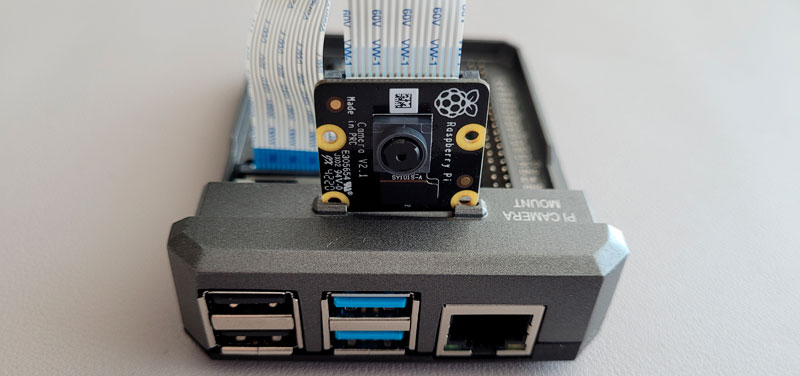
But if you plan to use a Raspberry Pi camera module on it, please do the installation and tests before going further. There’s no point in following all the steps for MotionEye if the camera doesn’t work already.
I have a dedicated tutorial on this website on how to install a camera module on Raspberry Pi. Read it for more details.
MotionEye installation guide
Here are the main steps to install MotionEye on your Raspberry Pi:
- Make sure your system is up-to-date.
- Install all Python dependencies and the PIP package manager.
- Use PIP to download and install MotionEye from the GitHub project.
Let’s see all these steps in detail now.
Update your system
As always, it’s good practice to update your system before starting any package installation for a new project. You can do this with two commands:sudo apt update
sudo apt upgrade -y
You can type them directly on the Raspberry Pi, or do it like me, and use SSH to do everything from the comfort of your computer (here is my SSH guide if you need help to set this up).
Are you a bit lost in the Linux command line? Check this article first for the most important commands to remember and a free downloadable cheat sheet so you can have the commands at your fingertips.
Install MotionEye dependencies
We can then move on and install the required dependencies for MotionEye:sudo apt install python3-dev libcurl4-openssl-dev libssl-dev
Download the free PDF, keep it open, and stop wasting time on Google.
Download now
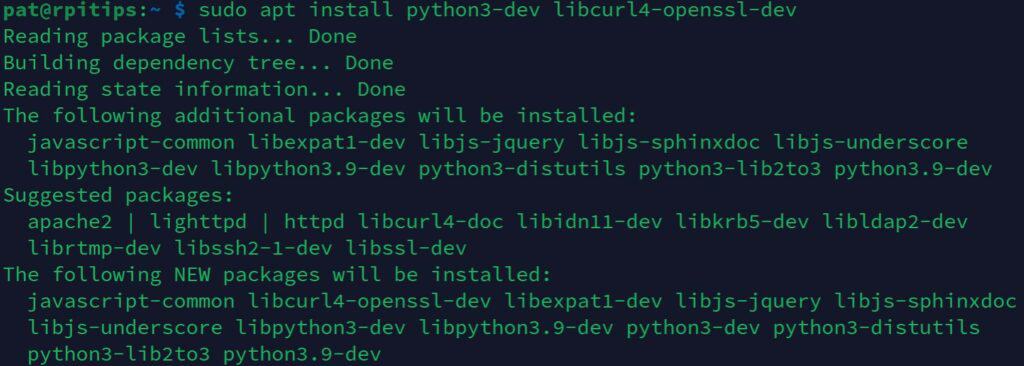
On Raspberry Pi OS, Python 3 is preinstalled (on all versions), so it should be pretty quick. But if you use another distribution, there will probably be way more packages to install at this stage.
We also need PIP (Python package manager), so make sure it’s installed by using this command:sudo apt install python3-pip
Install MotionEye
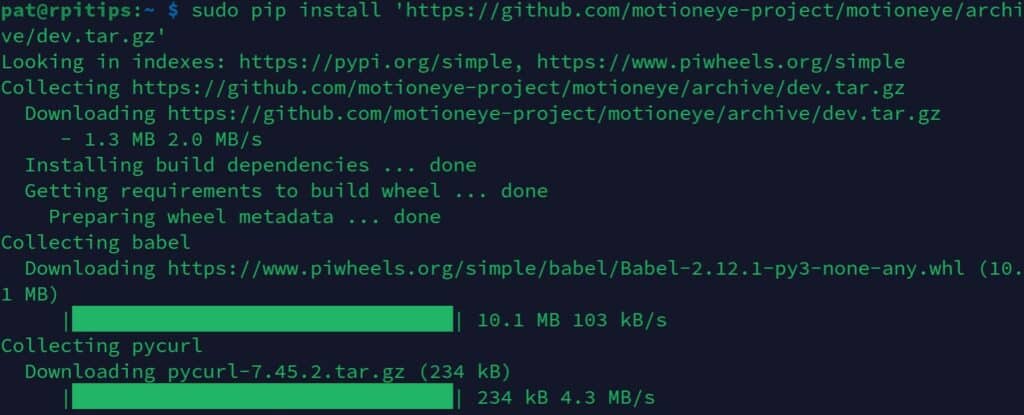
Now that the dependencies are installed, we can use the main commands to install MotionEye. We’ll download the archive from their GitHub project directly. So feel free to click on the link if you want to take a look first.
Anyway, here’s the command to install it with PIP:sudo pip3 install 'https://github.com/motioneye-project/motioneye/archive/dev.tar.gz'
Note: If you’re installing MotionEye on Bookworm or later, you’ll get an error at this point because it prevents installing libraries outside a virtual environment (more on that here). 
According to the developer, MotionEye has a small number of dependencies, so it’s fine to use this flag to bypass this security:sudo pip3 install 'https://github.com/motioneye-project/motioneye/archive/dev.tar.gz' --break-system-packages
Once done, we can run the MotionEye initialization script, which will add all the requirements (including Motion, MariaDB, a web server, etc.):sudo motioneye_init
I only tested on a brand-new Raspberry Pi OS setup, so I can’t tell you how well it’s integrated if you already have some of these services running. I guess it will ask for your MySQL password at some point, but I don’t know. Maybe it’s safer to do a backup first in this case.
If this project doesn’t work as expected on your setup, don’t worry. You can get help directly from me and other Pi users inside the RaspberryTips Community. Try it for $1 and fix it together.
Getting started with MotionEye
Once MotionEye is installed, it’s ready to use. The web interface starts automatically, so you can directly use it to add new cameras to your system. Here are a few tips to get started.
Download the free PDF, keep it open, and stop wasting time on Google.
Download now
Web access and configuration
The MotionEye interface is accessible via a web browser, on the Raspberry Pi IP address with the port 8765: http://<YOUR-IP>:8765.
If you don’t know the Raspberry Pi IP address, you can use one of the ways listed here to find it quickly. If you have a desktop environment, http://localhost:8765 should work too.
The default page of MotionEye gives you a login form. The default credentials are:
- Login: admin
- Password: (empty)
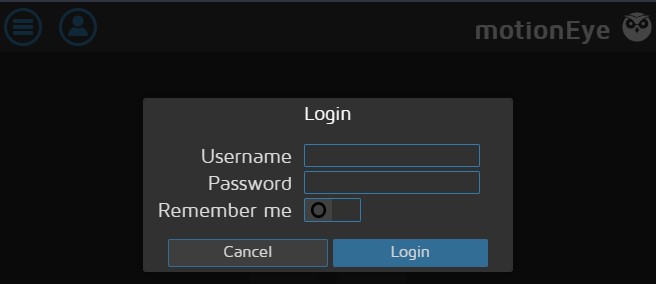
Click on “Login” to access the full interface.
Requirements for Bookworm and later versions
As I update this article, adding a camera still doesn’t work by default on a fresh installation of Raspberry Pi OS Bookworm. There are some additional steps.
You can try the next section without doing these and see how it goes, but you’ll probably need to do them to make it work:
- Install the libcamera package:
sudo apt install libcamera-v4l2 - Update the service file to use it:
sudo sed -i 's/\/usr\/local\/bin\/meyectl/\/usr\/bin\/libcamerify \/usr\/local\/bin\/meyectl/' /etc/systemd/system/motioneye.service - Restart the MotionEye service to apply changes:
sudo systemctl restart motioneye
After that, it should work almost the same no matter what OS version you are using.
Adding your camera
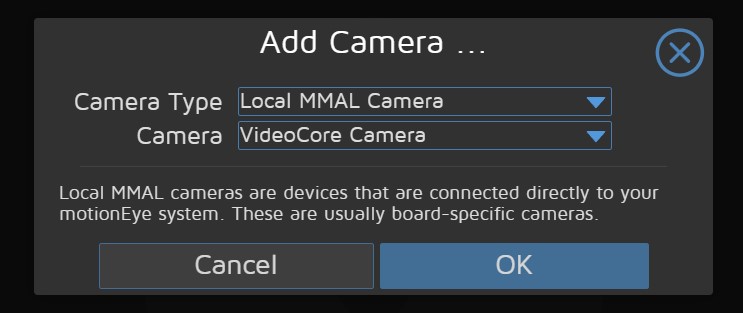
Once connected to the web interface, you’ll be invited to add your camera to it.

From there, the next steps will be completely different depending on your project. If you only want to add the camera module from the Raspberry Pi, pick the default one suggested in the camera list:

Download the free PDF, keep it open, and stop wasting time on Google.
Download now
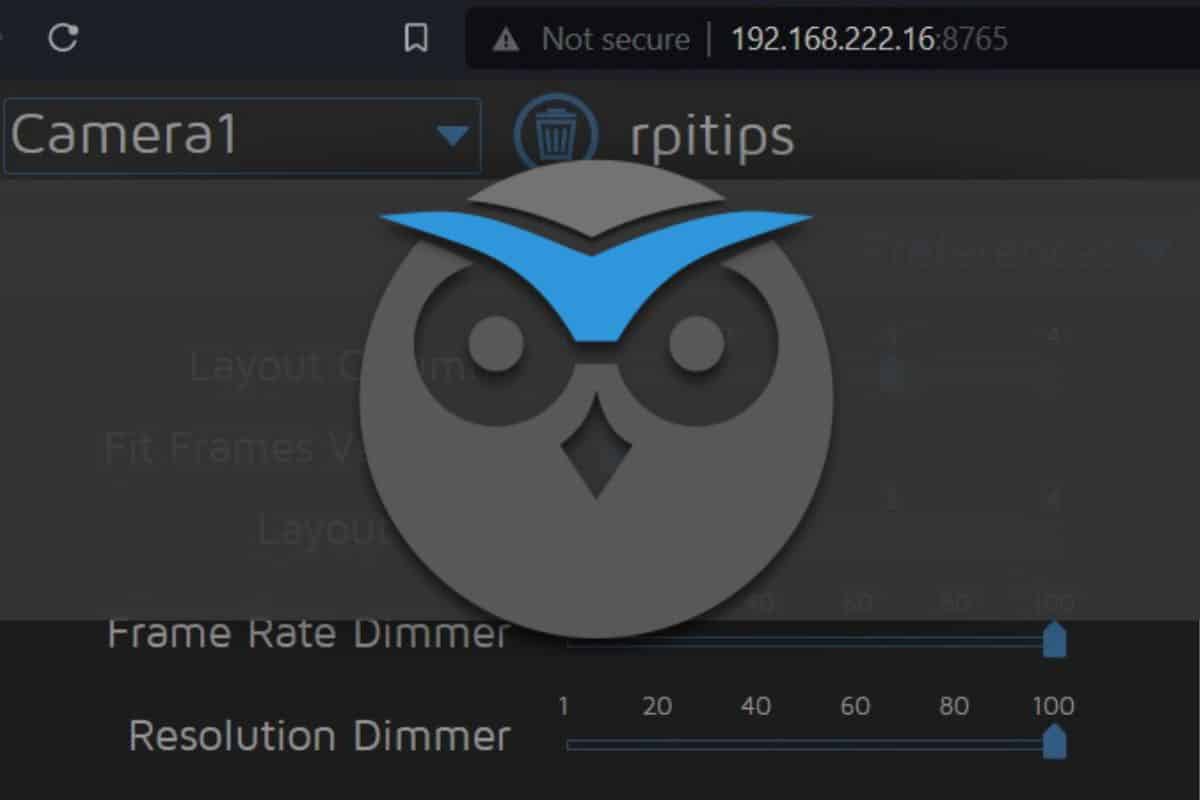
If everything works as expected, you should get an interface looking like this:
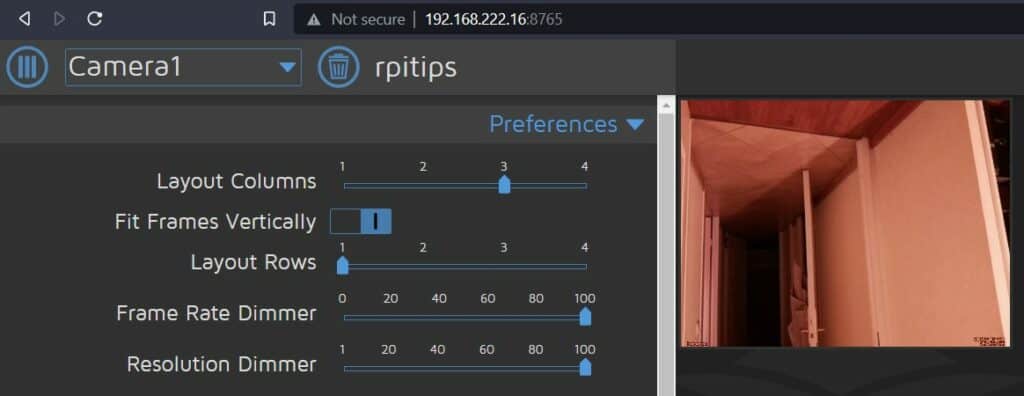
You have a preview of your camera on the right side, and many options on the left. You can add as many cameras as you like by clicking on the dropdown list (Camera1) and then “Add new camera…”.
As mentioned earlier, MotionEye supports the Pi camera module, but you can add any remote camera to the same page, and view all your security cameras from one page.
From there, I’ll let you play with all the options and check the official wiki for specific questions.
To push your project a bit further, I would probably add a VPN server on the Raspberry Pi, so you can access the MotionEye page from anywhere. In this case, just don’t forget to set a strong password (Admin without a password is not a good idea ^^).
You might also like: I've tested hundreds of Linux apps, here are the ones I recommend.
Manage the service
MotionEye and Motion services are set to start automatically after the installation, so you shouldn’t have to worry about them.
If needed, you can handle them with your favorite service management command. I generally use service for this:sudo service <service_name> status | start | restart | stop
But “systemctl” should work too.
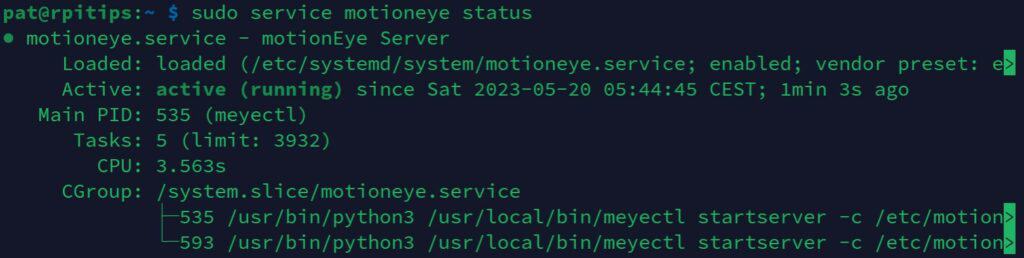
So, for example:sudo service motioneye status
And if you’re looking for other cool project ideas you can do with a Raspberry Pi (and a camera), take a look at these articles:
- 11 Cool Projects Ideas for the Raspberry Pi Camera Module
- How To Live Stream The Raspberry Pi Camera (2 Easy Ways)
- How To Use The Raspberry Pi Camera With Python
- 6 Raspberry Pi Projects That Went Viral (Try Them Yourself!)
Whenever you’re ready, here are other ways I can help you:
Test Your Raspberry Pi Level (Free): Not sure why everything takes so long on your Raspberry Pi? Take this free 3-minute assessment and see what’s causing the problems.
The RaspberryTips Community: Need help or want to discuss your Raspberry Pi projects with others who actually get it? Join the RaspberryTips Community and get access to private forums, exclusive lessons, and direct help (try it for just $1).
Master your Raspberry Pi in 30 days: If you are looking for the best tips to become an expert on Raspberry Pi, this book is for you. Learn useful Linux skills and practice multiple projects with step-by-step guides.
Master Python on Raspberry Pi: Create, understand, and improve any Python script for your Raspberry Pi. Learn the essentials step-by-step without losing time understanding useless concepts.
You can also find all my recommendations for tools and hardware on this page.