How To Live Stream The Raspberry Pi Camera (2 Easy Ways)
The camera support for the Raspberry Pi opened a host of new applications. There are numerous applications which require the Pi to live stream its captured video and make it accessible to the user through some interface. Official Pi Camera modules are the first choice for these projects.
Pi Camera modules provide deep integration with the Raspberry Pi ecosystem. Once it has been set up, there are two ways to live-stream Pi Camera video: first is creating an RTSP (Real Time Streaming Protocol) stream and the second is live-streaming it into a web page.
In this tutorial, we will learn these two methods to live stream a Raspberry Pi Camera’s video stream. Before we dive into the tutorial, let’s look at the hardware and software requirements for this project.
If you’re new to Raspberry Pi or Linux, I’ve got something that can help you right away!
Download my free Linux commands cheat sheet – it’s a quick reference guide with all the essential commands you’ll need to get things done on your Raspberry Pi. Click here to get it for free!
Hardware and Software Requirements
You will need the following hardware components for this project:
- Raspberry Pi: I would recommend using a Raspberry Pi 4 but you can use any version of the Pi for this tutorial.
- SD Card: To flash the latest version of the Raspberry Pi OS for your Pi, you’ll need at least 8 GB capacity. You can find my SD card benchmark here (or get the best one on Amazon).
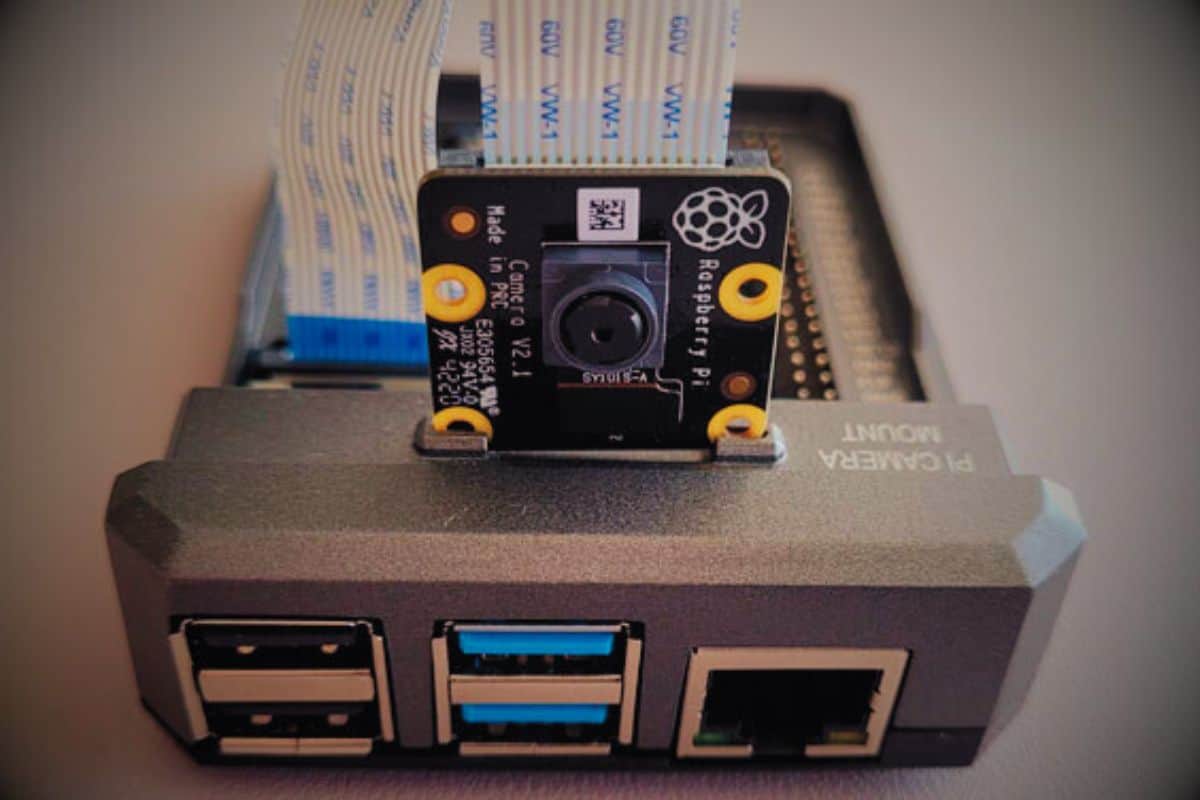
- Camera Module: There are numerous options for cameras. I would recommend using any of the official Raspberry Pi Camera modules.
As for the software requirements, all you need is the latest version of the Raspberry Pi OS flashed onto your SD card (select the one which gives you a Desktop interface and supporting software components).
Please note that because of significant changes in the Pi Cam’s software in the latest Bookworm distribution (which I am using for this tutorial), this tutorial will not work for older software distributions.
This tutorial expects you to have a working camera (you should be able to capture still images), as explained in the comprehensive guide Install a Camera on your Raspberry Pi: The Ultimate Guide.
If you face any issues during the setup process, you can refer to this troubleshooting guide How Do I Know if My Raspberry Pi Camera is Working?
Download the free PDF, keep it open, and stop wasting time on Google.
Download now
That is all for the requirements. Now that we are squared away with that, let’s get started with the tutorial.
Live Streaming from the Pi Camera
In this section, we will explore two ways in which we can live stream the video stream of our Raspberry Pi Camera over the local network:
- RTSP (Real Time Streaming Protocol)
- Streaming Video into a Webpage with Python
So, let us cover both of these ways in detail now:
Method 1: Live Streaming through RTSP
The first way to stream our video is through the RTSP protocol. The really good news is that all you need to do is run a single command in the terminal to start the stream! This section will cover the following:
- Understanding the RTSP Command
- Running Our First Test Stream
Understanding the RTSP Command
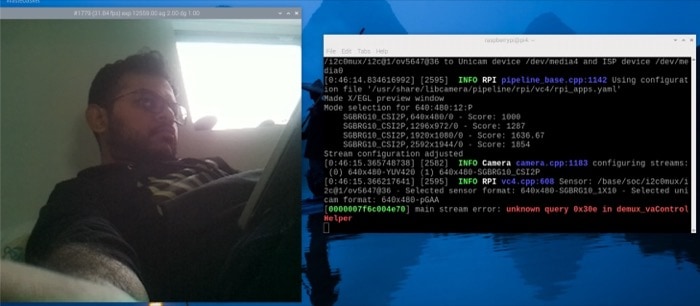
So, let’s take a look at the command first and then we will break it down further for better understanding:rpicam-vid -t 2 --inline -o - | cvlc stream:///dev/stdin --sout '#rtp{sdp=rtsp://:8000/}' :demux=h264
The rpicam-vid command is used to record videos from the Pi cam and optionally save them if needed. Here is a breakdown of the above command:
- -o –: as nothing is mentioned, it’s passed to the stdout stream (which we want for streaming it). If you want to save it as a file, specify the file name instead.
- -t 2: It indicates the timeout time before which the video recording starts. We have set it to 2 seconds for now.
The ‘|’ indicates a break in the command. Then, the clvc (VLC Media Player) command runs, which picks the stdout stream and live streams H264 encoded video (this is the format the Pi cam supports) through the RTSP protocol on the port you specify (8000 in this case).
Are you a bit lost in the Linux command line? Check this article first for the most important commands to remember and a free downloadable cheat sheet so you can have the commands at your fingertips.
Running Our First Test Stream
Now, running the above command will start the video recording and create an RTSP stream of that very video. To access this stream, you will need your Pi’s IPV4 address. You can get it by running ifconfig on your terminal. You will find it in the wlan0 section under inet.
Download the free PDF, keep it open, and stop wasting time on Google.
Download now

You can access this from the VLC media player installed on your PC. To access it, open the application, then go to File >> Open Network Stream.
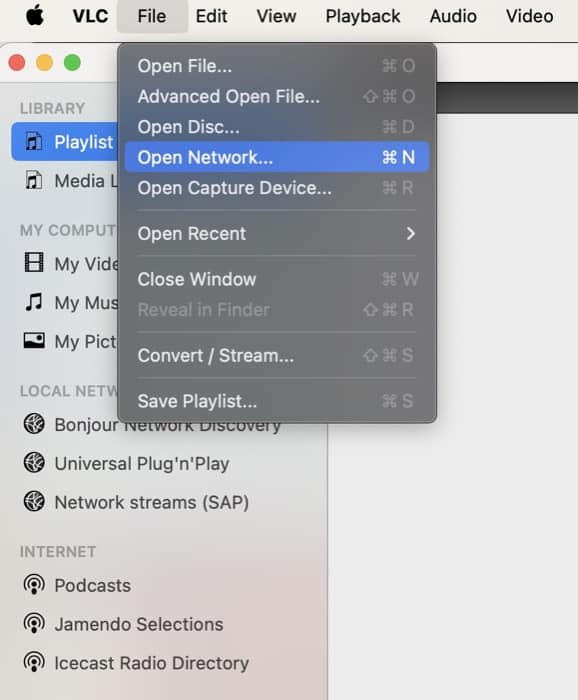
This will open a new window, where you are prompted to enter the URL for the network stream. Just type the following URL:rtsp://<pi_ip_address>:8000/
That’s it. Just wait for a few seconds while the stream loads. After that, you will be able to view the Pi cam’s stream in real time (albeit with a delay of around 5 seconds) on your laptop.
Next, we will see how we can access this stream from a webpage using a simple Python script.
Method 2: Live Streaming into a Webpage with Python
Download the free PDF, keep it open, and stop wasting time on Google.
Download now
The previous method required us to have the VLC Media Player client to access the stream. What if we wanted no such dependencies? That is what this section will address. We will use a simple Python script that will let us stream our video in real time on a simple webpage.
First, let’s take a look at the Python code that we will be using for this tutorial.
The Python Code
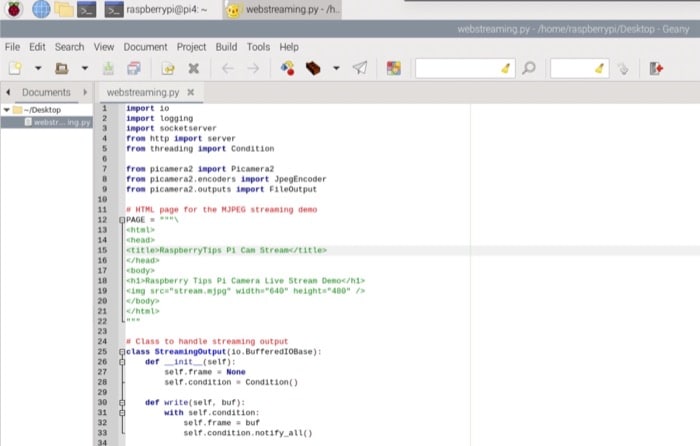
The Python script for video streaming is shown below. This script is a part of the official PiCamera2 package examples.
import io
import logging
import socketserver
from http import server
from threading import Condition
from picamera2 import Picamera2
from picamera2.encoders import JpegEncoder
from picamera2.outputs import FileOutput
# HTML page for the MJPEG streaming demo
PAGE = """\
<html>
<head>
<title>RaspberryTips Pi Cam Stream</title>
</head>
<body>
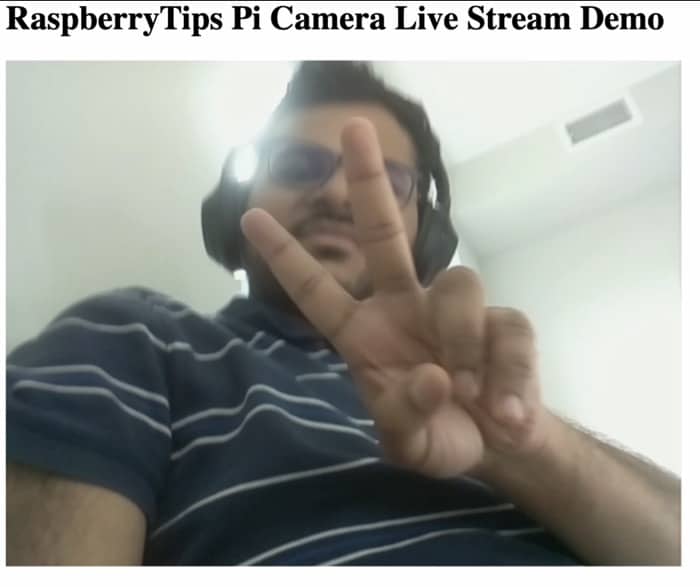
<h1>Raspberry Tips Pi Camera Live Stream Demo</h1>
<img src="stream.mjpg" width="640" height="480" />
</body>
</html>
"""
# Class to handle streaming output
class StreamingOutput(io.BufferedIOBase):
def __init__(self):
self.frame = None
self.condition = Condition()
def write(self, buf):
with self.condition:
self.frame = buf
self.condition.notify_all()
# Class to handle HTTP requests
class StreamingHandler(server.BaseHTTPRequestHandler):
def do_GET(self):
if self.path == '/':
# Redirect root path to index.html
self.send_response(301)
self.send_header('Location', '/index.html')
self.end_headers()
elif self.path == '/index.html':
# Serve the HTML page
content = PAGE.encode('utf-8')
self.send_response(200)
self.send_header('Content-Type', 'text/html')
self.send_header('Content-Length', len(content))
self.end_headers()
self.wfile.write(content)
elif self.path == '/stream.mjpg':
# Set up MJPEG streaming
self.send_response(200)
self.send_header('Age', 0)
self.send_header('Cache-Control', 'no-cache, private')
self.send_header('Pragma', 'no-cache')
self.send_header('Content-Type', 'multipart/x-mixed-replace; boundary=FRAME')
self.end_headers()
try:
while True:
with output.condition:
output.condition.wait()
frame = output.frame
self.wfile.write(b'--FRAME\r\n')
self.send_header('Content-Type', 'image/jpeg')
self.send_header('Content-Length', len(frame))
self.end_headers()
self.wfile.write(frame)
self.wfile.write(b'\r\n')
except Exception as e:
logging.warning(
'Removed streaming client %s: %s',
self.client_address, str(e))
else:
# Handle 404 Not Found
self.send_error(404)
self.end_headers()
# Class to handle streaming server
class StreamingServer(socketserver.ThreadingMixIn, server.HTTPServer):
allow_reuse_address = True
daemon_threads = True
# Create Picamera2 instance and configure it
picam2 = Picamera2()
picam2.configure(picam2.create_video_configuration(main={"size": (640, 480)}))
output = StreamingOutput()
picam2.start_recording(JpegEncoder(), FileOutput(output))
try:
# Set up and start the streaming server
address = ('', 8000)
server = StreamingServer(address, StreamingHandler)
server.serve_forever()
finally:
# Stop recording when the script is interrupted
picam2.stop_recording()
At first glance, this code seems much more complicated than it is. Let’s break it down into smaller pieces to understand it better:
- The PAGE variable stores the HTML code for our simple webpage that will be shown when the code is running.
- The StreamingOutput Class manages the streaming output that comes from your Pi cam.
- The StreamingHandler Class handles all the HTTP requests that come to our webpage. It allows us to access the stream whenever we open the webpage.
- Finally, the StreamingServer class creates a simple HTTP server through which we host our webpage and access our video stream.
- The code after this is the main code snippet. It does the following:
1. Set up the Pi Camera with a specific resolution as we did in the previous method.
2. Create a StreamingOutput instance.
3. Then, we start the recording on our Pi Cam.
4. After this, we setup and create a StreamingServer instance.
5. Finally, we keep the stream running indefinitely unless interrupted.
If you’re new to Raspberry Pi or Linux, I’ve got something that can help you right away!
Download my free Linux commands cheat sheet – it’s a quick reference guide with all the essential commands you’ll need to get things done on your Raspberry Pi. Click here to get it for free!
Starting and Accessing our Web Stream
To start our web stream, just copy this code onto your Pi. You can copy and run the above code using a text editor GUI like Geany. You can run it by pressing the plane icon shown in the top menu bar.
Once the script is running, visit http://<your-pi-address>:8000/ from any device which is connected to the same network to access your web stream.
Download the free PDF, keep it open, and stop wasting time on Google.
Download now
Note the streaming delay in this method is almost non-existent. It’s virtually a real-time stream of whatever your camera captures, which wasn’t the case in the RTSP method. In addition to this, you get a lot more flexibility when using something like Python.
You might also like: 15 Easy Projects for Raspberry Pi Beginners
That is all for this tutorial.
If you prefer watching videos instead of reading tutorials, you’ll love the RaspberryTips Community. I post a new lesson every month (only for members), and you can unlock them all with a 7-day trial for $1.
Conclusion
In this “How to” tutorial, we learnt how to live stream video from our Raspberry Pi Camera using two popular methods: RTSP and through a Python script. Now, the question is how do we use this in real-life applications?
It is really easy to integrate this into our existing projects, especially the Python script tutorial. For instance, you can create a fully functioning home security system by just changing the code a bit and adding multiple cameras around your house.
By the way, if you find this too complex, there’s an easier camera command for beginners: How to Use picamzero to Take Photos and Videos.
Moreover, you can use an application like ngrok which would allow you to access your stream over the Internet instead of just your local network.
Hence, the possibilities are endless. This tutorial provides the necessary fundamentals of live streaming your Pi cam’s video stream.
Whenever you’re ready, here are other ways I can help you:
Test Your Raspberry Pi Level (Free): Not sure why everything takes so long on your Raspberry Pi? Take this free 3-minute assessment and see what’s causing the problems.
The RaspberryTips Community: Need help or want to discuss your Raspberry Pi projects with others who actually get it? Join the RaspberryTips Community and get access to private forums, exclusive lessons, and direct help (try it for just $1).
Master your Raspberry Pi in 30 days: If you are looking for the best tips to become an expert on Raspberry Pi, this book is for you. Learn useful Linux skills and practice multiple projects with step-by-step guides.
Master Python on Raspberry Pi: Create, understand, and improve any Python script for your Raspberry Pi. Learn the essentials step-by-step without losing time understanding useless concepts.
You can also find all my recommendations for tools and hardware on this page.
Read next: 7 Surprising Uses for a Raspberry Pi