

How to Disable Sleep Mode on Raspberry Pi (with pictures)
When you first set up a Raspberry Pi, it’s very scary for the screen to suddenly just go black. Don’t worry, there’s no need to be alarmed. This black screen can cause some necessary anxiety, especially during software updates and other long processes. Fortunately, there are several methods to prevent this, which I will share in this article.
Raspberry Pi doesn’t have a sleep mode, but it does utilize screen blanking which is very similar. To quickly disable screen blanking, use the raspi-config utility through the terminal and turn it off in the Display Options section.
There are other ways to accomplish this, including installing a screensaver, which can be done without using the terminal. Read on for more info and step-by-step instructions to prevent screen blanking!
If you’re feeling lost in all the Raspberry Pi jargon, I’ve got something to help you out. I’ve created a free glossary that explains all the essential terms and abbreviations in a way that’s easy to understand. It’s a great resource to have by your side. Get your free copy here.
Does Raspberry Pi 4 Have Sleep Mode?
Strictly speaking, the Raspberry Pi does not have a sleep mode as we would see on a desktop or laptop computer. The hardware is either on or off, but it does not go into a power save or sleep mode as you would see on a more complete system.
Note: The method below does not work on the most recent version of Raspberry Pi OS (Trixie) due to the move to Wayland.
It might still work if you switch the display server back to X11.
(More details here)
The feature is available on older versions of Raspberry Pi OS running the X11 display server, but it’s turned off by default. We call this a DPMS (Display Power Management System).
DPMS has 3 values that can be set, suspend time, hibernate time and off time. These are set with the terminal command:xset dpms <suspend> <hibernate> <off>
If you are lost in all these new words and abbreviations, request my free Raspberry Pi glossary here (PDF format)!
Download now
Here is an example: xset dpms 60 120 240

And you can turn DPMS on or off with: xset +dpms xset -dpms
Suspend just puts the monitor to sleep, but everything else stays on.
Hibernate is where we get into trouble because the Raspberry Pi doesn’t understand how to hibernate. Hibernation is transferring the contents of memory to disk and putting the computer into a very low-power state, which the Pi simply doesn’t support.
It can be difficult to recover from in certain circumstances because Pi doesn’t know how to deal with anything other than on or off. DPMS is best left off for our purposes. That’s why the Raspberry Pi Foundation enables screen blanking, but not the DPMS feature.
What is Screen Blanking?
Screen blanking will take the image off your screen and replace it with a completely black screen, but the power is still supplied to the HDMI port. This is what you are encountering when you first set up a Raspberry Pi system, and it can be very annoying.
In the most recent Trixie release of Raspberry Pi OS, screen blanking is disabled by default.
If you are lost in all these new words and abbreviations, request my free Raspberry Pi glossary here (PDF format)!
Download now
How Do I Wake Up a Raspberry Pi from Sleep?
If your Raspberry Pi does try to hibernate or sleep, the only fix may be to turn it off and reboot, which we’d rather avoid.
If your screen has just gone blank, you may be able to revive it with a quick press on the keyboard (Pressing the SPACE bar is usually recommended, but any key will work).
If this project doesn’t work as expected on your setup, don’t worry. You can get help directly from me and other Pi users inside the RaspberryTips Community. Try it for $1 and fix it together.
How to Disable Screen Blanking
You can disable screen blanking from either the desktop GUI or from the command line.
Let’s go over how to do each one.
From the Desktop Interface
To disable screen blanking from the desktop interface:
- Open the main menu > Preferences > Control Centre.
- Navigate to the Display tab.
- Toggle the button to enable or disable Screen Blanking.
From the Command Line
If you’d prefer to use the command line, you have several options, depending on how detailed you want to get. In the terminal, start with:
- Bring up the raspi-config tool, the terminal version of the configuration settings:
sudo raspi-config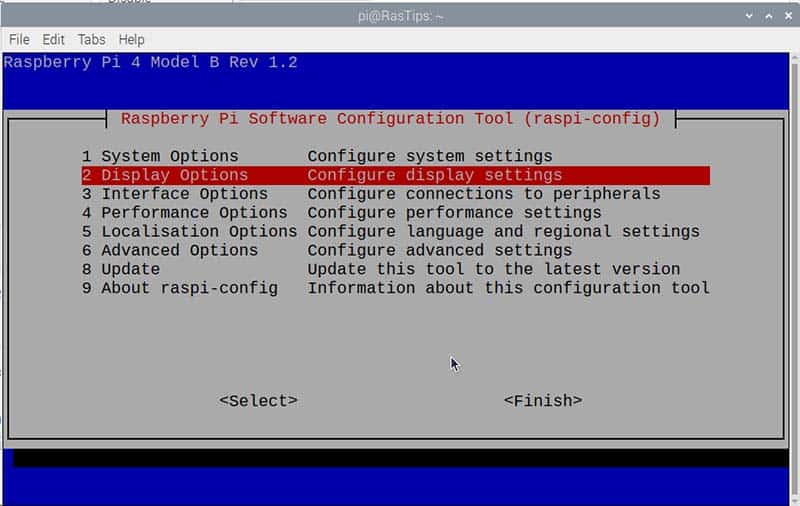
- Use the arrows to navigate to Display Options, and press ENTER.
Then navigate to Screen Blanking, and press ENTER.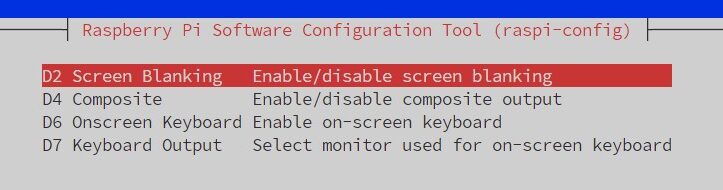
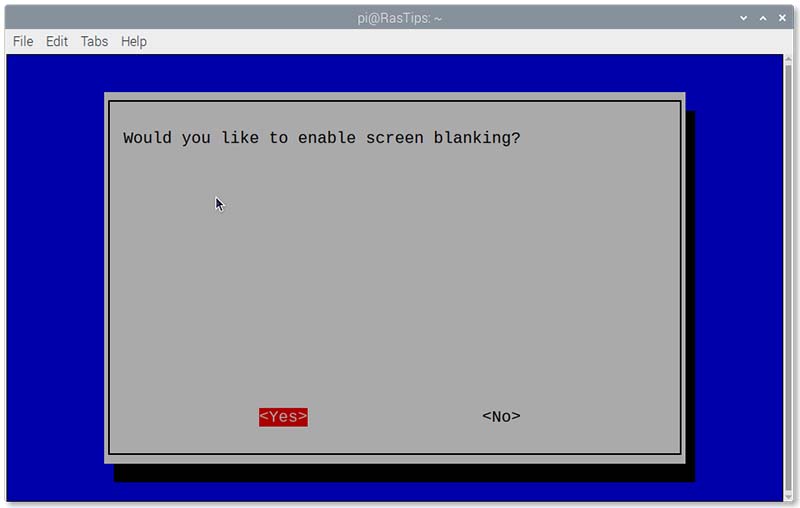
- Select No on this screen, then confirm again at the OK prompt.
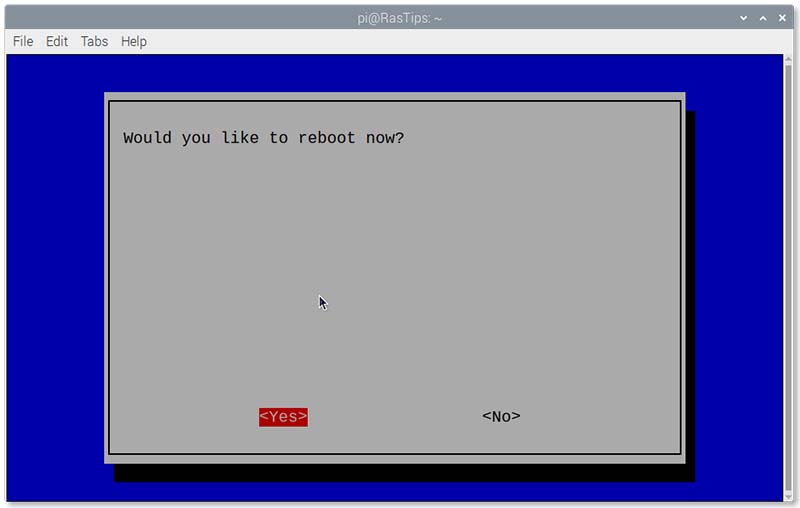
- Finally, select Finish at the bottom of the menu. It will prompt you for a reboot. Your settings will not take effect until you reboot, but you don’t have to do it right away if you’d prefer.
Are you a bit lost in the Linux command line? Check this article first for the most important commands to remember and a free downloadable cheat sheet so you can have the commands at your fingertips.
You might also like: 7 Surprising Uses for a Raspberry Pi
Using a Screensaver
Download the free PDF, keep it open, and stop wasting time on Google.
Download now
Note: The method below no longer works on the most recent release of Raspberry Pi OS (Trixie) due to the move to Wayland. Screensavers are difficult to implement under Wayland at the moment without a lot of custom workarounds.
This method might still work if you switch the display server back to X11.
(More details here)
Another way to control screen blanking is by using a good old-fashioned screen saver. When monitors had cathode ray tubes, these were essential to prevent damaging your screen from having the same image displayed all day.
The idea is that rather than having a screen display that doesn’t change, you introduce some motion or color-changing effects onto the screen when the user was not busy with the computer. This helped save CRT displays from “burn in” where the constantly displayed image became more or less permanent on display after hours.
Today, with LCD and LED monitors, screen savers aren’t really necessary, but they can be fun when your system is idle. There is an excellent screensaver available that works just fine on the Pi called xscreensaver. You can install it from the terminal with the command:
sudo apt install xscreensaver
Or you can use the Add/Remove software tool in the graphical desktop environment if you prefer not to use the terminal.
- Under Preferences, choose Add/Remove Software.
- Enter xscreensaver in the search area and press return.
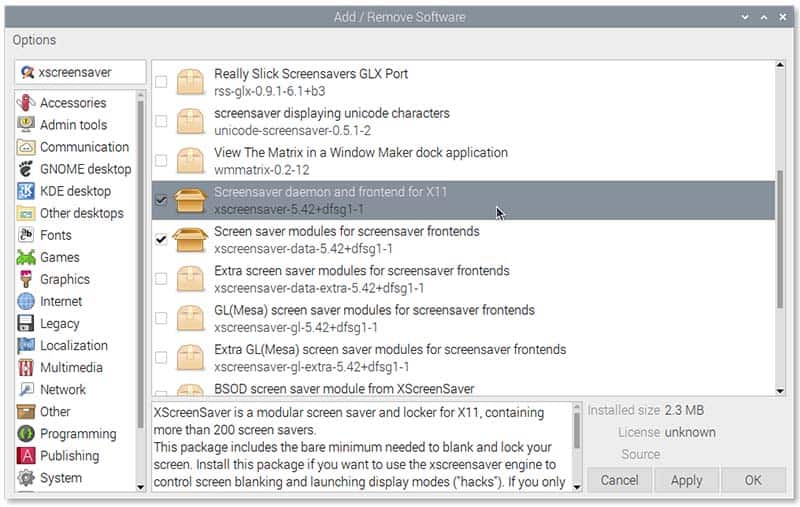
You’ll get back quite a list of things, but the main one you need is called Screensaver daemon and frontend for X11. Most of the other things in the list are add-ons that will add additional modules to the screensaver after it’s installed. - Select that one and click apply. After it’s installed, a reboot will be necessary to start it (although it may not prompt you for that).
If you are not familiar with the installation of new applications on Raspberry Pi, you can click on that link to read my step-by-step tutorial on the topic.
You might also like: The 5 fastest web browsers for Raspberry Pi — tested and ranked!
Download the free PDF, keep it open, and stop wasting time on Google.
Download now
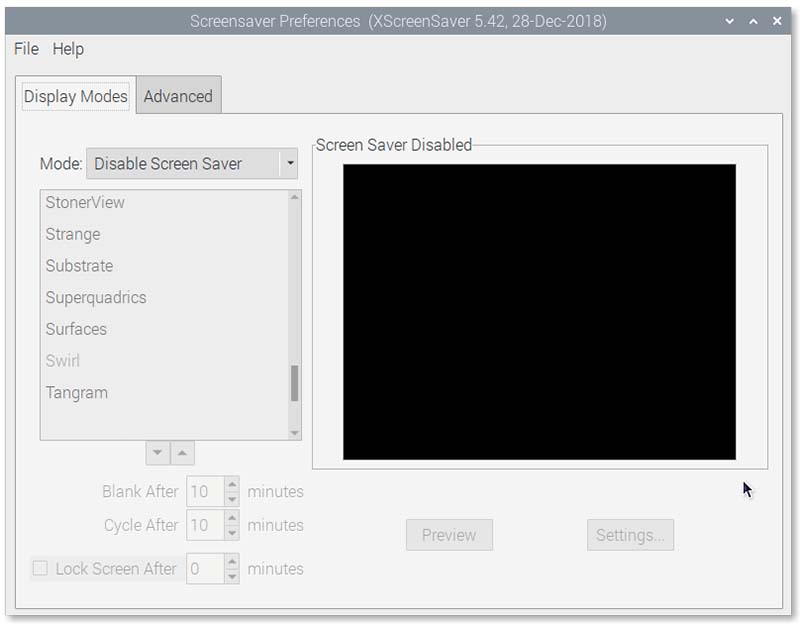
Anyway, once installed, under Preferences, you’ll now have a new Screensaver option. Choosing this will bring up the main screensaver window. If you are only interested in disabling the screen blanking, you can choose that under the Mode pop-up menu at the top left.
If you’d like to play a little, you can select any of the screensavers listed and see what they do in the sample window on the right.
Many in the list will appear slightly grey and show as Not Installed if you select them. They are available in some of those other options we saw in the Add/Remove Software list, but figuring out which one is in which package can be a bit challenging.
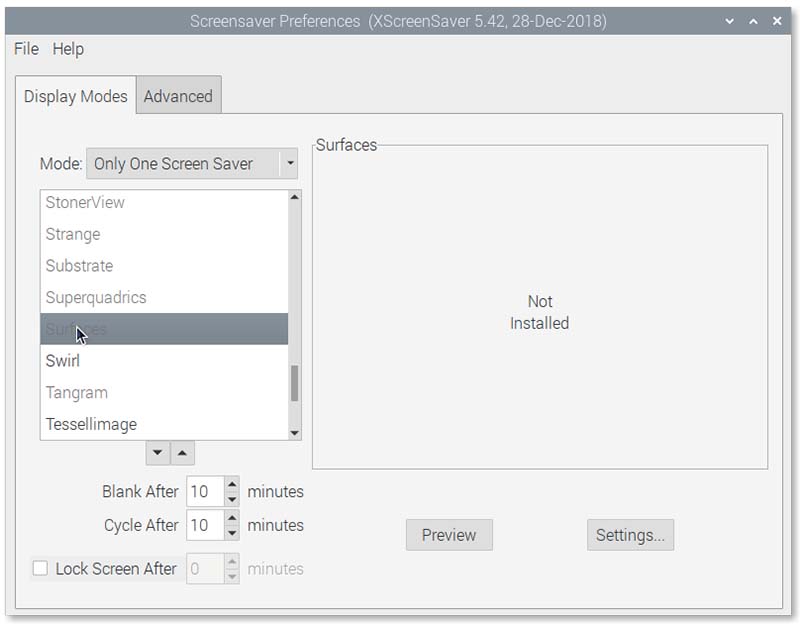
However, if you select one that is listed in black, it will be installed and you’ll get a sample on the right. Down below, you can set how long you’d like the display to be idle before the screensaver appears, and also if you’d like the screen to lock with a password after a certain number of minutes.
One of the modes above is to choose a random screensaver, and if you choose that, the Cycle After setting will control how long each one is on the screen before it randomly chooses another one. It can be fun to see old favorites now and then, especially if you have been around long enough to have had one on a CRT display.
So, there you have several options for keeping the display alive while you’re working on things. It is usually one of the first things I do when setting up a new Raspberry Pi OS drive so that I don’t lose the display while doing updates or other installations.
Whatever you decide, have fun with your Pi. And now that this issue is fixed, here are a few articles I recommend to do more with your Raspberry Pi:
- The 7 Best Text Editors for Programming on Raspberry Pi
- All The Best Raspberry Pi Project Ideas (with links)
- What Does the Green and Red Light Mean on Raspberry Pi?
Whenever you’re ready, here are other ways I can help you:
Test Your Raspberry Pi Level (Free): Not sure why everything takes so long on your Raspberry Pi? Take this free 3-minute assessment and see what’s causing the problems.
The RaspberryTips Community: Need help or want to discuss your Raspberry Pi projects with others who actually get it? Join the RaspberryTips Community and get access to private forums, exclusive lessons, and direct help (try it for just $1).
Master your Raspberry Pi in 30 days: If you are looking for the best tips to become an expert on Raspberry Pi, this book is for you. Learn useful Linux skills and practice multiple projects with step-by-step guides.
Master Python on Raspberry Pi: Create, understand, and improve any Python script for your Raspberry Pi. Learn the essentials step-by-step without losing time understanding useless concepts.
You can also find all my recommendations for tools and hardware on this page.


So are you still disabling screen blanking and installing xcreensaver? I dont seem to ever have it active automatically. I had to create a desktop icon called lock.