AI tooling is everywhere these days. And with it comes a flood of new concepts, everything from fine-tuning models to hand-crafting your own agents.
You’ve probably got generative AI workflows or AI-assisted coding down pat by now, but training an LLM on your own data or wiring up a custom Retrieval-Augmented Generation (RAG) pipeline can still feel daunting. In this tutorial, we’ll demystify the process: step by step, you’ll build and deploy your own RAG application that enriches LLM responses with your own content– no PhD required.
#What is RAG?
Retrieval-Augmented Generation, or RAG, is a pattern that combines a vector-powered search layer with a generative LLM.
It’s like querying ChatGPT but giving it your own dataset to inform the responses. By dynamically fetching relevant content from your database at query time, you can stitch these insights directly into the prompt so the LLM is effectively answering with live, up-to-date context. You can learn more about this pattern here.
With RAG in your toolkit, you’ll deliver more accurate, trustworthy LLM-powered experiences informed by the data you control.
#Overview
We’re going to build an application that provides travel advice for San Francisco tourists. Think of it as a ChatGPT clone for things to do, places to eat and interesting venues to explore when visiting the city.
Here are the tools we’ll be using to construct our application.
- Netlify for hosting the front-end
- Netlify Functions for serverless computing
- Netlify DB for similarity searches
- OpenAI API for vector embeddings & chat completion
Together, these tools give you a frictionless RAG pipeline so you can build locally, push to Git, and watch your RAG-powered app come to life.
#Things You’ll Need
Before we dive in, make sure you’ve got the following essentials in place…
-
Node.js version 20.12.2 or later installed on your machine
-
A free Netlify account (for local dev & deployment)
-
An OpenAI account and API key (get yours at platform.openai.com)
Once that’s ready, fire up your terminal and let’s get started!
#Laying the groundwork
Let’s start with a new project using Vite. You can choose your frontend framework of choice. We’ll do this via the following steps…
#Install the CLI
Let’s get started by installing the Netlify command line interface (CLI). We’ll use this tool to run our application locally and deploy to Netlify via the command line.
npm install -g netlify-cli#Create a new project
Scaffold your project by running the following command.
npm create vite@latestFollow the prompts to enter your project name and select a template (we’re going to select the ‘Vanilla’ template). Check out the create-vite docs for more information.
Let’s also create a new project in Netlify by running the following command.
netlify sites:create --name example-ai-rag#Your first deploy
Run the following command to deploy your project to Netlify. You can learn more about the CLI tool by reading the documentation.
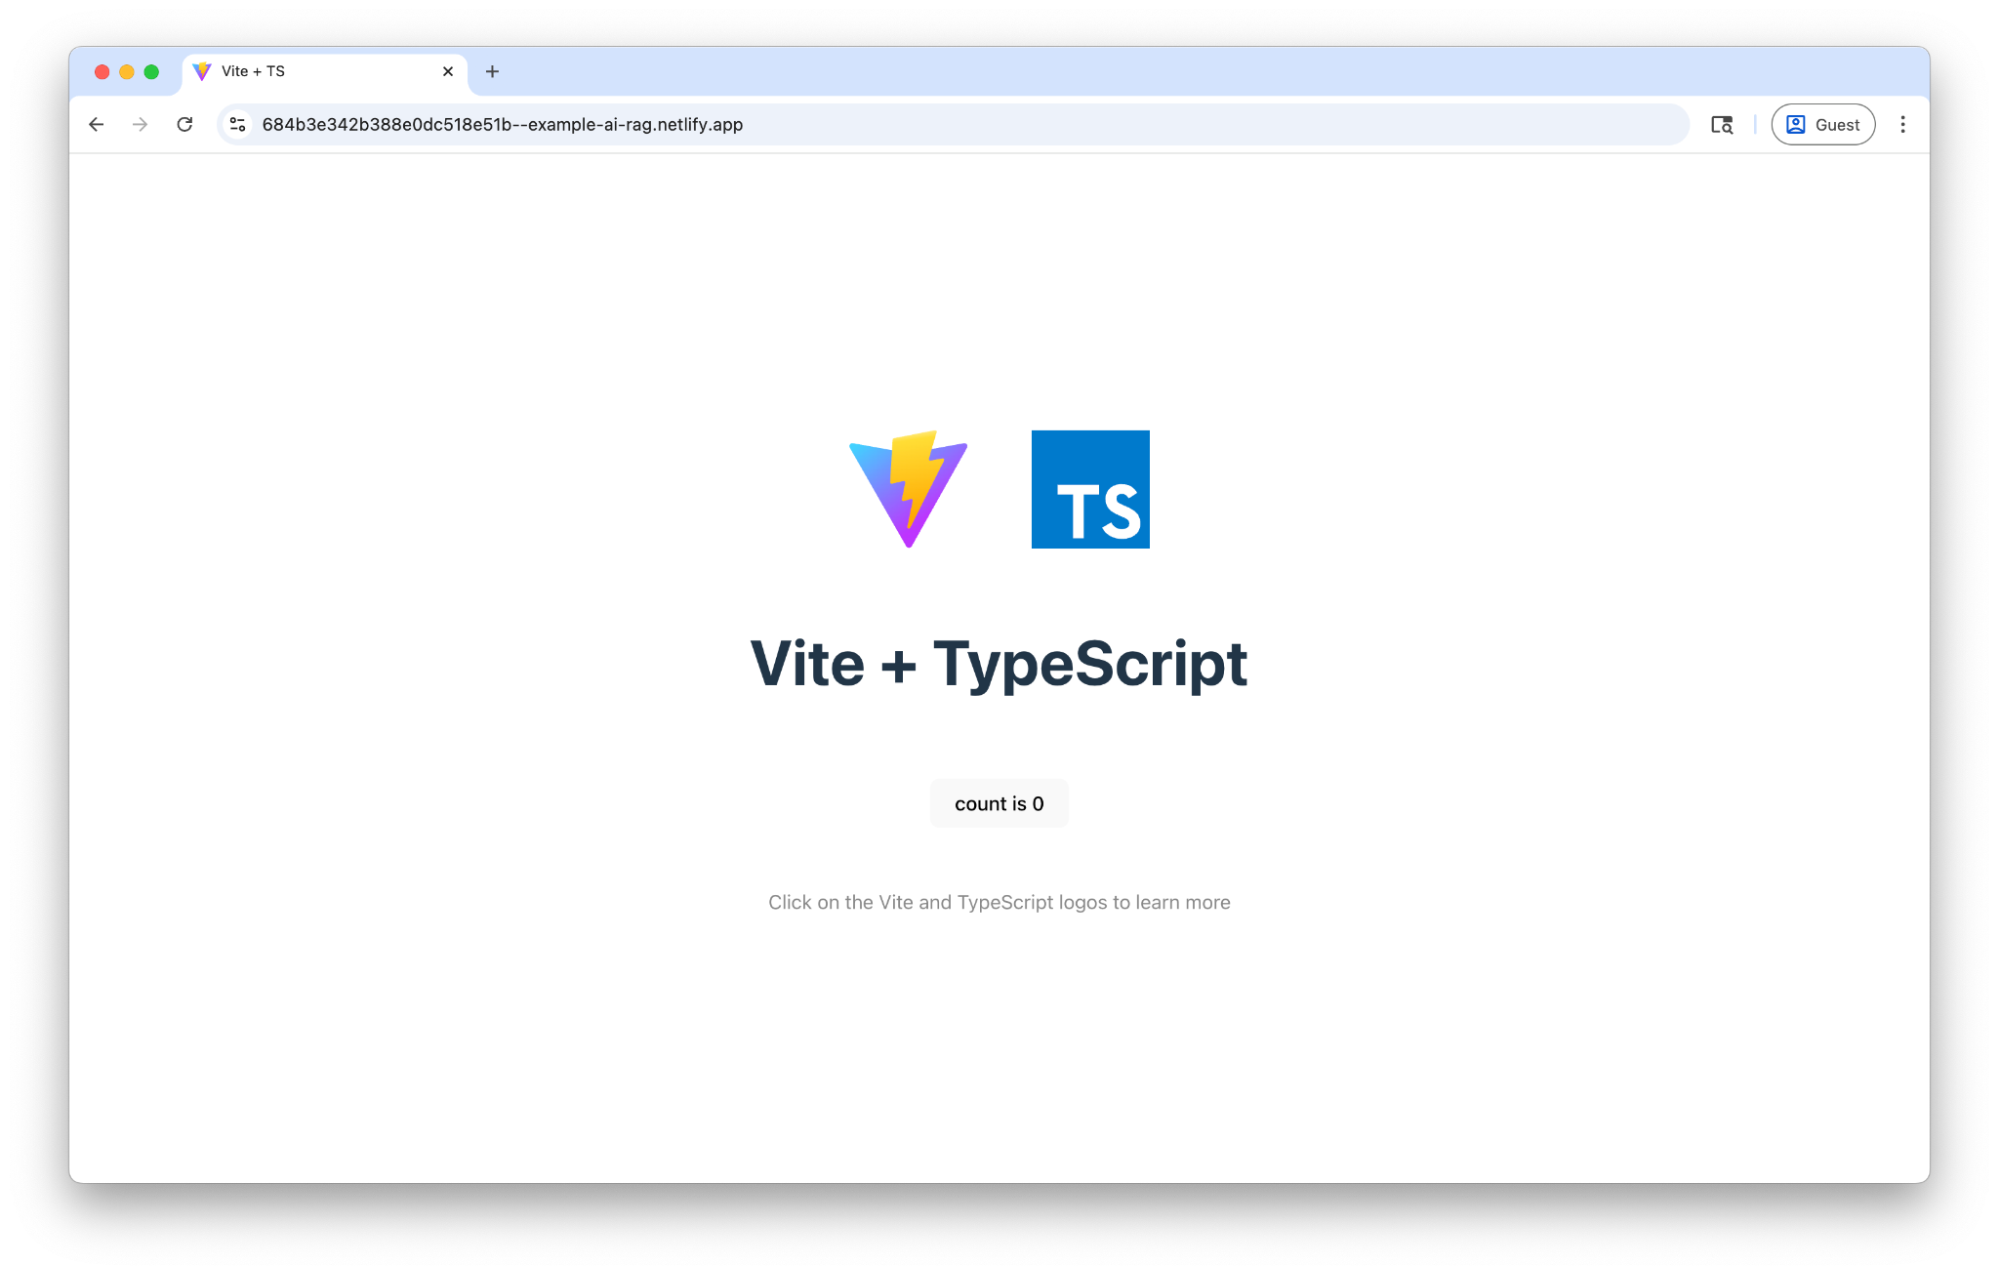
ntl deployFollow the prompts to create a new project and deploy our application. Eventually, you’ll see something like this, which means things are working…
Deployed draft to https://684b3e342b388e0dc518e51b--example-ai-rag.netlify.appNow we can open this URL in a browser window just to check that everything is working as expected.
So far so good!
#Setup the database
Now let’s configure Netlify DB so we have some place to store our embeddings. Check out the docs for more information on the following command…
npx netlify db init --boilerplate=drizzleThis command will provision a new Postgres instance on Neon and add ENV variables to your Netlify project that we’ll use later to connect to the DB. We’ll be using Drizzle ORM to interact with the database so make sure you accept any defaults during the setup process.
Database provisioning
You’ll need to claim your database within 7 days to ensure your app stays online but don’t worry– Neon offers a generous free tier.
Read more about how to claim your database.
#Define the Database Schema
With our application setup and our database configured, we’re ready to add our schema.
The first thing we need to do is enable the pgvector extension in our DB. This extension adds a native vector column type and similarity functions which we’ll use later to store and query our data.
#Create a Drizzle migration
Create a blank migration file by running the following command in your terminal. This will create a migrations directory in your project directory where we can track all future updates to the database schema.
npx drizzle-kit generate --custom --name=enable-pgvector#Enable the pgvector extension
Open the newly created migration file at migrations/0000_enable-pgvector.sql and paste the following contents. Save and close the file.
Activating the pgvector extension is important as it equips Postgres with the ability to function as a powerful vector data storage system.
CREATE EXTENSION IF NOT EXISTS vector;#Define your schema in db/schema.ts
Open the file ./db/schema.ts and paste the following contents. This snippet sets up an embeddings table, which will store our vectorized data.
import {  integer,  pgTable,  text,  timestamp,  serial,  primaryKey,  foreignKey,  index,  customType,} from "drizzle-orm/pg-core";import { sql } from "drizzle-orm";
// Define custom vector typeconst vector = customType<{ data: number[] }>({  dataType() {    return "vector(1536)";  },});
export const embeddings = pgTable( "embeddings", { id: serial("id"), chunk_index: integer("chunk_index").notNull(), content: text("content").notNull(), embedding: vector("embedding").notNull(), created_at: timestamp("created_at", { withTimezone: true }).default(sql`now()`), }, (table) => ({ pk: primaryKey({ columns: [table.id] }), }));#Generate SQL migrations for your tables
Run the following command to generate the SQL files that will be run against our DB.
This will create a new file migrations/0001_create-tables.sql containing the raw SQL commands that will be run against the DB in the next step.
npm run db:generate -- --name create-tables#Add the ivfflat index
We need to define a vector-aware index for the embedding column on our new table. This will allow us to perform super fast, nearest-neighbor searches. Run the following command to generate a new migration file.
npx drizzle-kit generate --custom --name=create-ivfflat-indexOpen the migrations/0003_create-ivfflat-index.sql file and insert the following contents.
CREATE INDEX idx_embeddings_vectorON embeddingsUSING ivfflat (embedding vector_cosine_ops)WITH (lists = 100);#Run your migrations
This will apply the SQL files contained in the migrations directory in sequential order. The first migration applies the pgvector extension, the second creates our two tables, and the third creates the vector index.
npm run db:migrate#Verify in Drizzle Studio
If all goes well, the extension will be enabled and you’ll have a new table in your Postgres DB to store the data for your RAG application. You can inspect the changes to the database by opening Drizzle Studio with the following command.
npm run db:studioThe above command starts the Drizzle Studio process which you can access via https://local.drizzle.studio
From here, you can interact directly with your database through a simple GUI. You can visualize & manage all tables & data, make changes to the schema and even open a SQL console to run queries right from the browser!
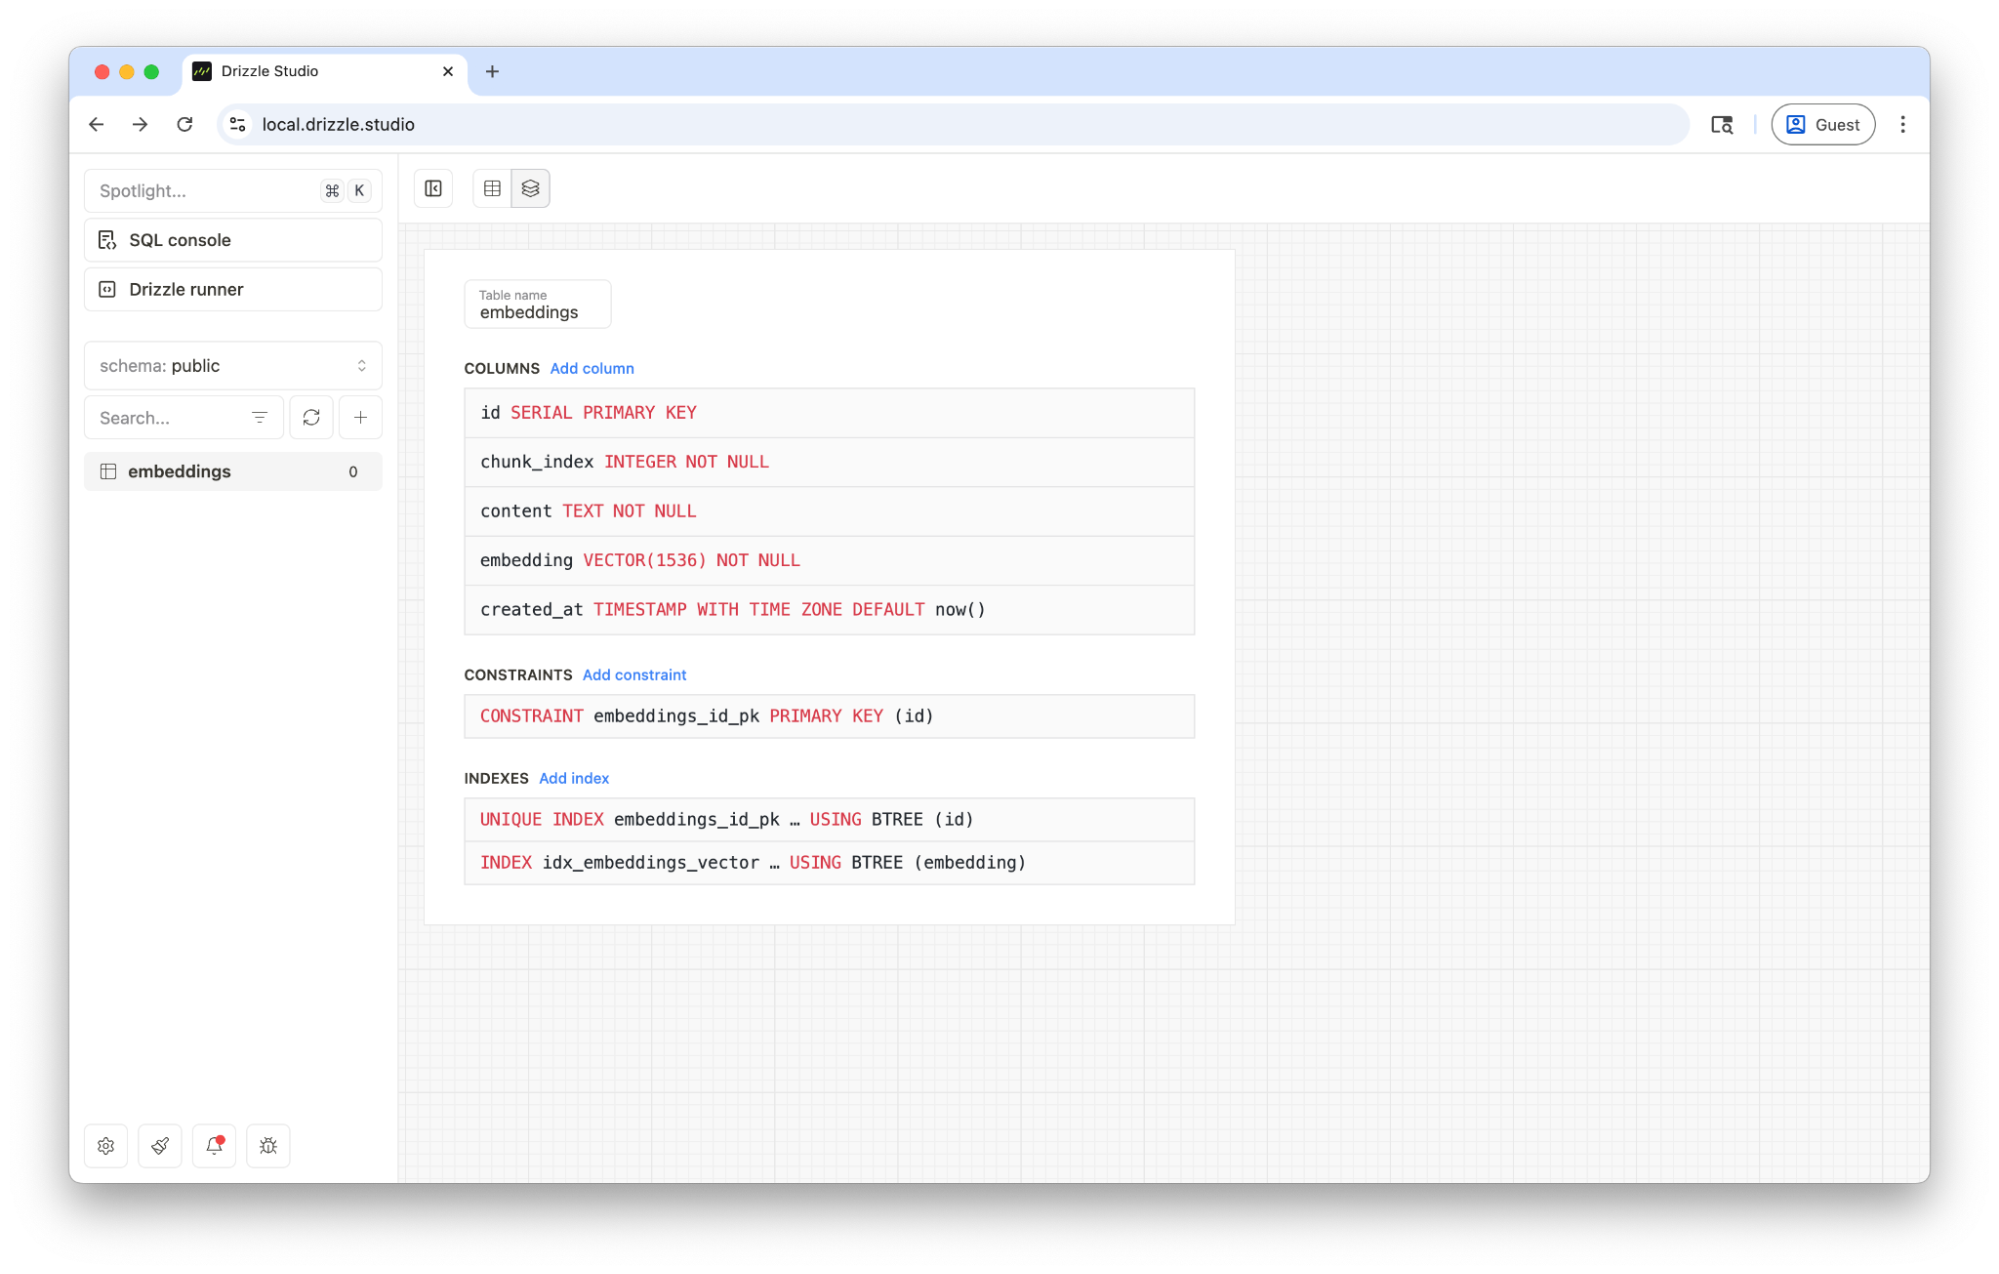
Now that we can see our table, we’re ready to start ingesting content!
Commit your work
Now would be a good time to commit your work to a Git repository. Learn more about Git on Netlify.
#Get an API Key
Before we go any further, it would be a good idea to generate an API key for OpenAI which we’ll need in the next section.
-
Go to platform.openai.com/api-keys and generate a new secret key. You can use a service account which helps to keep things a little cleaner.
-
Once you have your API token, copy it to your clipboard and head back over to the command line. We’ll use the Netlify CLI to save this variable to your project.
netlify env:set OPENAI_API_KEY <sk-your-openai-key> --secretOnce that’s done, we’re ready to move on.
#Ingest Content & Generate Embeddings
Embeddings are the magic that turns chunks of text into high-dimensional vectors, capturing their underlying meaning in a format your database can index and query. By generating an embedding for each piece of searchable content, you’ll be able to run lightning-fast similarity searches and pull in only the most relevant snippets when a user asks a question.
In our RAG pipeline, these embeddings form the bridge between your raw content and the LLM– without them, the model would have to guess which bits of your data matter most on its own.
The process for ingesting and generating embeddings has a few steps. Here’s the general overview of what we’re going to cover…
- Let’s assume you’re starting with a local directory of small files that will represent the chunks of content we want to make searchable. In a real-world scenario with larger documents, you’d split the text into appropriately sized segments (for example, ~500 tokens per chunk) before calling the Embeddings API, to stay within the model’s context window.
- Once you’ve got your chunks of data, we query the OpenAI Embeddings API to convert each one into a high-dimensional vector. Then we persist those vectors in our Postgres instance.
- With your content now vectorized and stored, you’ll be all set to perform lightning-fast similarity searches and feed the top matches into your LLM as context for the user’s query.
Chunking your data
Chunking your data is an important step. For effective vector creation using OpenAI’s Embeddings API, it’s crucial to chunk text into manageable sizes. Each segment should ideally be 500-1000 tokens long to avoid exceeding the model’s context limit and maintain logical coherence. This ensures successful embedding and prevents truncation or incomplete vector representations of the original text.
Now that we understand the process, let’s get into the weeds.
#Identify the content you want to vectorize
Think about the exact documents you want your RAG system to pull from—like product specs, support articles, or internal reports—and make sure they directly answer your users’ questions.
For the purposes of this tutorial, we’ve created 100 Markdown files containing brief descriptions of things to do in & around San Francisco. This will be the dataset that our users are querying from our application.
Download and unzip the contents of this Zip file directly into your project folder– it should be located at project root and be named data/.
#Add some new dependencies
Now let’s add a few necessary dependencies to our application. Run the following commands to get everything installed.
npm install openainpm install --save-dev tsx ts-node typescript @types/node#Create ingestion script
In your project directory create a new file at bin/ingest.ts with the following contents. This script will iterate over the data directory, generate embeddings for each and save the output to our database.
#!/usr/bin/env tsx
import { readdir, readFile } from "fs/promises";import path from "path";import { neon } from "@neondatabase/serverless";import { drizzle } from "drizzle-orm/neon-http";import { sql } from "drizzle-orm";import { OpenAI } from "openai";import { embeddings } from "../db/schema"; // adjust path to your schema
const OPENAI_KEY = process.env.OPENAI_API_KEY;const DATABASE_URL = process.env.NETLIFY_DATABASE_URL;
if (!OPENAI_KEY) {  console.error("Missing OPENAI_API_KEY in environment");  process.exit(1);}if (!DATABASE_URL) {  console.error("Missing DATABASE_URL in environment");  process.exit(1);}
// Initialize Neon client and Drizzle ORMconst neonSql = neon(DATABASE_URL);const db = drizzle(neonSql);
// Initialize OpenAI clientconst openai = new OpenAI({ apiKey: OPENAI_KEY });
/** * Recursively walk a directory, yielding every Markdown file path. */async function* walk(dir: string): AsyncGenerator<string> {  for (const dirent of await readdir(dir, { withFileTypes: true })) {    const full = path.join(dir, dirent.name);    if (dirent.isDirectory()) {      yield* walk(full);    } else if (dirent.isFile() && full.endsWith(".md")) {      yield full;    }  }}
async function main() {  const targetDir = process.argv[2] || "./data";
  for await (const filePath of walk(targetDir)) {    const relPath = path.relative(targetDir, filePath);    const content = await readFile(filePath, "utf8");
    // Throttle to avoid hitting rate limits    await new Promise((r) => setTimeout(r, 200));
    // Generate embedding for the entire file    const response = await openai.embeddings.create({      model: "text-embedding-ada-002",      input: content,    });    const vector = response.data[0].embedding;    const vecString = `[${vector.join(",")}]`;
    // Insert into Neon DB via Drizzle    const [inserted] = await db      .insert(embeddings)      .values({        chunk_index: 0,        content,        embedding: sql`${vecString}::vector`,      })      .returning({ id: embeddings.id });
    console.log(`Inserted ${relPath} with ID ${inserted.id}`);  }
  console.log("All embeddings saved to the database.");}
main().catch((err) => {  console.error(err);  process.exit(1);});
Next we need to update package.json so we can invoke the above script. Add the following to your scripts object.
{ "scripts": { "ingest": "tsx bin/ingest.ts" }}And finally, we can invoke this script via the following command.
ntl dev:exec npm run ingestBy executing the command using the Netlify CLI tool, we can inject the ENV variables stored in our Netlify project automatically.
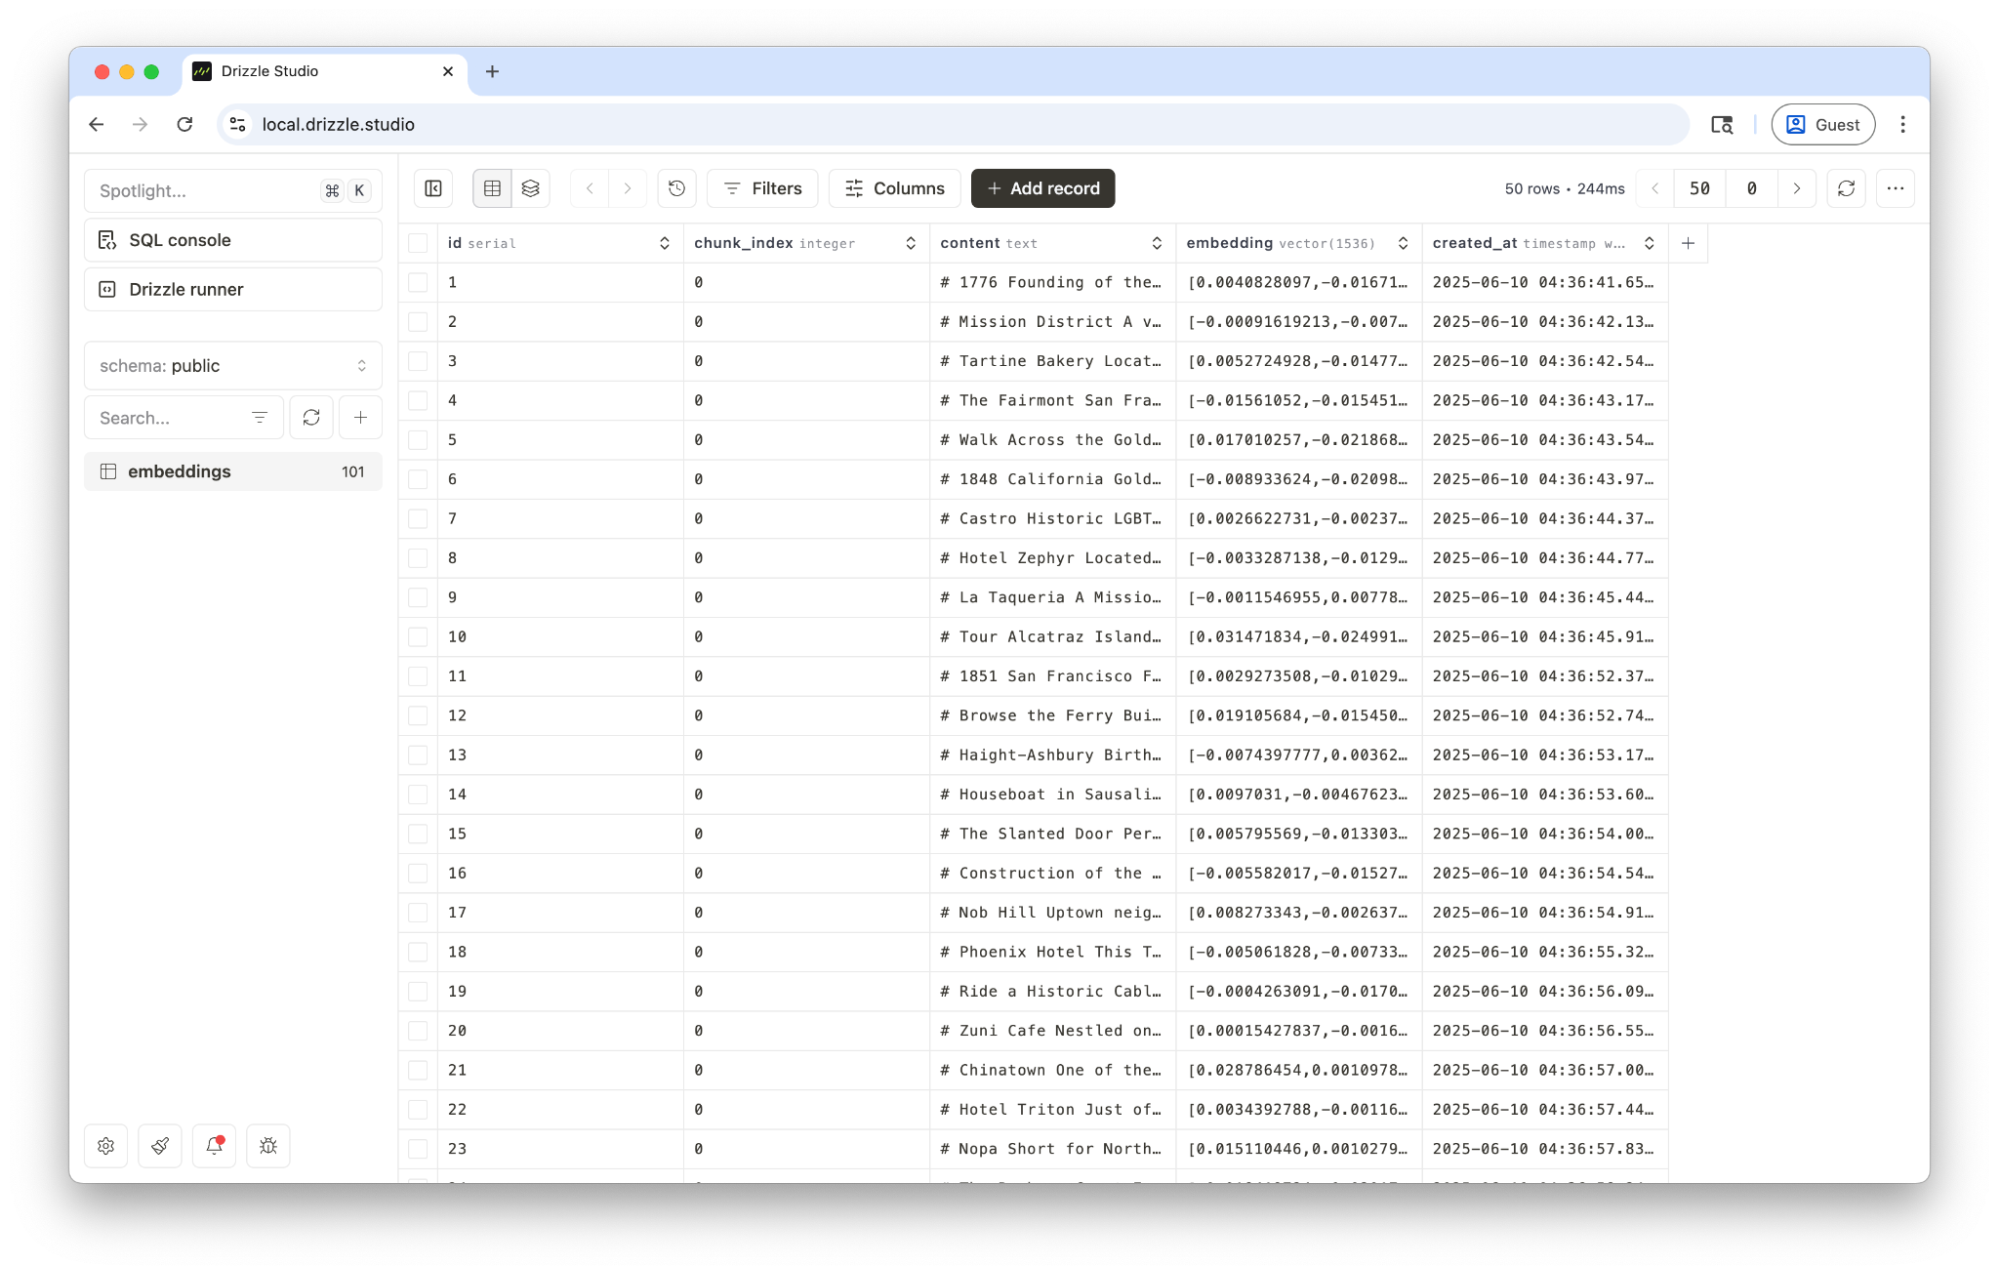
If everything is working correctly, you should see information like the following logged to your terminal window…
Inserted 01-1776-founding-of-the-presidio-and-mission-dolores.md with ID 1Inserted 01-mission-district.md with ID 2Inserted 01-tartine-bakery.md with ID 3Inserted 01-the-fairmont-san-francisco.md with ID 4Inserted 01-walk-across-the-golden-gate-bridge.md with ID 5Inserted 02-1848-california-gold-rush.md with ID 6Inserted 02-castro.md with ID 7...All embeddings saved to the database.And when reviewing the DB via Drizzle Studio, we should see the newly inserted rows in our embeddings table!
We’re getting close now. Next up, let’s add an endpoint for querying the data.
#Similarity Matching
We’re going to add an SSR route to our application to which we can send a POST request to query our database for content that is similar to the user’s query. In our next step, we’ll use this response as context for the LLM.
#Another dependency?
First– we need to install the @netlify/functions library. This package provides typings for our API handler, which is really just an SSR route under the hood.
npm i @netlify/functions#Add a function handler
Add a new file to your application at netlify/functions/query.ts with the following contents. This adds our POST route as a Netlify Function.
export default async (req: Request) => { if (req.method !== "POST") { return new Response("Method Not Allowed", { status: 405 }); } return new Response("Hello, world!");};Restart the application so we can test this new route by making requests to our function.
ntl devOnce the dev server is up and running, in a new terminal window, make a request to the application via the following command.
curl -XPOST http://localhost:8888/.netlify/functions/queryIf everything is working properly, you should see the string Hello, World! returned by the server.
#Query the database
Now let’s add support for querying the database by updating query.ts with the following.
import { neon } from "@neondatabase/serverless";import { OpenAI } from "openai";
const OPENAI_KEY = process.env.OPENAI_API_KEY;const DATABASE_URL = process.env.NETLIFY_DATABASE_URL;
if (!OPENAI_KEY || !DATABASE_URL) {  throw new Error("Missing OPENAI_API_KEY or DATABASE_URL in environment");}
// Initialize Neon clientconst sql = neon(DATABASE_URL);
// Initialize OpenAI clientconst openai = new OpenAI({ apiKey: OPENAI_KEY });
export default async (req: Request) => {  if (req.method !== "POST") {    return new Response("Method Not Allowed", { status: 405 });  }
  let body;  try {    body = await req.json();  } catch (e) {    console.error(e);    return new Response("Invalid JSON payload", { status: 400 });  }
  const { query, top_k = 5 } = body;  if (typeof query !== "string") {    return new Response("`query` must be a string", { status: 400 });  }
  try {    // Generate embedding for the user query    const embedRes = await openai.embeddings.create({      model: "text-embedding-ada-002",      input: query,    });    const vector = embedRes.data[0].embedding;    const vecString = `[${vector.join(",")}]`;
    // Query the embeddings table for nearest neighbors    // Using the ivfflat index with L2 distance operator `<=>`    const rows = await sql`      SELECT id, content,             embedding <=> ${vecString}::vector AS distance      FROM embeddings      ORDER BY distance      LIMIT ${top_k}    `;
    // Return response    return new Response(JSON.stringify({ results: rows }), {      headers: { "Content-Type": "application/json" },    });  } catch (err: any) {    console.error(err);    return new Response("Internal Server Error", { status: 500 });  }  return new Response("Hello, world!");};
This is looking great. We have our logic to respond to requests containing URLs to remote text files. Let’s test the process by making the following request via the command line.
Note
The data object passed to the curl command contains the user’s query in natural language.
curl -XPOST http://localhost:8888/.netlify/functions/query --data '{ "query": "Where should I eat dinner?" }'If things are working as expected, you should see the output similar to the following…
{ "results": [ { "id": 28, "content": "# Foreign Cinema\n\nThis funky Mission eatery combines ...", "distance": 0.21138800111102474 }, { "id": 39, "content": "# House of Prime Rib\n\nStep into old-school...", "distance": 0.21138800111102474 }, { "id": 40, "content": "# The Cliff House\n\nPerched atop a cliff overlooking...", "distance": 0.21138800111102474 } ]}Great! Our API is up and running.
We’re now able to make requests and get similarity matches back from the database. Now we can take the information returned by our database and seed context for our LLM to get a natural language response for the user.
#Providing Context
The next step is to update our API route to query the ChatGPT API and get a natural language response on behalf of the user.
#Query the LLM
Let’s update the netlify/functions/query.ts file with the following changes.
import { neon } from "@neondatabase/serverless";import { OpenAI } from "openai";
const OPENAI_KEY = process.env.OPENAI_API_KEY;const DATABASE_URL = process.env.NETLIFY_DATABASE_URL;
if (!OPENAI_KEY || !DATABASE_URL) {  throw new Error("Missing OPENAI_API_KEY or DATABASE_URL in environment");}
// Initialize Neon clientconst sql = neon(DATABASE_URL);
// Initialize OpenAI clientconst openai = new OpenAI({ apiKey: OPENAI_KEY });
export default async (req: Request) => {  if (req.method !== "POST") {    return new Response("Method Not Allowed", { status: 405 });  }
  let body;  try {    body = await req.json();  } catch (e) {    console.error(e);    return new Response("Invalid JSON payload", { status: 400 });  }
  const { query, top_k = 5 } = body;  if (typeof query !== "string") {    return new Response("`query` must be a string", { status: 400 });  }
  try {    // Generate embedding for the user query    const embedRes = await openai.embeddings.create({      model: "text-embedding-ada-002",      input: query,    });    const vector = embedRes.data[0].embedding;    const vecString = `[${vector.join(",")}]`;
    // Query the embeddings table for nearest neighbors    // Using the ivfflat index with L2 distance operator `<=>`    const rows = await sql`      SELECT id, content,             embedding <=> ${vecString}::vector AS distance      FROM embeddings      ORDER BY distance      LIMIT ${top_k}    `;
    // Build a ChatGPT prompt with the matched content as context    const contextText = rows.map((row, i) => `Context ${i + 1}:\n${row.content}`).join("\n\n");
    const chatRes = await openai.chat.completions.create({      model: "gpt-3.5-turbo",      messages: [        {          role: "system",          content: [            "You are a helpful assistant. Use the following context snippets to answer the user's question.",            'If the answer cannot be found in the context, respond with "I\'m not sure."',            "Please refrain from asking follow up questions and just answer the query to the best of your ability based on the provided context.",            "",            contextText,          ].join("\n"),        },        { role: "user", content: query },      ],    });
    const answer = chatRes.choices?.[0]?.message?.content ?? "";
    // Return response    return new Response(JSON.stringify({ answer }), {      headers: { "Content-Type": "application/json" },    });  } catch (err: any) {    console.error(err);    return new Response("Internal Server Error", { status: 500 });  }};
With this update in place, we can now query the API and get a sensible response from ChatGPT.
curl -XPOST http://localhost:8888/.netlify/functions/query --data '{ "query": "Where should I eat dinner tonight?" }'You should see something like the following returned…
{ "answer": "It depends on your preferences! If you're in the mood for a funky dining experience combined with film screenings, you can check out Foreign Cinema in the Mission. For a classic steakhouse with prime rib carved tableside, House of Prime Rib in Nob Hill is a great choice. If you're looking for an elegant tasting menu blending Korean and French techniques, Benu in SoMa would be a memorable option. For inventive New American cuisine focusing on local produce, you might enjoy Rich Table in Hayes Valley. Lastly, for modern Vietnamese cuisine with fresh, local ingredients, The Slanted Door in the Ferry Building would be a fantastic choice."}It works! That response is definitely human readable and clearly seeded with context from our vector DB.
#Putting it all together
Now let’s build the front-end so the user can start making queries easily. We’ll take advantage of the API route we just route to perform the heavy lifting.
#Adding Tailwind CSS
Install and configure TailwindCSS. We’ll use this library to style our front-end elements.
npm install tailwindcss @tailwindcss/viteAdd a new file in your project root named vite.config.ts
import { defineConfig } from "vite";import tailwindcss from "@tailwindcss/vite";export default defineConfig({ plugins: [tailwindcss()],});Replace the contents of src/style.css with the following…
@import "tailwindcss";#Adding the user-interface
And lastly, update src/main.ts to reflect the following. This is our form that the user will use to query our endpoint.
import "./style.css";
function handleSubmit(form: HTMLFormElement) {  form.addEventListener("submit", async (e) => {    e.preventDefault();    const formData = new FormData(form);    const query = formData.get("query");
    const submitButton = document.querySelector<HTMLButtonElement>("#submit")!;    submitButton.textContent = "Loading...";    submitButton.disabled = true;
    const response = await fetch("/.netlify/functions/query", {      method: "POST",      body: JSON.stringify({ query }),    });    const data = await response.json();    const queryResults = document.querySelector<HTMLDivElement>("#queryResults")!;    queryResults.innerHTML = data.answer;
    submitButton.textContent = "Submit";    submitButton.disabled = false;    form.reset();  });}
document.querySelector<HTMLDivElement>("#app")!.innerHTML = `  <div class="w-screen h-screen flex items-center justify-center bg-gray-50 p-4">    <div class="w-full max-w-md bg-white rounded-lg shadow-md p-6">      <h1 class="text-2xl font-bold mb-4 text-center">San Francisco Travel Guide</h1>      <form id="queryForm" class="flex flex-col gap-4">        <input type="text" id="query" name="query" placeholder="Ask me anything..." class="w-full p-2 border border-gray-300 rounded-md mb-4">        <button id="submit" class="bg-blue-500 text-white px-4 py-2 rounded-md hover:bg-blue-600 disabled:bg-gray-400 disabled:cursor-not-allowed">Submit</button>        <div id="queryResults" class="mt-4"></div>      </form>    </div>  </div>`;
handleSubmit(document.querySelector<HTMLFormElement>("#queryForm")!);
Restart your server and you should be looking at a screen similar to the following.
When submitting this form with a question, it should perform a POST request against our API route and return the response below the form.

This is a simple example, but it illustrates the power of using the RAG pattern in your own applications. You can now use the Netlify CLI to deploy your code to a production URL and have your travel guide application up and running in mere seconds!
#Conclusion
Congratulations! At this point, you’ve assembled a full-fledged RAG pipeline entirely on Netlify’s serverless platform: you initialized a Postgres-powered vector store with Netlify DB and Drizzle ORM, ingested and vectorized your own Markdown content via OpenAI embeddings, built a Netlify Function to perform lightning-fast similarity searches, and then fed those top-K snippets into ChatGPT for context-aware, up-to-date responses.
You can see how separating “knowledge” (your vector store) from “generation” (the LLM) gives you auditable, cost-efficient results, while Netlify’s auto-scaling serverless functions and zero-config hosting mean you can move from local prototype to production deployment in minutes—no infrastructure wrestling required.