

Fanar-1-9B-Instruct is a bilingual Arabic-English large language model developed by Qatar Computing Research Institute (QCRI) at HBKU, fine-tuned from Google’s Gemma-2-9B. Trained on 1 trillion tokens with a strong focus on Arabic dialects (Gulf, Levantine, Egyptian) and Modern Standard Arabic (MSA), it’s designed for culturally aware conversations, government/civic applications, and educational tools. With 4.5M instructions and 250K DPO preference pairs, it’s aligned with Islamic values and excels in multilingual Q&A, dialogue, and cultural understanding.
Resources
Link: https://huggingface.co/QCRI/Fanar-1-9B-Instruct

Model Training
Pretraining
Fanar-1-9B-Instruct was continually pretrained on 1T tokens, with a balanced focus on Arabic and English: ~515B English tokens from a carefully curated subset of the Dolma dataset, 410B Arabic tokens that we collected, parsed, and filtered from a variety of sources, and 102B code tokens curated from The Stack dataset. Our codebase used the LitGPT framework.
Post-training
Fanar-1-9B-Instruct underwent a two-phase post-training pipeline:

Step-by-Step Process to Install Fanar-1 9B Arabic-English LLM Locally
For the purpose of this tutorial, we will use a GPU-powered Virtual Machine offered by NodeShift; however, you can replicate the same steps with any other cloud provider of your choice. NodeShift provides the most affordable Virtual Machines at a scale that meets GDPR, SOC2, and ISO27001 requirements.
Step 1: Sign Up and Set Up a NodeShift Cloud Account
Visit the NodeShift Platform and create an account. Once you’ve signed up, log into your account.
Follow the account setup process and provide the necessary details and information.

Step 2: Create a GPU Node (Virtual Machine)
GPU Nodes are NodeShift’s GPU Virtual Machines, on-demand resources equipped with diverse GPUs ranging from H100s to A100s. These GPU-powered VMs provide enhanced environmental control, allowing configuration adjustments for GPUs, CPUs, RAM, and Storage based on specific requirements.


Navigate to the menu on the left side. Select the GPU Nodes option, create a GPU Node in the Dashboard, click the Create GPU Node button, and create your first Virtual Machine deploy
Step 3: Select a Model, Region, and Storage
In the “GPU Nodes” tab, select a GPU Model and Storage according to your needs and the geographical region where you want to launch your model.


We will use 1 x RTXA6000 GPU for this tutorial to achieve the fastest performance. However, you can choose a more affordable GPU with less VRAM if that better suits your requirements.
Step 4: Select Authentication Method
There are two authentication methods available: Password and SSH Key. SSH keys are a more secure option. To create them, please refer to our official documentation.

Step 5: Choose an Image
Next, you will need to choose an image for your Virtual Machine. We will deploy Fanar-1 9B on an NVIDIA Cuda Virtual Machine. This proprietary, closed-source parallel computing platform will allow you to install Fanar-1 9B on your GPU Node.

After choosing the image, click the ‘Create’ button, and your Virtual Machine will be deployed.

Step 6: Virtual Machine Successfully Deployed
You will get visual confirmation that your node is up and running.

Step 7: Connect to GPUs using SSH
NodeShift GPUs can be connected to and controlled through a terminal using the SSH key provided during GPU creation.
Once your GPU Node deployment is successfully created and has reached the ‘RUNNING’ status, you can navigate to the page of your GPU Deployment Instance. Then, click the ‘Connect’ button in the top right corner.


Now open your terminal and paste the proxy SSH IP or direct SSH IP.

Step 8: Check the Available Python version and Install the new version
Run the following commands to check the available Python version.
If you check the version of the python, system has Python 3.8.1 available by default. To install a higher version of Python, you’ll need to use the deadsnakes PPA.
Run the following commands to add the deadsnakes PPA:
sudo apt update
sudo apt install -y software-properties-common
sudo add-apt-repository -y ppa:deadsnakes/ppa
sudo apt update

Step 9: Install Python 3.11
Now, run the following command to install Python 3.11 or another desired version:
sudo apt install -y python3.11 python3.11-venv python3.11-dev

Step 10: Update the Default Python3 Version
Now, run the following command to link the new Python version as the default python3:
sudo update-alternatives --install /usr/bin/python3 python3 /usr/bin/python3.8 1
sudo update-alternatives --install /usr/bin/python3 python3 /usr/bin/python3.11 2
sudo update-alternatives --config python3
Then, run the following command to verify that the new Python version is active:
python3 --version

Step 11: Install and Update Pip
Run the following command to install and update the pip:
curl -O https://bootstrap.pypa.io/get-pip.py
python3.11 get-pip.py
Then, run the following command to check the version of pip:
pip --version

Step 12: Clone the WebUI Repo
Run the following command to clone the webui repo:
git clone https://github.com/oobabooga/text-generation-webui
cd text-generation-webui

Step 13: Run the One-Click Installer Script
Execute the following command to run the one-click installer script:
bash start_linux.sh
- It will automatically detect your GPU, install everything needed (Python, pip, CUDA toolkits, etc.)
- You’ll be prompted to select your GPU backend (choose CUDA or NVIDIA GPU).
- Wait for it to finish setting up Python environment + dependencies.
 Since our VM uses NVIDIA CUDA GPUs (e.g., A100, H100, A6000), choose:
A
Just type A and hit Enter.

What Happens Next
Once you select option A, the script will:
- Install torch, vllm, and GPU-specific dependencies
- Prepare the web UI environment
- Prompt you to select or download a model (or you can do that manually)
- Launch the server on http://127.0.0.1:7860

Step 14: SSH Port Forward
On your machine run the following command for SSH port forward:
ssh -L 7860:127.0.0.1:7860 root@<your_vm_ip>

Then open: http://localhost:7860 in your browser.
Step 15: Download the Model
Run the following command to download the model:
python3 download-model.py QCRI/Fanar-1-9B-Instruct

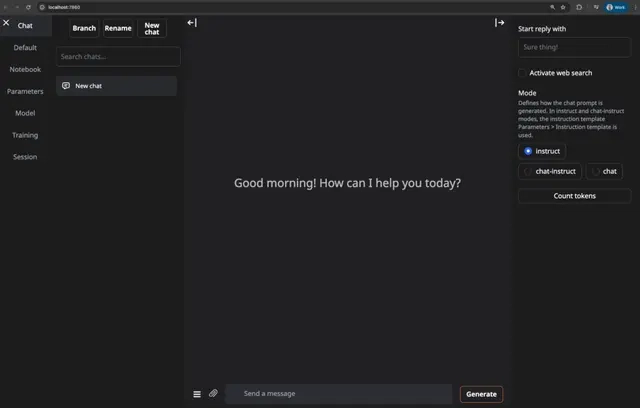
Step 16: Go back to the Web UI in browser
- Go to the “Model” tab
- Find QCRI/Fanar-1-9B-Instruct
- Click Load


Step 17: Test with Prompts
Sample Prompts
Translate this sentence into Arabic: 'The weather is beautiful in Doha today.

Deep Cultural Reasoning (Arabic)
قارن بين تأثير الشعر الجاهلي في الثقافة العربية وتأثير الرواية الحديثة، وناقش كيف تطور التعبير الأدبي بين العصرين.
Arabic-English Code-Switching Translation
Explain the importance of hospitality in Arab culture and then translate your explanation into Arabic.


Conclusion
Fanar-1-9B-Instruct isn’t just another language model — it’s a cultural bridge between Arabic and English, built with intention and purpose. From deep understanding of dialects and Islamic values to smooth integration with modern tooling like WebUI and VLLM, it’s an ideal choice for developers, educators, and civic technologists working in or around the Arabic-speaking world.
Whether you’re building a chatbot, drafting educational material, or powering public sector applications, this model brings linguistic precision and cultural depth together in one solid package. And thanks to easy deployment on platforms like NodeShift, setting it up takes minutes — not hours.
Now that everything’s configured and ready, it’s your turn: run a few prompts, explore the dual-language capabilities, and see what this model can truly do.
Let your ideas speak in two languages — clearly, respectfully, and beautifully.

Top comments (0)