Introduction
This project involves deploying an AWS EC2 Linux instance and establishing a connection to it using SSH. This includes selecting the appropriate Amazon Machine Image (AMI), configuring instance details, launching the instance, and ensuring proper security settings. Once the instance is running, the SSH client is used to connect to the instance securely, enabling remote access and management. Through this process, users gain practical experience in deploying cloud infrastructure and utilizing SSH for remote server access.
First, lets understand what an EC2 instance and SSH is all about:
An EC2 instance is a virtual server you can launch in the AWS cloud, allowing you to run applications and services. SSH (Secure Shell) is a secure protocol that allows you to remotely access and manage that EC2 instance. In essence, SSH provides a secure channel to connect to your EC2 instance, enabling you to interact with its operating system and manage it remotely.
Creating an EC2 Instance on a Linux Operating System and SSH involves the following step:
Step 1: Create an AWS Account
Go to the AWS portal page and Sign up for free tier account if you are a New User and once you are signed in successfully AWS portal page shows up that you are successfully logged in.
Step 2: Go to search bar on the AWS portal top, type EC2 and search then select the EC2 service
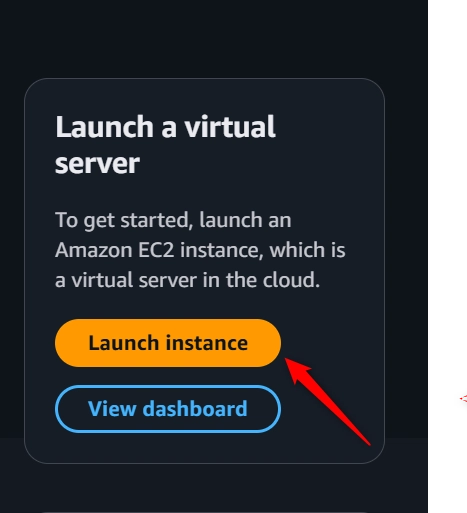
Step 3: Launch an EC2 instance on AWS portal option down right "option" and Click "Launch Instance" Button
Step 4: Choose an Instance Type: I selected the instance type based on my requirements as well. The instance type determines the computing power, memory and networking capacity of your instance and I named my instance "myfirstEC2" then select Amazon Linux 2023 AMI option.
Step 5: Choose types of computer options or instance type like "t2.micro" or "t3.nano". These are small free tier eligible instances types that defines the power of your computer.
Step 6: Create a Key Pair
I was prompted to create a key pair. if you do not have an existing key pair, create a new one and name it "my-ec2-key" then save it and I used ".pem" as the file format.
Step 7: Leave VPC and subnet as default settings or customize them according to your needs. Ensure "Auto assign Public IP" is enabled then create a new security group with one rule type: SSH {port 22} source or use an existing one. A security group acts as a virtual firewall for your instance, controlling inbound and outbound traffic. Click " Review and Launch" after configuring the security group.
Step 8: "Review and Launch"
Next in the process, I reviewed all the configurations I made for my instance and saw that everything looked good, so I clicked "Launch Instance" to proceed.
I waited for instance to Launch, it may take a few minutes for your instance to launch. Once it is ready, you will see it listed on the EC2 Dashboard.
Connecting the using SSH: Now, open your terminal or SSH client. Use the following command to connect to your instance
Conclusion: You have now successfully created an EC2 instance on Linux operating system then launching the instance to be successful.


Top comments (0)
Some comments may only be visible to logged-in visitors. Sign in to view all comments.