🚀 What is the Model Context Protocol (MCP)?
The Model Context Protocol (MCP) is an open standard introduced by Anthropic that aims to simplify how AI applications—like chatbots, IDE assistants, or custom agents—connect with external tools, data sources, and systems.
🔌 Think of it like “USB for AI integrations”
Before USB, connecting devices meant dealing with dozens of ports and drivers. Similarly, integrating M different AI apps with N different tools used to require M × N custom integrations—a huge development burden.
MCP changes that to an M + N model:
- Tool creators only need to build 1 MCP server per tool
- App developers only need to build 1 MCP client per application
🧩 How it works
MCP follows a client-server architecture:
- Hosts: AI applications the user interacts with (e.g., Claude, an IDE, a custom agent)
- Clients: Reside within the host and manage a 1:1 connection to an MCP server
- Servers: External programs exposing functionality to AI apps via a standard API
📚 MCP Servers expose 3 components:
Tools (model-controlled):
Functions the LLM can call to perform actions (e.g., calling a weather API)-
Resources (app-controlled):
Data sources the model can read, similar toGETrequests in a REST APINo heavy computation, no side effects
Prompts (user-controlled):
Predefined templates that help LLMs use tools/resources in the most effective way
This enables a modular, scalable ecosystem for AI integrations — with minimal duplication and maximum reuse.
🛠️ Configuring mongodb-mcp-server in VS Code
On the mongodb-mcp-server npm page, you'll find four different ways to run the server.
In this tutorial, we'll choose the simplest option — using a connection string directly in the mcp.json file.
Let's run the following command in your terminal:
npm i mongodb-mcp-server
Make sure you're using Node.js version 20 or higher. You can check your version with:
node -v
📁 Create the .vscode/mcp.json file
Inside your project's .vscode folder, create a file named mcp.json with the following content:
{
  "mcpServers": {
    "MongoDB": {
      "command": "npx",
      "args": [
        "-y",
        "mongodb-mcp-server",
        "--connectionString",
        "mongodb+srv://username:[email protected]/myDatabase"
      ]
    }
  }
}
Once you've entered your MongoDB connection details, click Start to launch the server.
🚀 Installing GitHub Copilot Extensions
We will install the two GitHub Copilot extensions from the VS Code Marketplace:
- GitHub Copilot – the core AI coding assistant.
- GitHub Copilot Chat – enables chat-based interactions within your IDE.
🔑 Log in to GitHub Copilot
Then, log in to GitHub Copilot following the instructions provided after installation.
This will authenticate your GitHub account and activate Copilot features in your editor.
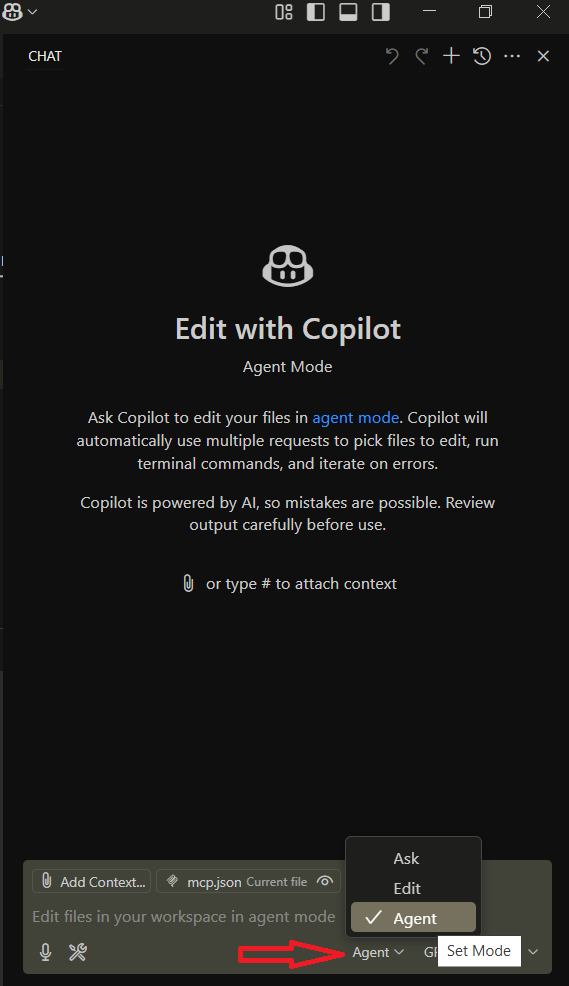
🧠 Using Agent Mode with MongoDB
Once you've selected Agent Mode, you can start using natural language to give high-level instructions to your MongoDB database.
For example, you can type prompts like:
"Show me all users who signed up last week"
"Add a new user with the username TestUser7"
The agent will translate these into MongoDB queries and execute them for you.
Let's see what we have in our database in the User collection:


Top comments (0)