In this article, I want to show you how to display 3D elements on your website in a very simple way.
I also made a video about it, so if you're interested, feel free to check it out — but if not, all good! I’ll walk you through everything step by step right here.
The video is originally in Spanish. AI-generated English voice. Yeah, I know, not ideal. But hey, one day I hope to upload the full thing in English (with a lot of accent 😅).
Anyway, let’s get started with the article step by step.
1. How to get a 3D model for your website
The internet is full of 3D models you can download. Either for free or paid.
A well-known place is sketchfab
I recommend downloading the model in .gltf or .glb format — these are the ones that work best on the web.
If you download a .glb file, it’ll come as a single file with the .glb extension.
But if you go with .gltf, you’ll get a folder with multiple files inside you’ll need to unzip it.
Even though the main file is scene.gltf, don’t delete anything all the files depend on each other, so it’s totally fine to keep them all together in the same folder.
I found a really cool 3D dragon model that I was able to download for free (shoutout to the creator of the model in the video).
Once you’ve got your 3D model, let’s move on to step two:
2. How to Insert a 3D model in HTML
There isn’t a default HTML tag that can load 3D elements on the web. That would be a dream!
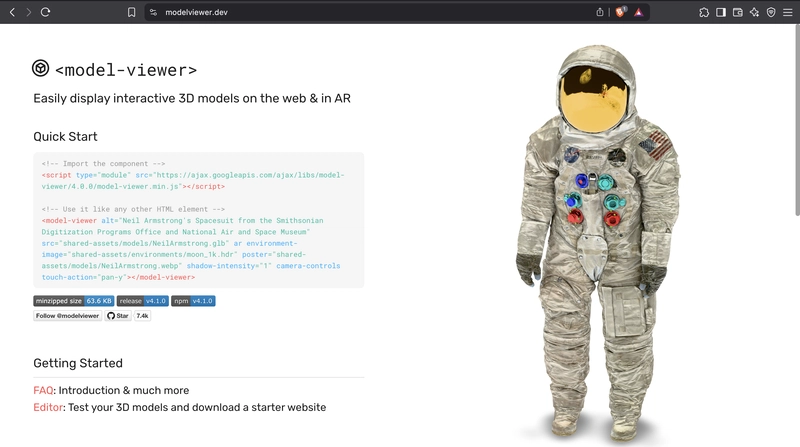
But luckily, Google took care of this by creating a nice web element called model-viewer
What is model-viewer?
<model-viewer> is a web component that lets you embed 3D models directly into your HTML without needing libraries like Three.js. It’s supported by all major modern browsers and works with formats like .glb and .gltf.
As the documentation on the model-viewer page says, you need to import the script with the model-viewer component, and after that, you can use <model-viewer>just like any other HTML element.
Keep in mind that since we’re working without any framework, just a bit of HTML. we need to run our project on a server. Without a server, this won’t work. the extension live server It's more than enough.
so:
3. Insert the 3D model in HTML with model-viewer
<!DOCTYPE html>
<html lang="en">
<head>
    <meta charset="UTF-8">
    <meta name="viewport" content="width=device-width, initial-scale=1.0">
    <title>Document</title>
</head>
<body>

<!-- Use it like any other HTML element -->
    <model-viewer
    src="shenron_dragon_ball/scene.gltf"
    alt="avatar"
    shadow-intensity="1"
    camera-controls
     >
    </model-viewer>

<!-- Import the component -->
<script type="module" src="https://ajax.googleapis.com/ajax/libs/model-viewer/4.0.0/model-viewer.min.js"></script>
</body>
</html>
The <model-viewer> element has several attributes and properties you can use. You can find them in the API REFERENCE section of the documentation.
But the most essential ones to include, almost as a must, are the following:
src To set the path to our 3D file. If you downloaded a .glb, it’ll just be the file. If you grabbed a .gltf, then the path needs to point to the downloaded folder and inside it to the scene.gltf file.
Just be super careful not to mess up the file path 😅
shadow-intensity Controls the opacity of the 3D model’s shadow. For example, if you set it to 0, it should completely disable the shadow.
camara-controls They allow the user to move and control the 3D model.
But there are many others you’ll love if you feel like trying them out :) Check them out here:API REFERENCE
You can also apply styles to the model-viewer without any problem. For example:
<style>
   model-viewer {
       width: 100vw;
       height: 100vh;
   }
</style>
Some final comments
It’s worth mentioning that model-viewer is compatible with the latest major versions of all browsers.
The only limitations are if you want to use it for augmented reality models, especially with Safari and Mozilla browsers. But when it comes to 3D, everything works amazing!
That’s all!
thanks so much.
Cheers,
Pablo


Top comments (1)
Some comments may only be visible to logged-in visitors. Sign in to view all comments.