This tutorial (for Mac) will guide you through deploying a Node.js application using AWS Copilot, first as a monolith and then breaking it down into microservices. By following these steps, you'll learn how to use AWS Copilot to deploy containerized applications to Amazon ECS.
I will leave a doc with all systems contemplated. Link: All Systems (Linux & Windows)
Tutorial Modules Overview
- Introduction: Understanding the application and architecture
- Setup: Installing and configuring prerequisites
- Containerize and Deploy the Monolith: Building and deploying the application as a monolith
- Break the Monolith: Separating the application into microservices
- Deploy Microservices: Deploying each microservice independently
- Clean Up: Removing all resources to avoid ongoing charges
Prerequisites
Before starting this tutorial, ensure you have the following:
- AWS Account: You need an active AWS account. Some services may require your account to be active for more than 12 hours after creation.
- Docker: Docker must be installed and running on your system.
For macOS:
Install Docker Desktop for Mac
Download from https://www.docker.com/products/docker-desktop/
Verify Docker installation
docker --version
Install AWS CLI v2 (for macOS)
curl "https://awscli.amazonaws.com/AWSCLIV2.pkg" -o "AWSCLIV2.pkg"
sudo installer -pkg AWSCLIV2.pkg -target /
Verify installation
aws --version
Configure AWS credentials
aws configure
AWS Copilot CLI: Install the AWS Copilot CLI
Install via Homebrew (macOS)
brew install aws/tap/copilot-cli
Verify installation
copilot --version
Part 1: Deploying the Monolithic Application
Step 1: Create an AWS Copilot Application
An AWS Copilot Application is a collection of services and environments.
# Clone the sample repository
git clone https://github.com/awslabs/amazon-ecs-nodejs-microservices
cd ./amazon-ecs-nodejs-microservices/

# Initialize a new Copilot application
copilot app init
# Name the application "api" when prompted
Step 2: Create the Environment
Copilot environments represent the infrastructure where your application runs.
# Create a new environment
copilot env init
When prompted:
Name the environment "api"
Choose "profile default" for credentials
Select "Yes, use default" for environment configuration
Step 3: Deploy the Environment
# Deploy the environment
copilot env deploy --name api
This step creates the VPC, subnets, security groups, and other necessary infrastructure for your application.
Step 4: Create the Monolith AWS Copilot Service
A Copilot Service runs containers on ECS or Fargate.
# Create a new service
copilot svc init
When prompted:
Select "Load Balanced Web Service" as the workload type
Name the service "monolith"
For the Dockerfile path, select or enter the appropriate path to the Dockerfile
Step 5: Deploy the Monolith Service
# Deploy the API
copilot env deploy --name api
Deploy the service
copilot svc deploy --name monolith
This builds the Docker container locally, pushes it to an Amazon Elastic Container Registry (ECR) repository, and deploys it on Amazon Elastic Container Service (ECS).
Step 6: Confirm the Deployment
After deployment completes, AWS Copilot will display a URL for your service. You can test the deployment by accessing the URL in a browser or using curl.
You can test the application deployment by entering queries in a browser, such as:
- http:///api-ap-Publi-tqekqzwAKyhA-2052337664.us-east-1.elb.amazonaws.com/api/users/3

- http:///api-ap-Publi-tqekqzwAKyhA-2052337664.us-east-1.elb.amazonaws.com/api/threads/2

- http:///api-ap-Publi-tqekqzwAKyhA-2052337664.us-east-1.elb.amazonaws.com/api/posts/

- http:///api-ap-Publi-tqekqzwAKyhA-2052337664.us-east-1.elb.amazonaws.com/api/posts/in-thread/1

Part 2: Breaking the Monolith into Microservices
Step 1: Create the Microservices
Create separate services for posts, threads, and users components.
Create the posts service (copy all the script up to Load Balanced Web Service)
copilot svc init --app api --dockerfile ./3-microservices/services/posts/Dockerfile --name posts --svc-type "Load Balanced Web Service"
Create the threads service (copy all the script up to Load Balanced Web Service)
copilot svc init --app api --dockerfile ./3-microservices/services/threads/Dockerfile --name threads --svc-type "Load Balanced Web Service"
Create the users service (copy all the script up to Load Balanced Web Service)
copilot svc init --app api --dockerfile ./3-microservices/services/users/Dockerfile --name users --svc-type "Load Balanced Web Service"
Step 2: Edit the Path in the Manifest Files
AWS Copilot sets the path to a service based on the service name. Edit each microservice manifest to ensure proper routing.
Edit the posts service manifest
nano copilot/posts/manifest.yml
Update the path under the http section to:
path: "api/posts"
Repeat for the threads and users services, updating their respective paths to:
For threads service
nano copilot/threads/manifest.yml
Edit to:
path: "api/threads"
For users service
nano copilot/users/manifest.yml
Edit to:
path: "api/users"
Step 3: Deploy the Microservices
Deploy the posts service
copilot svc deploy --name posts
Your service is accessible at http://api-ap-Publi-tqekqzwAKyhA-2052337664.us-east-1.elb.amazonaws.com/api/posts over the internet.
Deploy the threads service
copilot svc deploy --name threads
Your service is accessible at http://api-ap-Publi-tqekqzwAKyhA-2052337664.us-east-1.elb.amazonaws.com/api/threads over the internet.
Deploy the users service
copilot svc deploy --name users
Your service is accessible at http://api-ap-Publi-tqekqzwAKyhA-2052337664.us-east-1.elb.amazonaws.com/api/users over the internet.
Step 4: Shut Down the Monolith
Once all microservices are deployed and working, you can shut down the monolith service.
Delete the monolith service
copilot svc delete --name monolith
Step 5: Verify the Deployment
Test the deployment by accessing the endpoints:
- Threads endpoint: http://api-ap-Publi-tqekqzwAKyhA-2052337664.us-east-1.elb.amazonaws.com/api/threads/2
Environment on AWS:
- VPC:
- ECS:
- ELB:
Step 6: Clean Up Resources
Best practice is to delete resources when the tutorial is complete to avoid ongoing charges for running services. This cleanup process will terminate all the resources you created during this tutorial.
Step 1: Delete the Application
To delete the entire application and all associated resources:
Delete all resources
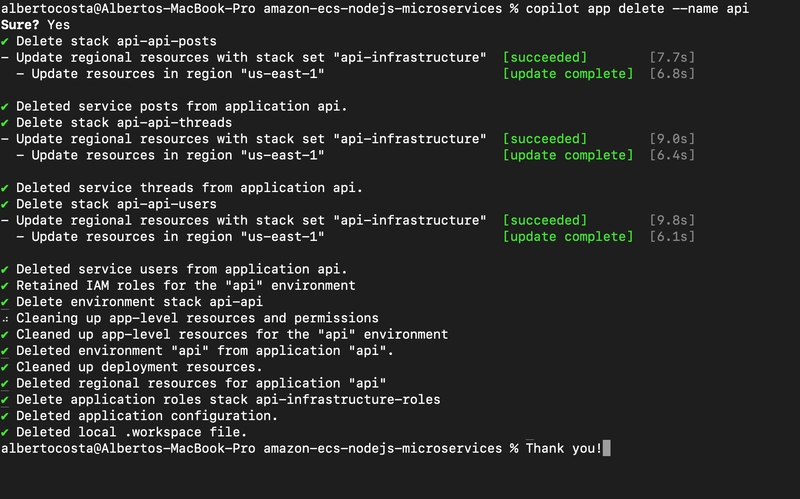
copilot app delete --name api
When you run this command:
- AWS Copilot will list all the resources that will be deleted
- You will be asked to confirm the deletion
The command will delete:
- All services running on Amazon ECS
- The Application Load Balancer
- Amazon Elastic Container Registry repositories
- AWS CloudFormation stacks
- Underlying EC2 instances This process takes approximately 10 minutes to complete.
Resources Being Deleted
This cleanup will remove:
- Amazon Elastic Container Service resources
- Amazon Elastic Container Registry repositories
- Elastic Load Balancer
- Associated CloudFormation stacks
- IAM roles created for your services
- CloudWatch logs
- Any other resources created by AWS Copilot
Thank you a lot! See you soon. I hope you enjoy it!


Top comments (0)