What is Virtual Machines?
When you of what a Virtual Machine is, you think of it as a software-created computer that lives inside your real, physical computer. It has its own pretend set of hardware – its own little fake processor, memory, storage, and network connection – all powered and managed by your actual computer's resources.
So, even though you only have one physical machine sitting on your desk, a virtual machine lets you run a completely separate operating system (like Windows, macOS, or Linux) and its applications within a window on your current operating system.
Think of it like this:
Your physical computer is the actual house.
A virtual machine is like creating a separate, fully functional apartment
inside that house.1 The apartment has its own furniture, its own kitchen, its own living room – everything it needs to operate independently. People living in different apartments in the same house can do their own thing without interfering with each other.
Why is this useful?
Well, it lets you do things like:
Try out a different operating system without messing with your main computer.
Run software that's only compatible with a specific operating system.
Test new applications in a safe, isolated environment so if something goes wrong, it doesn't affect your main system.
Consolidate multiple physical servers onto a single, more powerful machine, saving space and energy.
So, in simple terms, a virtual machine is like having a computer within a computer, created by software, allowing you to run different environments and do different things all on the same physical hardware.
It's like a clever way of making one computer act like many!
*How to create Virtual Machines
*
Step 1: Log in to Azure Portal
(i) Navigate to portal.azure.com
(ii) Enter you username & password to access the dashboard
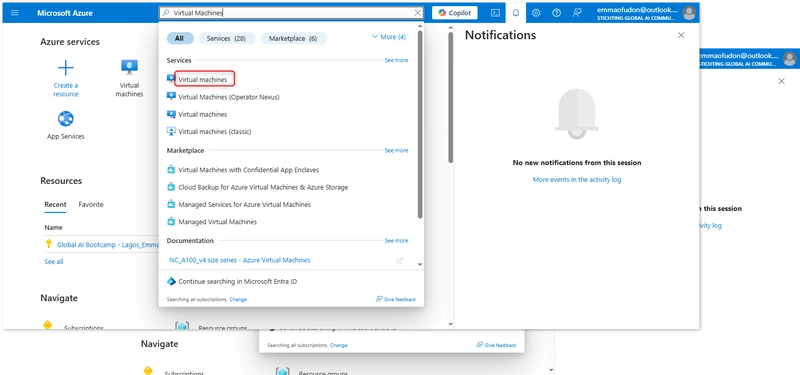
Step 2: Search for "Virtual Machines"
(i) In the search bar, type "Virtual Machines"
Step 3: Select for Virtual Machine from the Search Results
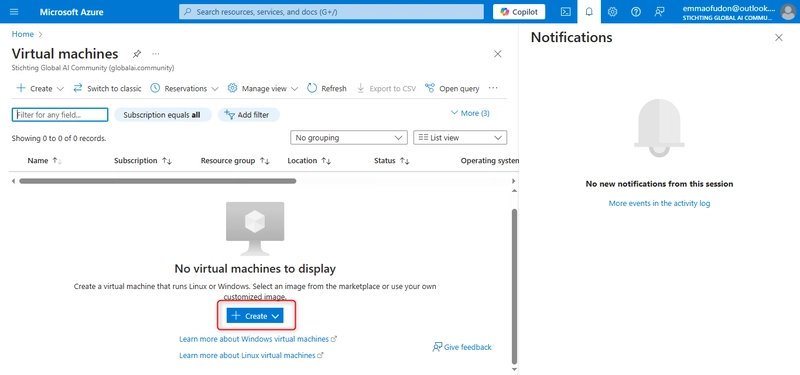
Step 4: ** Click on "Create"**
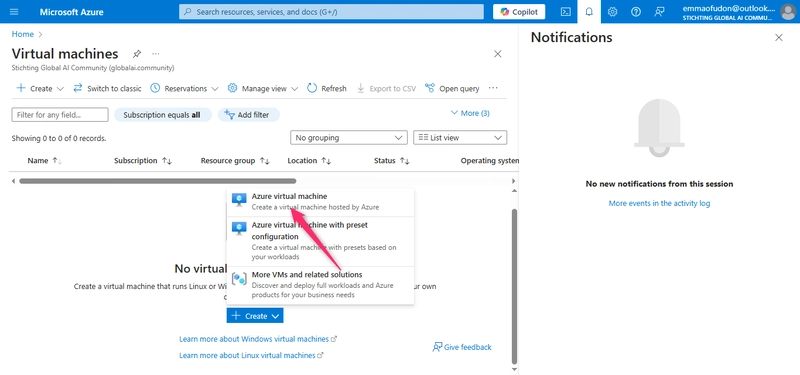
(ii) Click "Azure Virtual Machine"
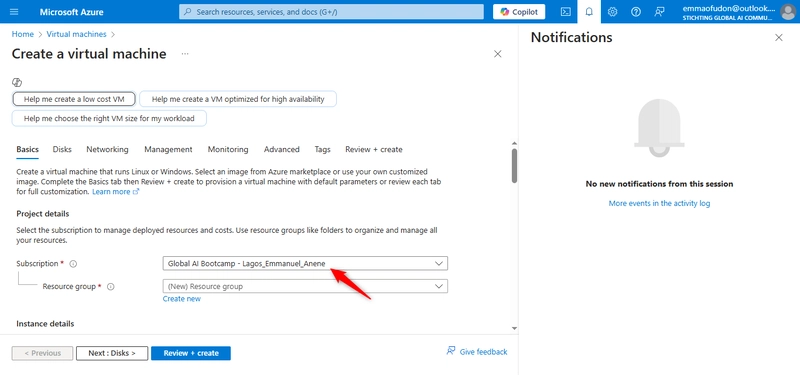
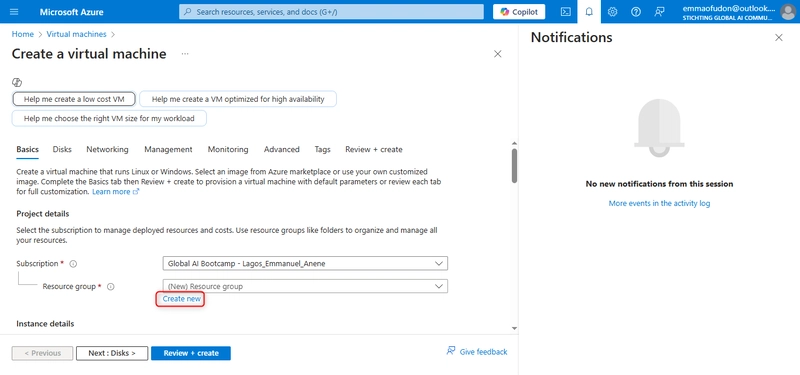
Step 5: Enter Project Details
(i) Select the appropriate Subscription
(ii) Click "Create Resource Group"——> Enter a name for it
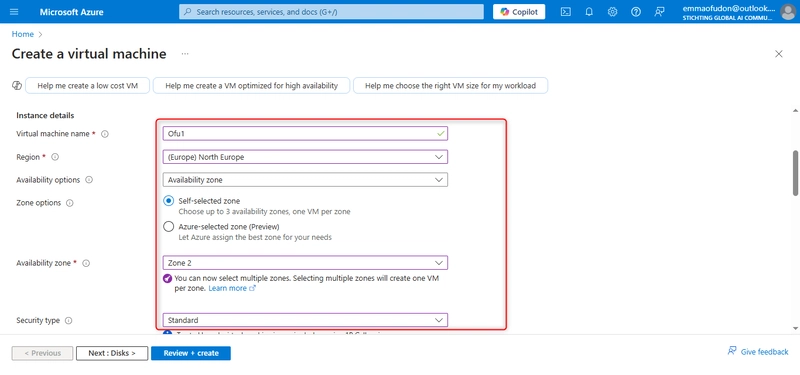
Step 6: Configure Virtual Machine Details.
  (i) VM Name (eg., MyAzureVM)
  (ii) Region
  (iii) Availability Options
  (iv) Zone Options
  (v) Availability Zone
  (vi)  Security Type
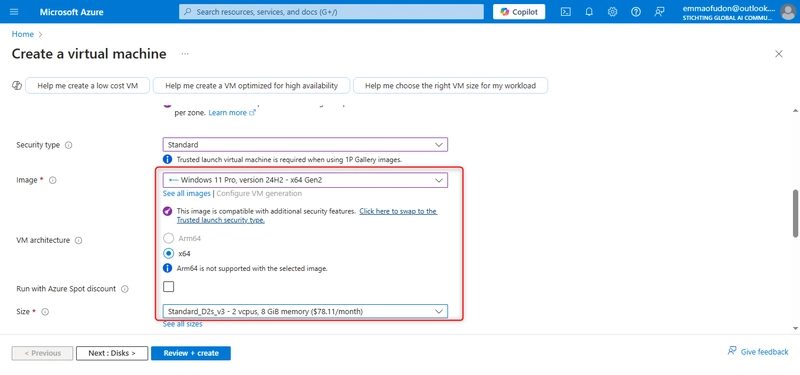
(vii) Operating System: Select Ubuntu Server 20.04 or Windows Server Datacenter-x64 G2
 (viii)VM Size: Keep the default option
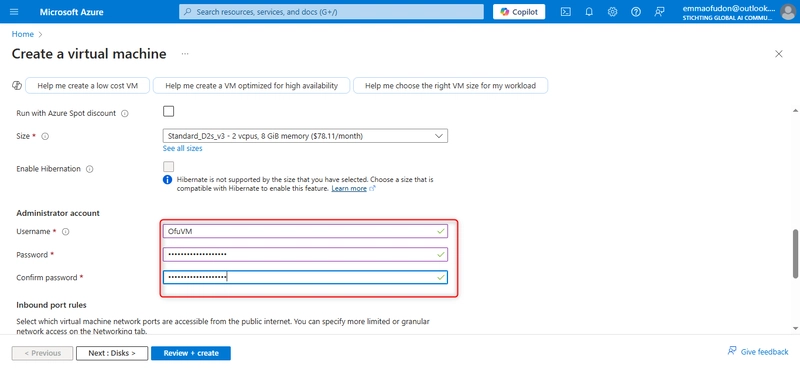
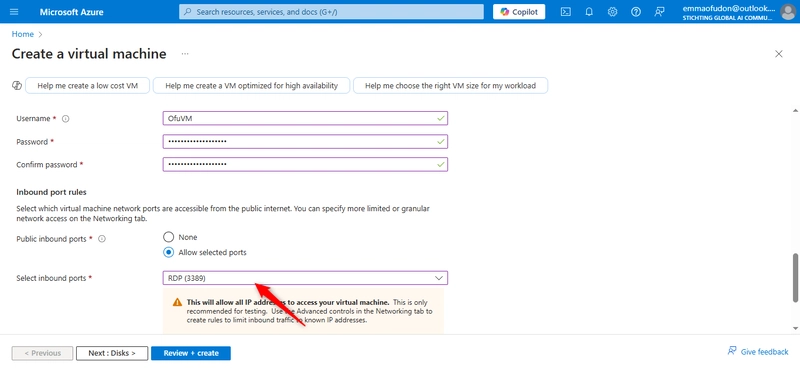
Step 7: Set Up Administrator Account:
(i) Set User Name (Azureuser)
(ii) Password (Something you can always remember)
(iii) Confirm password
Step 8: Configure Inbound Port Rules
Select SSH(for Linux) or RDP (for Windows)
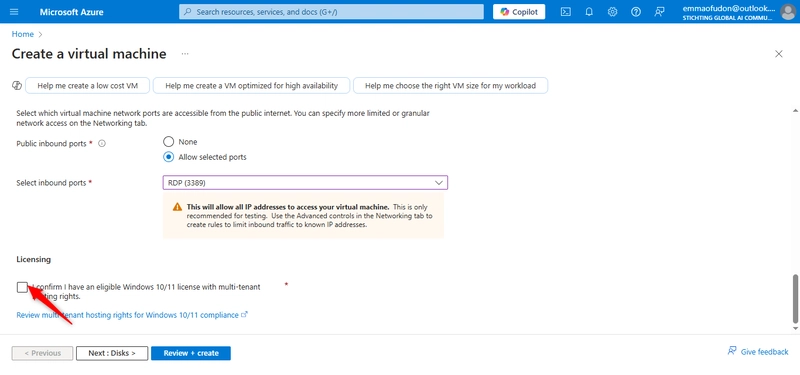
Step 9: Accept Licensing Terms
Click the checkbox to accept the licensing agreements.
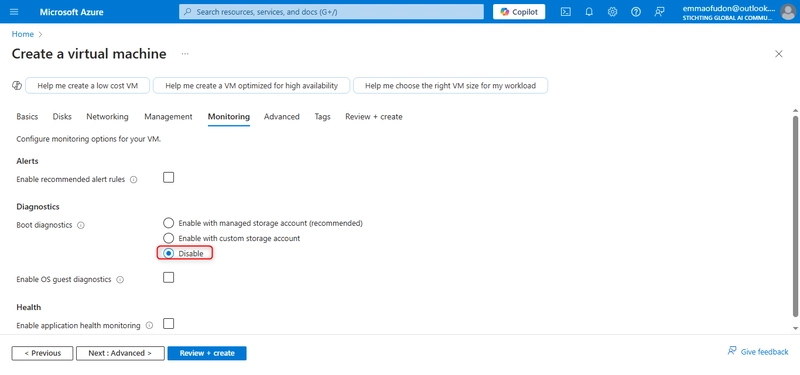
Step 10: Disable Boot Diagnostics
Click Next——> Navigate to Monitoring Tab ——> Disable Boot Diagnostics.
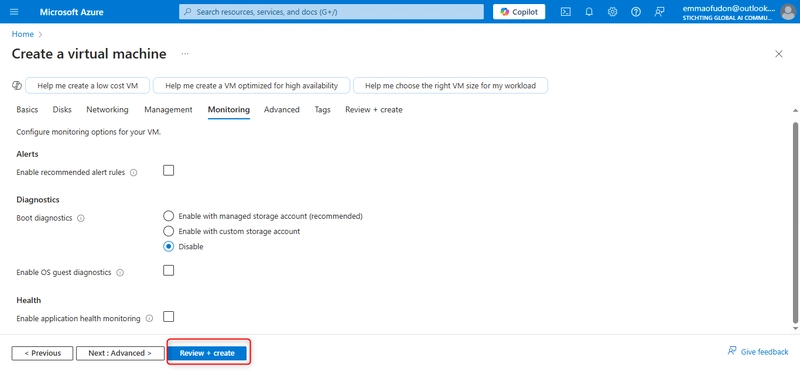
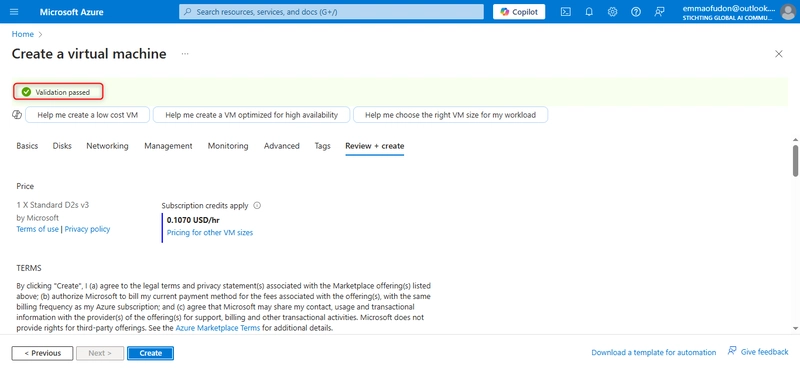
Step 11: Review & Deploy the Virtual Machine
(i) Review + Create
(ii) Ensure Validation passes.
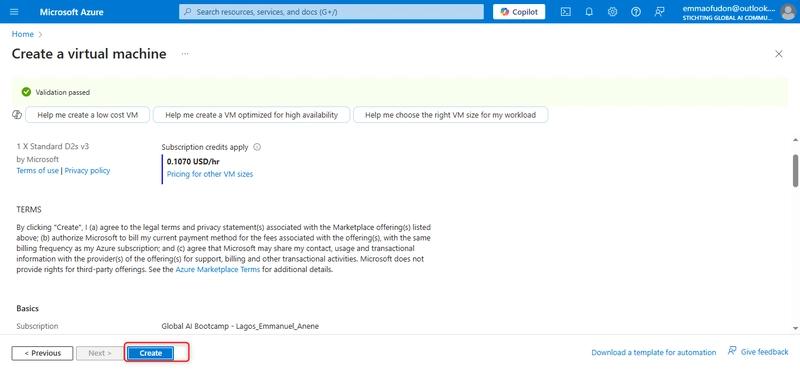
(iii) Click "Create" to deploy (Deployment takes 3-5 minutes)
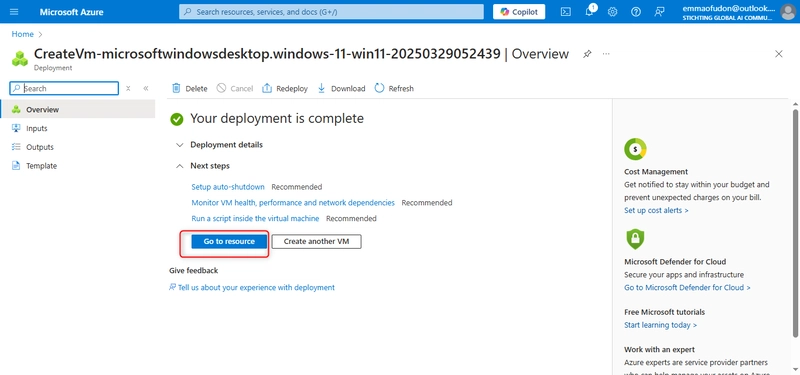
(iv) Click on "Go to Resource" to check your VM status and connect to the VM.
Step 12: Check VM Status
If the status is running, you VM is ready!🎉
Step 13: Connect to the Virtual Machine
Click "Connect" in the Azure VM blade.
Step 14: Download & Open RDP File (Windows VM Only)
(i) Click "Native RDP"——> Download RDP file
(ii) Open the RDP file on your computer
Step 15: Enter Admin Credentials
(i) Enter the Username and password created earlier.
(ii) ✅ Complete Connection
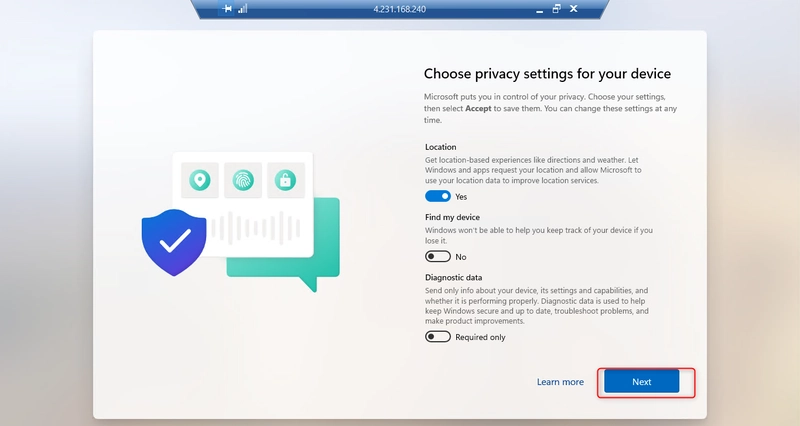
Chose pricy settings for your device and connect
Wait for Configuration
Step 16: Success! Start Using Your VM
🎉You are now connected! You can start using your Azure Virtual Machine
✅Final Thoughts:
Great job! You've taken the key steps to get your Azure Virtual Machine ready: you've built it, launched it into the Azure environment, and established a connection. Now that you're connected, you can begin installing the software you need, configuring your services exactly how you want them, and take your time to discover everything the Azure ecosystem has to offer.






Top comments (0)