Build Lightning-Fast Over-the-Air Updates for Your Mobile App
Introduction
Hot Updater is a powerful alternative to react-native-codepush that provides self-hostable Over-The-Air (OTA) update capabilities for React Native applications. Unlike traditional app store updates, Hot Updater allows you to instantly update your JavaScript bundle, enabling rapid deployment of bug fixes and feature updates without waiting for app store approval.
Why Choose Hot Updater?
Key Features
- Self-Hosting: Maintain complete control over your update infrastructure and data
- Multi-Platform Support: Seamless compatibility with both iOS and Android platforms
- Intuitive Web Console: User-friendly interface for managing and monitoring updates
- Robust Version Control: Advanced app versioning with semantic versioning support
- Forced Updates: Push critical security updates when immediate deployment is necessary
- Flexible Deployment: Support for multiple environments and channels
In this comprehensive guide, we'll walk through setting up Hot Updater using the AWS S3 Storage + Lambda@Edge Function provider for storing React Native bundles in the cloud. Hot Updater supports multiple providers as shown below.
Prerequisites
Before beginning the setup process, ensure you have the following requirements met:
System Requirements
- Node.js: Version 20 or later (recommended for optimal performance)
- React Native Development Environment: Properly configured for your target platforms
AWS Requirements
- AWS Account: Sign up at AWS if you don't have an existing account
- AWS CLI: Install the AWS CLI and configure your credentials with appropriate permissions
Additional Tools
- Package Manager: Yarn or npm
- Code Editor: VS Code or your preferred IDE
Step-by-Step Setup Guide
Phase 1: AWS Configuration
For detailed AWS setup, you can follow either:
- Video Tutorial: Step-by-step configuration video
- Written Guide: AWS provider documentation
Configuration Screenshots Reference
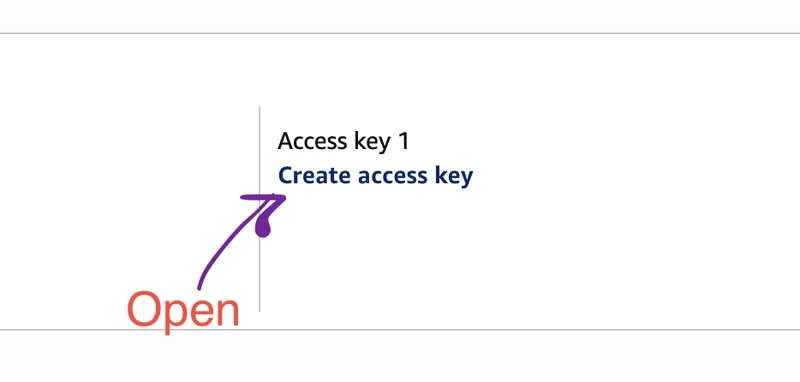
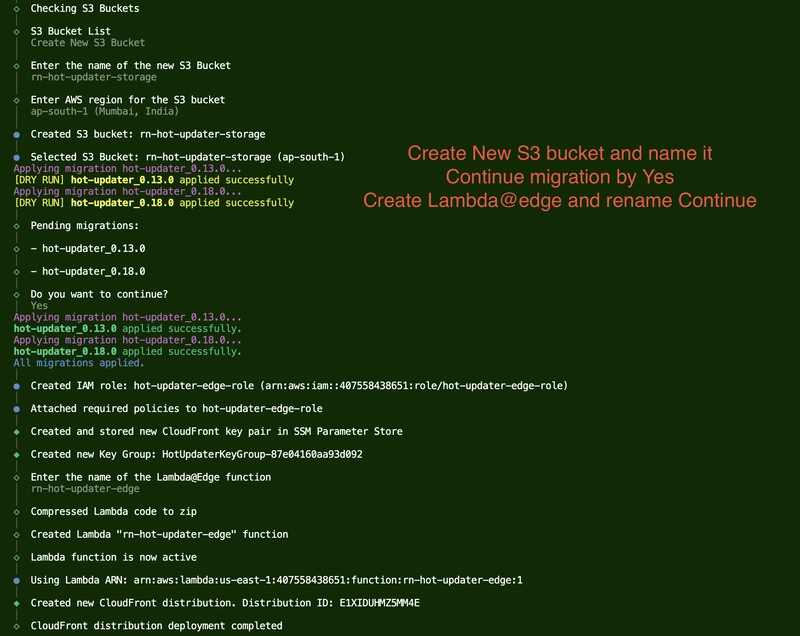
The following screenshots demonstrate the AWS setup process:
Phase 2: Configuration Files Generation
Once the AWS setup is complete, the system will automatically generate essential configuration files:
Generated Files
-
.envfile: Contains AWS credentials and configuration keys (reference) -
hot-updater.config.ts: Main configuration file (reference)
Important Note: Keep the automatically generated code intact, even when using dotenv. This applies even if you're using react-native-config for multiple scheme or flavoring setups.
Phase 3: Project Integration
Step 1: Add Required Plugins
Follow the official documentation to add necessary plugins to your project:
Step 2: Native Code Integration
Integrate native code components:
Step 3: Verification (Optional)
If you want to verify your setup:
Phase 4: Fingerprint Configuration
Create Fingerprint File
In your project's root directory, create a fingerprint.json file:
{
  "ios": {},
  "android": {}
}
Install Dependencies
Run the following commands to install dependencies:
yarn && cd ios && pod install && cd ..
Phase 5: App Integration
Wrap Your App Component
Modify your App.tsx file according to the official wrapping guide:
import { getUpdateSource, HotUpdater } from '@hot-updater/react-native';
import React from 'react';
import { Text, View } from 'react-native';
import Config from 'react-native-config';

const App = () => {
  return (
    <View
      style={{
        flex: 1,
        backgroundColor: 'teal', // Change to "pink" for testing
        justifyContent: 'center',
        alignItems: 'center',
      }}
    >
      <Text>{Config.env}-- 555</Text>
      <Text>{__DEV__ ? 'Development Mode' : 'Release Mode'}</Text>
      <Text>Fingerprint: {HotUpdater.getFingerprintHash()}</Text>
      <Text>Channel: {HotUpdater.getChannel()}</Text>
      <Text>App Version: {HotUpdater.getAppVersion()}</Text>
      <Text>Bundle Id: {HotUpdater.getBundleId()}</Text>
      <Text>Min Bundle Id: {HotUpdater.getMinBundleId()}</Text>
    </View>
  );
};

export default HotUpdater.wrap({
  source: getUpdateSource('https://do1f2fjq14bee.cloudfront.net/api/check-update', {
    updateStrategy: 'fingerprint', // or "appVersion"
  }),
  requestHeaders: {
    // Add custom request headers if needed
  },
  fallbackComponent: ({ progress, status }) => (
    <View
      style={{
        flex: 1,
        padding: 20,
        borderRadius: 10,
        justifyContent: 'center',
        alignItems: 'center',
        backgroundColor: 'rgba(0, 0, 0, 0.5)',
      }}
    >
      {/* You can add a splash image here for better UX */}
      <Text style={{ color: 'white', fontSize: 20, fontWeight: 'bold' }}>
        {status === 'UPDATING' ? 'Updating...' : 'Checking for Update...'}
      </Text>
      {progress > 0 ? (
        <Text style={{ color: 'white', fontSize: 20, fontWeight: 'bold' }}>
          {Math.round(progress * 100)}%
        </Text>
      ) : null}
    </View>
  ),
})(App);
Single Environment Setup
If you're not using multiple environments, you can proceed directly with these steps:
Build and Deploy Process
- Create Release Build: Simulator Testing Guide
- Update Fingerprint Hash: Fingerprint Management
- Deploy Updates: Deployment Guide
- Manage Updates: Console Management
Multiple Environment Setup
For projects requiring multiple environments (development, staging, production), follow these additional configurations:
Package.json Scripts Configuration
Add the following scripts to your package.json for streamlined environment management:
{
  "scripts": {
    "setDevelopment": "ENVFILE=.env.development",
    "setStaging": "ENVFILE=.env.staging",
    "setProduction": "ENVFILE=.env.production",

    "aos:dev-release": "yarn setDevelopment && react-native run-android --mode=developmentrelease",
    "aos:prod-release": "yarn setProduction && react-native run-android --mode=productionrelease",

    "hot-updater-console": "yarn hot-updater console",
    "check_fingerprint_hash": "yarn hot-updater fingerprint",
    "fingerprint_update": "yarn hot-updater fingerprint create",
    "channel_update_production": "yarn hot-updater channel set production",
    "channel_update_development": "yarn hot-updater channel set development",

    "update_ios_dev": "yarn installAll && yarn setDevelopment && npx hot-updater deploy -p ios -c development -f",
    "update_ios_prod": "yarn installAll && yarn setProduction && npx hot-updater deploy -p ios -c production -f",
    "update_android_dev": "yarn channel_update_development && yarn setDevelopment && npx hot-updater deploy -p android -c development -f",
    "update_android_prod": "yarn channel_update_production && yarn setProduction && npx hot-updater deploy -p android -c production -f"
  }
}
Script Parameters Explanation
For detailed understanding of deployment parameters (-p, -c, -f, etc.), refer to the deployment documentation.
Deployment Process (to deploy new changes)
Running Deploy Commands
When executing deploy commands, you should see output similar to this:
First set channel as per particular env(if using), then run deploy command
yarn channel_update_production && yarn update_android_prod
Another Update Strategy (Note: we are using Fingerprint):
The "App Version" update strategy in hot-updater allows you to target specific native app versions when deploying updates. Unlike the fingerprint strategy, which compares hash values to check for native code changes, this strategy applies updates only to the app version specified with the -t (or --target-app-version) option during the hot-updater deploy command.
Troubleshooting Fingerprint Issues
If you encounter a fingerprint error like:
■ Fingerprint mismatch. 'hot-updater fingerprint create' to update fingerprint.json
Solution: Run the fingerprint update command:
yarn fingerprint_update
AWS S3 Verification
After successful deployment, your AWS S3 bucket should contain the deployed bundles:
Management Console
Accessing the Console
Launch the management console using:
yarn hot-updater-console
The console provides a comprehensive interface for managing your deployments:
Console Features
- Update Management: Deploy, rollback, and delete updates
- Version Control: Track all deployed versions
- Channel Management: Manage different deployment channels
- Analytics: Monitor update adoption and performance
Troubleshooting
Common Issues and Solutions
Updates Not Appearing in Release Build
If updates aren't showing in your release build, verify that:
- Channel Configuration: Ensure the channel is correctly set
- Hash Verification: Confirm the fingerprint hash matches between deployment and app
- Network Connectivity: Check internet connection and CloudFront distribution
Reference: GitHub Issue #417
Fingerprint Mismatch Errors
This typically occurs when:
- App fingerprint doesn't match deployed bundle fingerprint
- Multiple environments are using conflicting fingerprints
Solution: Update fingerprints using the provided scripts.
AWS Permissions Issues
Ensure your AWS credentials have the necessary permissions for:
- S3 bucket operations
- CloudFront distribution management
- Lambda@Edge function deployment
Best Practices
Security Considerations
- Credential Management: Store AWS credentials securely using environment variables
- Access Control: Implement proper IAM policies for restricted access
- HTTPS Enforcement: Always use HTTPS for update endpoints
Performance Optimization
- Bundle Size: Keep JavaScript bundles as small as possible
- Caching Strategy: Leverage CloudFront caching for improved performance
- Incremental Updates: Use fingerprint strategy for efficient updates
Monitoring and Maintenance
- Regular Monitoring: Check console regularly for update adoption rates
- Rollback Strategy: Always have a rollback plan for critical updates
- Testing: Thoroughly test updates in staging environments before production deployment
Conclusion
Hot Updater with AWS S3 and Lambda@Edge provides a robust, scalable solution for React Native OTA updates. This setup gives you complete control over your update infrastructure while maintaining the flexibility to support multiple environments and deployment strategies.
The self-hosted approach ensures data privacy and eliminates dependency on third-party services, making it an excellent choice for enterprise applications or projects with specific compliance requirements.
By following this comprehensive guide, you should have a fully functional Hot Updater setup that enables rapid deployment of JavaScript bundle updates without going through traditional app store approval processes.


Top comments (0)
Some comments may only be visible to logged-in visitors. Sign in to view all comments.