
Welcome to the #CODESESSION001 the first article so far! In today's article, we will practise end-to-end autherization & authentication system for our brand new Next.js app, together.
Very beggining, I would like to inform you about the difficulty of the article that it's quite hard for the begginers. But no worries if you are one — once you understand the core logic of the auth process, you will be able deal with auth services like you are playing with a toy from your childhood.
Note
What you will see
- Dealing with multiple middlewares
- Fully customizable React server components with typescript.
@supabase/ssrmiddleware server OAuth setup.- Craeating client side React provider component.
- Creating slices in Redux to pass auth props to the client components.
- Deailing with
route.tsinside@app/(auth)/api/auth/callbackto handle Google Provider redirect URL default fallback backing service.
All this will happen in the latest version of the techs described above mentioned below
- React 19
- Typescript 5
- Tailwind 4 (optional)
- Next.js 15.3 (latest)
- Supabase 2.24
Supabase was strugling with @supabase/auth-helpers-react due to it's own client database handlers. In the way of evolving react.js Server Components — supabase always kept going with the same speed of react.js. Both on the same boat passing with newfangled ways to maximize throughput gracefully. So supabase optimized their code and provided @supabase/ssr to handle everything on server side before initial load facilitates dynamic systems above application level where concurrency matters.
We will practise application level server side typescript to handle all.
Auth logic
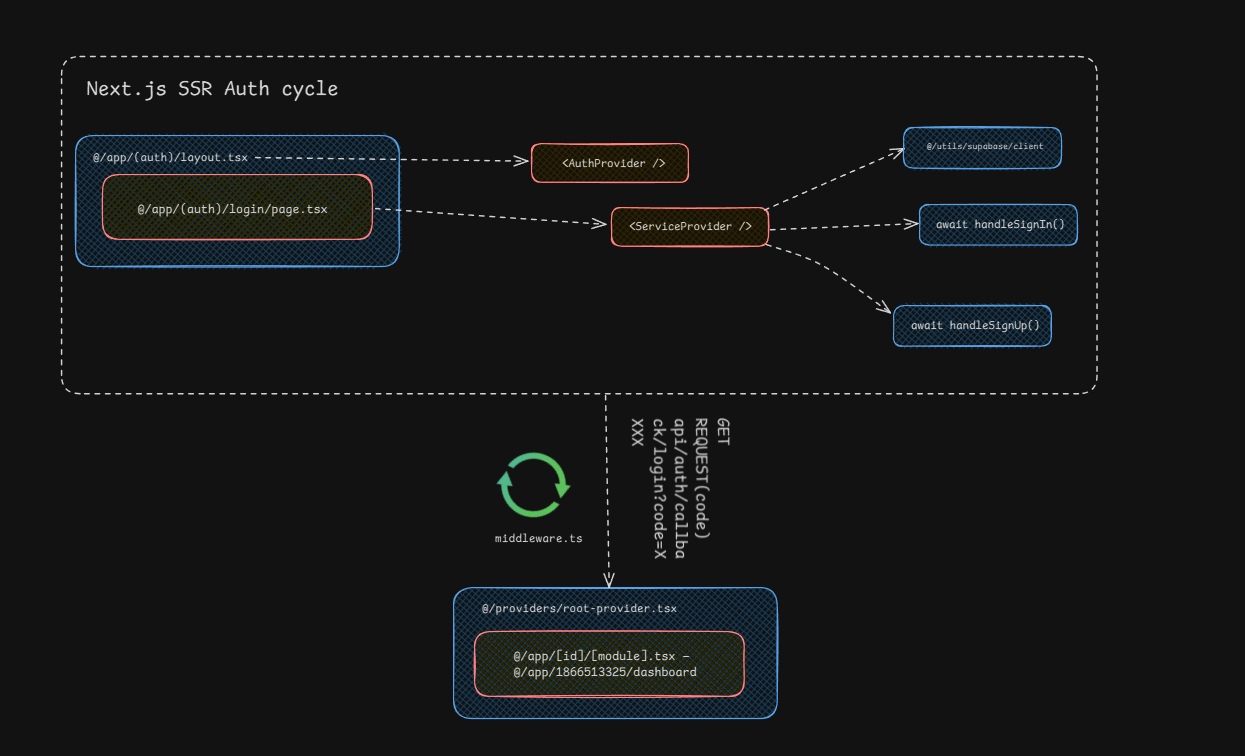
Below, there is a blueprint of the authentication process illustrates the login service's data and auth flows,
Creating supabase account
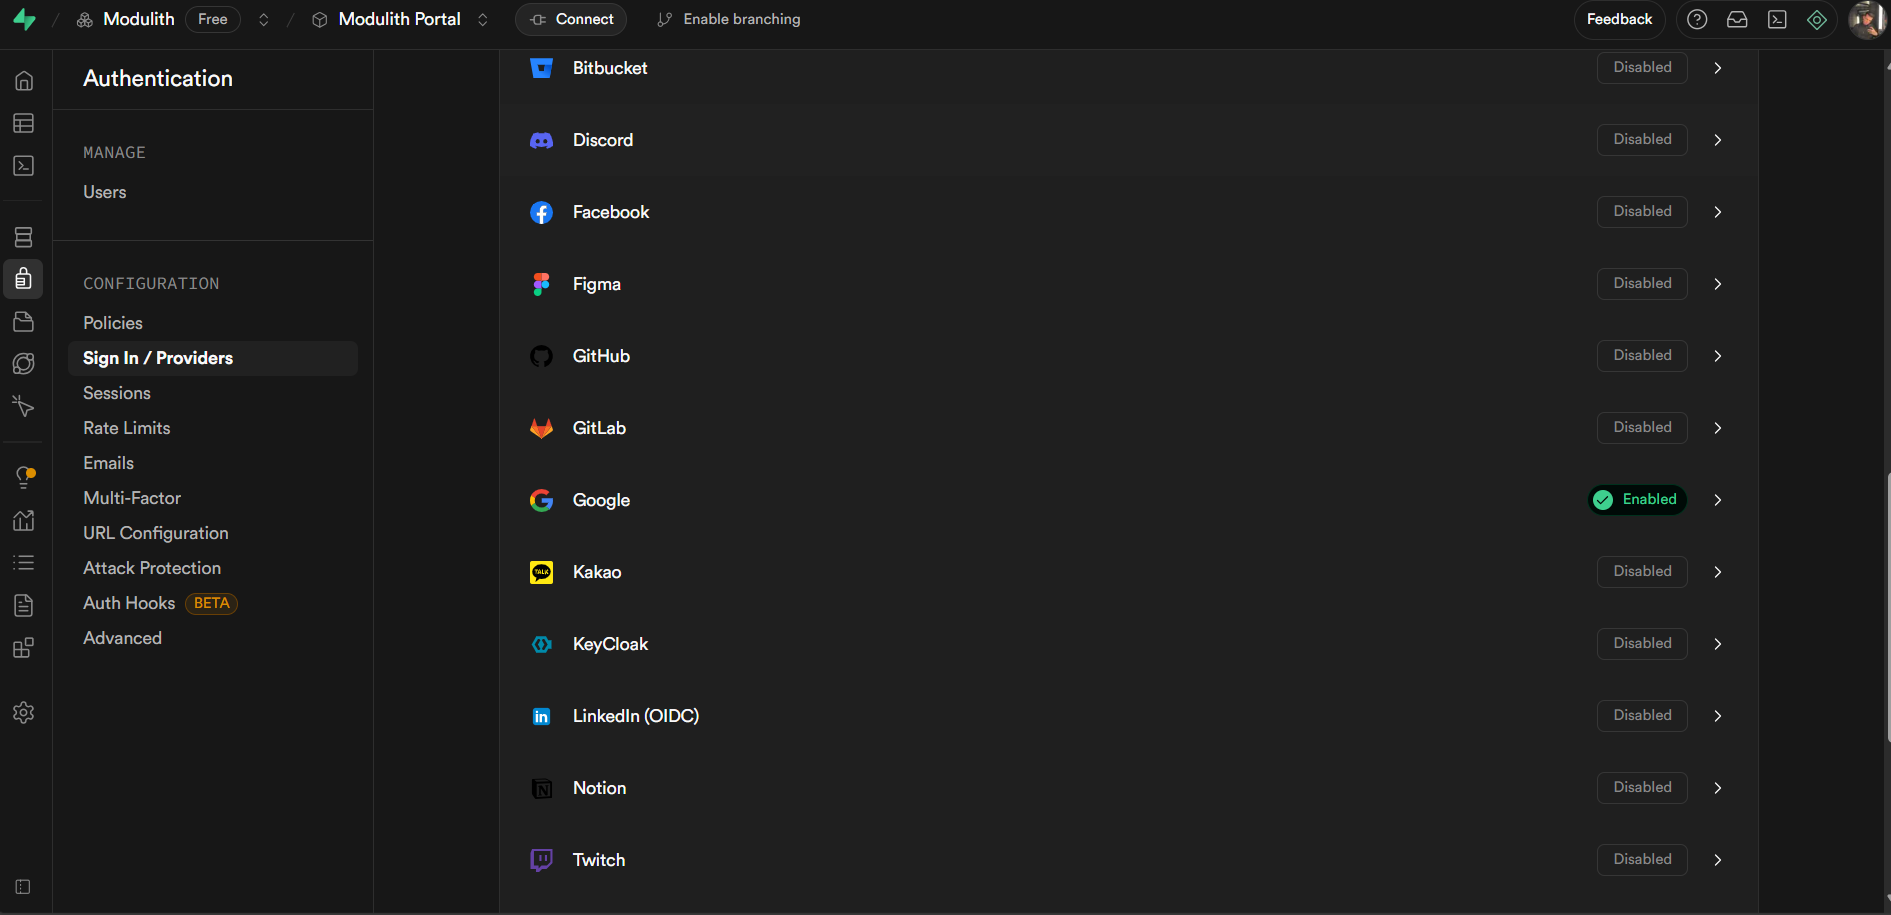
Go to supabase and create a new project after that in your user dashboard navigate to authentication to activate Google OAuth Provider by switching the related button on, shown below,
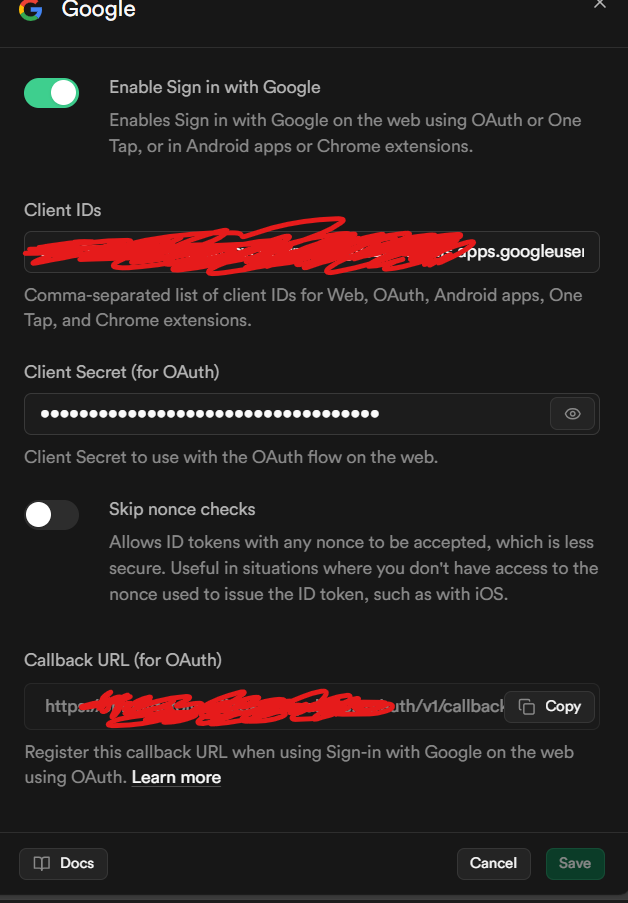
After that we're going to need configuration following to console cloud. Thus we're going to have a place for our supabase OAuth provider that will be used to create authentication illustrated below,
Then we can officially start building our brand new next.js project
Choose app router with typescript and create .env file at the root of your project, get your database credentials from your supabase project navigate to settings > API Keys then obtain your API keys,
Creating client db with SSR
Since auth-helpers depreceted — we will go fully with ssr in @utils/supabase/client.ts,
Creating server db with SSR
Creating @utils/supabase/server.ts,
So far we created our accessible db server components — now it's the time to use it in our real world application,
Here is the client side <LoginServices /> react component, it gets the email data from the server side; saving to redux auth slice and zod form library comes under the hood.
This is the actual client component that sends request to the db and validating whether the user is registered or not. Regardless — the user being redirect to the api/auth/callback/route.ts route if they have a chosen account that login successfully.
Therefore imagine a login page like this,
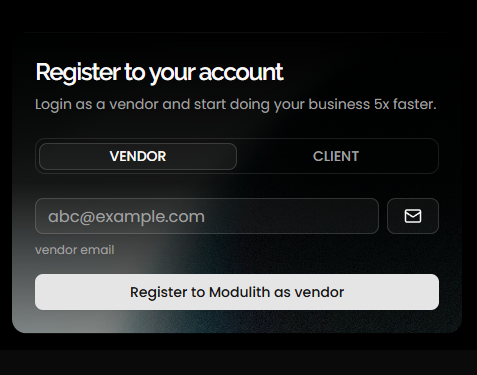
Basically, the component sends email to selected email account or sends magic link to redirect authenticated user to login right away.
OAuth API Callback Server Component
Whenever google redirects any user via magic link, if the login success (which means if the user got the link, therefore clicked on it), the user being redirected to /api/auth/callback/route.ts file which shown below,
This eventually handles the request comes via supabase callbacks and OAuth services. As instance, let's say a brand new user just registered/logged-in, the URL returns like
The given code being used inside our API GET server function facilities HTTP request logic.
Middleware — Supabase User Registration
To complete the entire authentication auth system in our brand new Next.js application finally we are going to configure middleware — to keep the responsiveness between client and server. To do this we are going to create a new file in the root of our project like this,
Imagine you are developing a CRM dashboard. You might need auth system right? Therefore you must also keep protected pages roughly unless the user logged in. What our middleware does you might ask — shown below;
- Creates an instance of db
await createClient(). - Checks whether auth valid or not with
await supabase.auth.getUser() matcherchecks the given array of the paths and activates that routes for the authenticated user.- Makes proper redirection using
nextUrlproperty.
Auth Provider
To dispatch the taken auth credentials we're going to need a special wrapper react component called auth-provider might located in @providers/auth-provider.tsx like this,
And we're going to use this component in our root layout component src/app/layout.tsx as shown below,
Conclusion
We have done so far in the way of our authentication journey using Next.js SSR and Supabase. By using the methods we have mentioned so far, you can handle all kind of authentication logics in your modern applications.