 Vijay
Vijay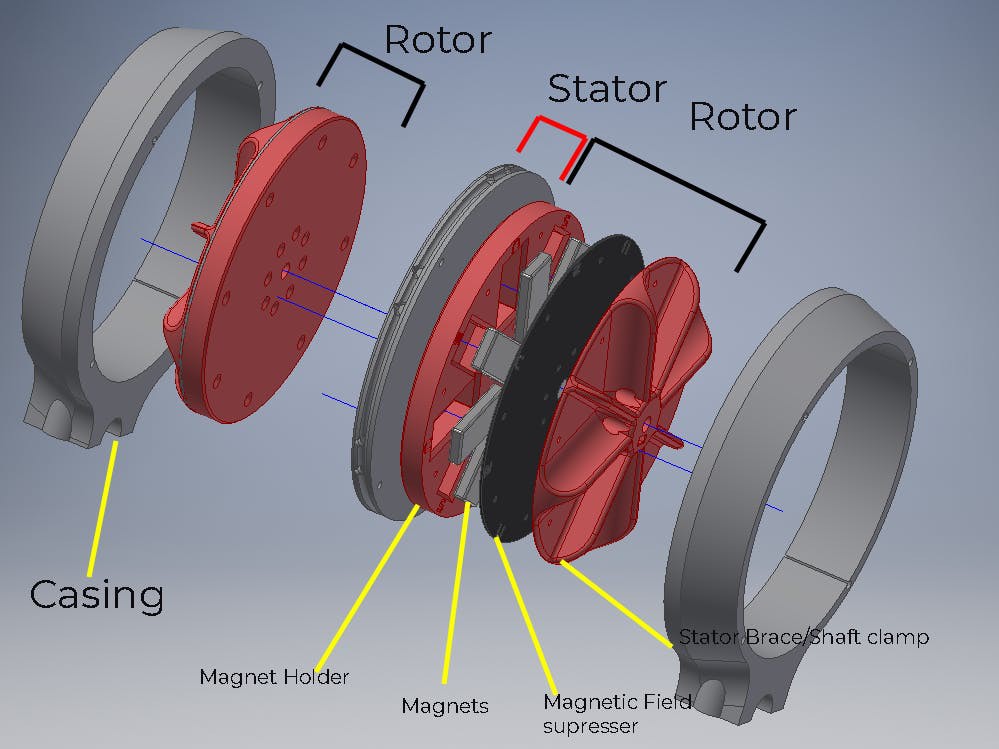
What is a Dual Axial Flux Generator?
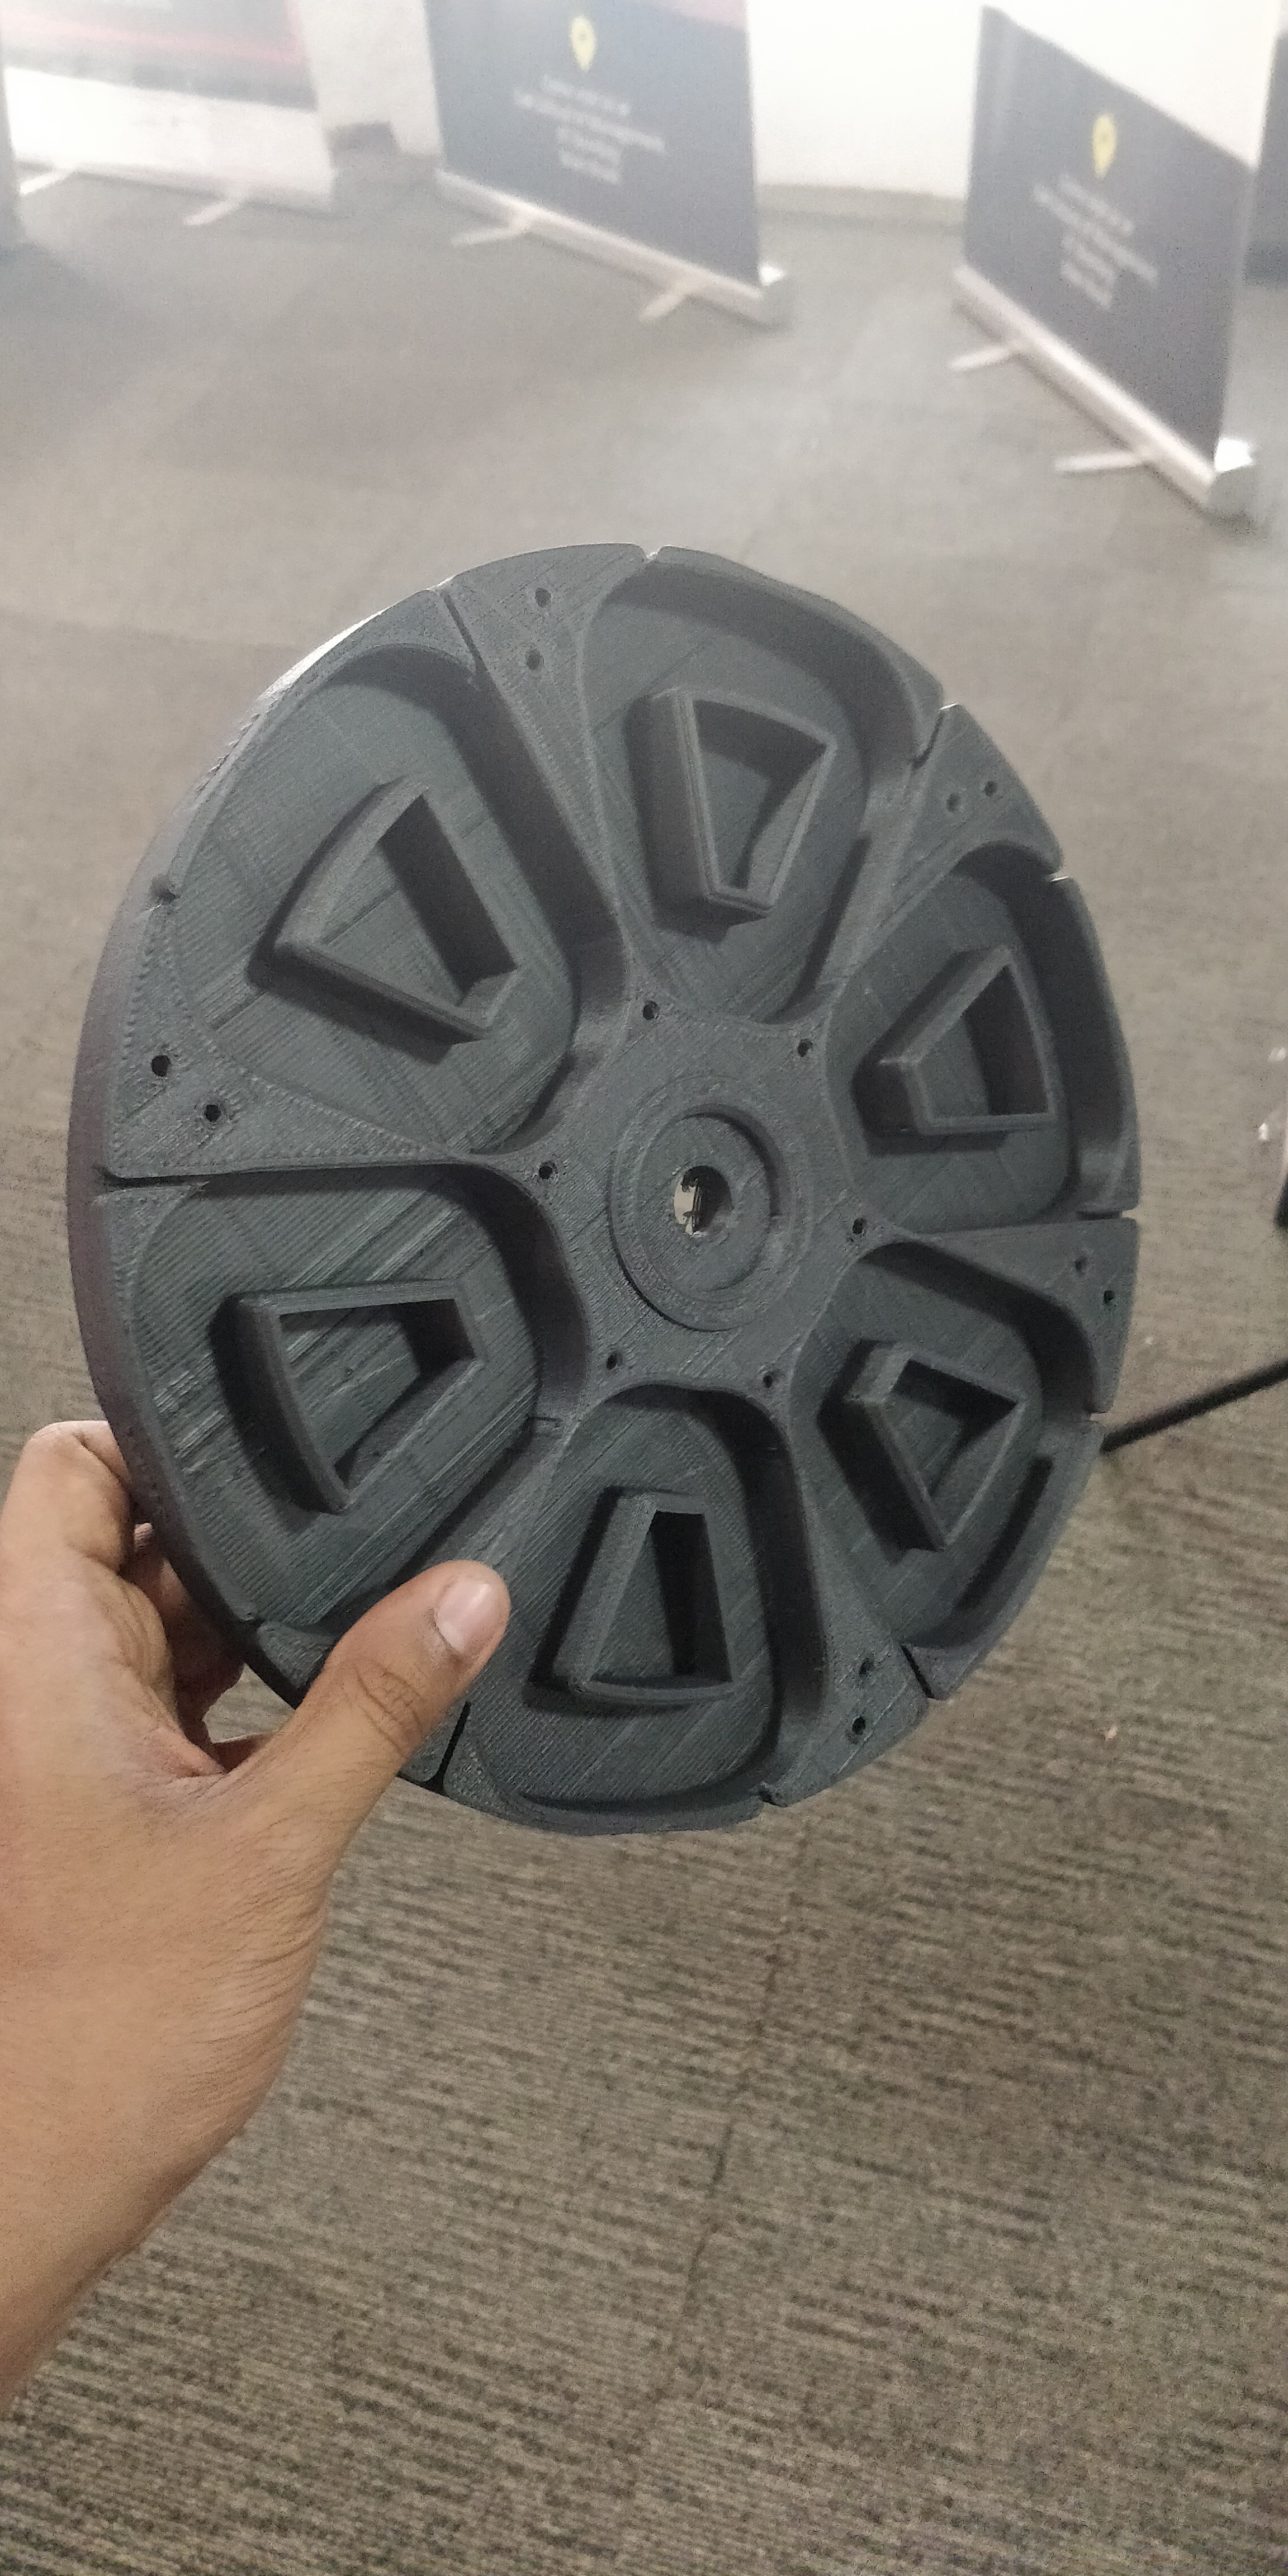
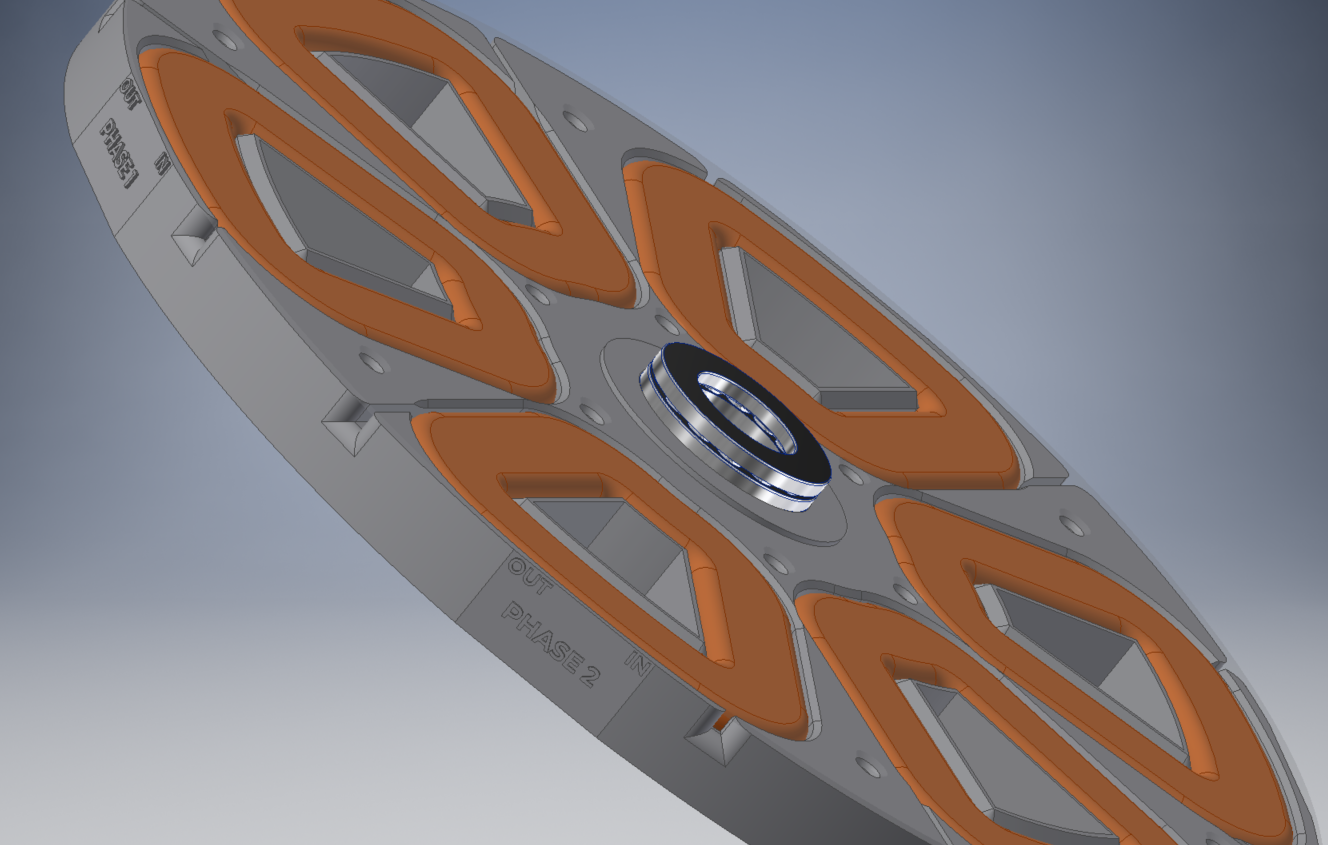
A dual axial flux generator consists of powerful magnets placed on either side of a fixed stator winding, like a sandwich creating a very strong magnetic flux between them, and thus inducing a powerful EMF in the stator winding when in motion. Since the magnetic flux is axial to the output shaft, it is an axial flux generator, unlike a radial flux generator like that most commonly found in DC motors that are converted as dynamos.
I chose to build this kind of generator, since it creates a dense magnetic field and makes the most efficient use of the magnets. There is hardly any magnetic flux leakage outside the generator itself.
Another upside is that, it makes the generator flat, and is easy to construct, as well as integrate into power generation projects.

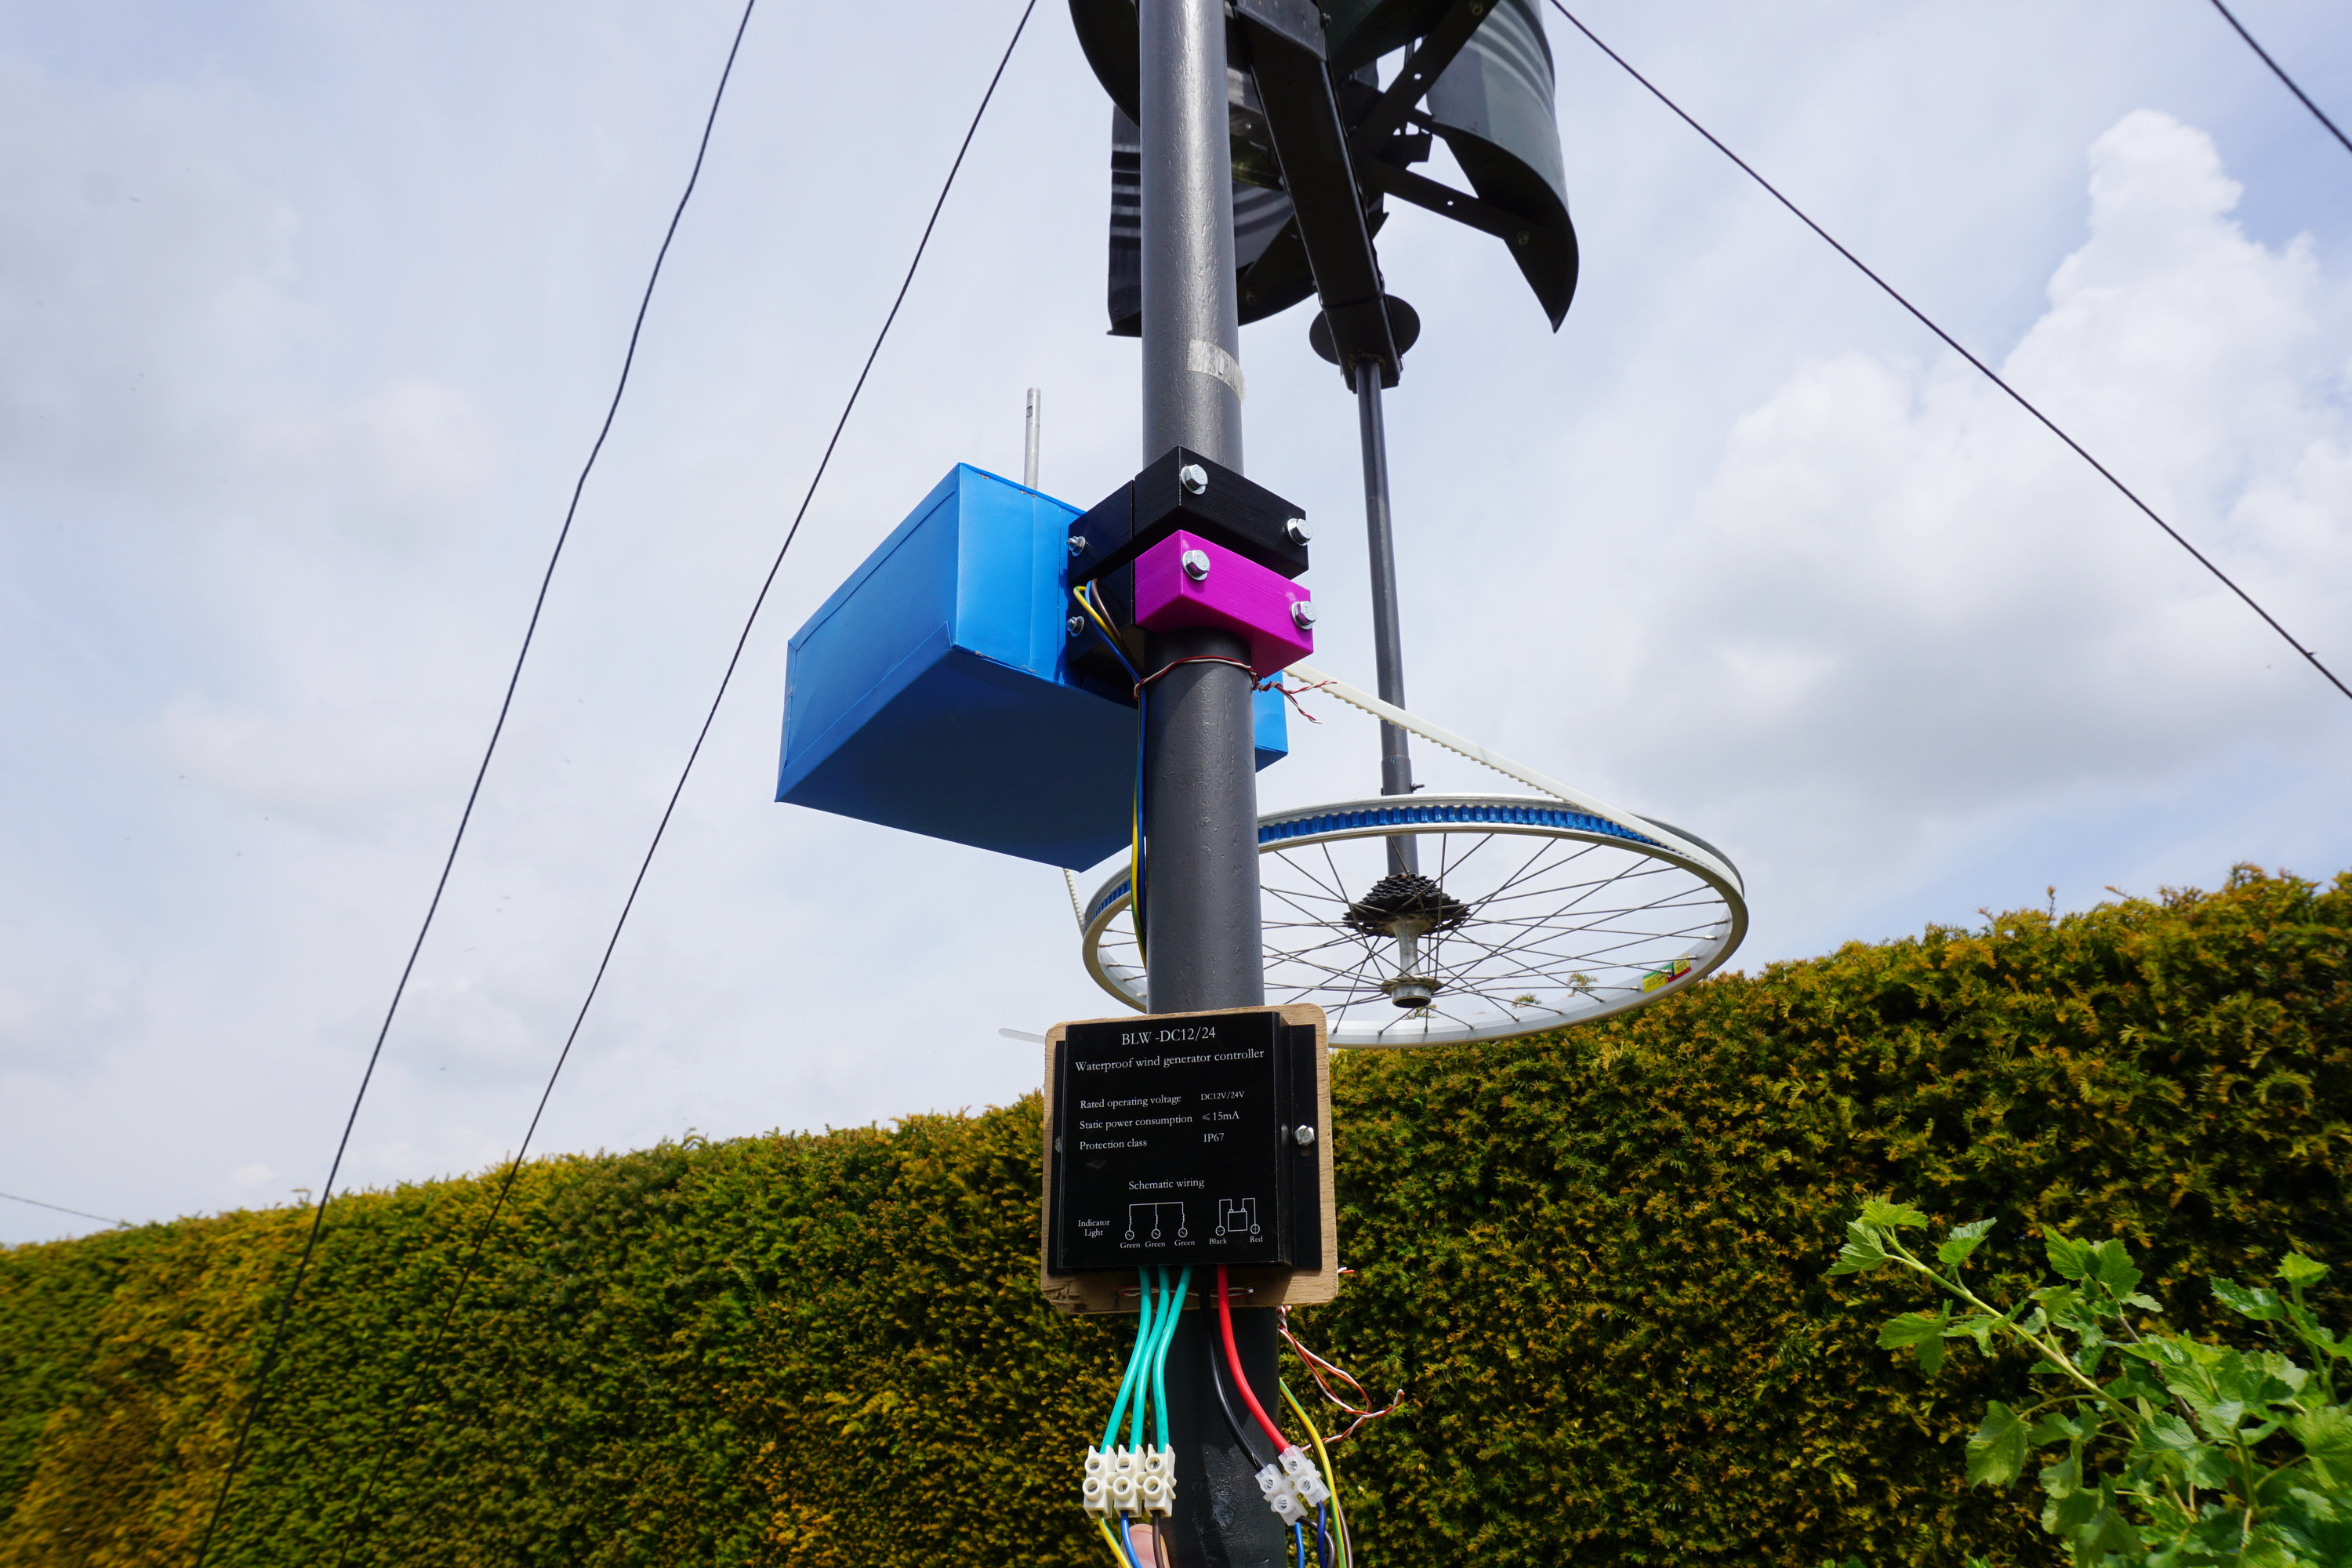
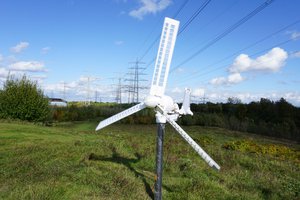
In the expedition to Antarctica, I coupled this along with a Helical Wind Turbine Design (https://www.thingiverse.com/thing:99132) to create a Wind Turbine we could use to charge our electronics and equipment with. In this documentation I shall also outline coupling the generator to the wind turbine project as well.


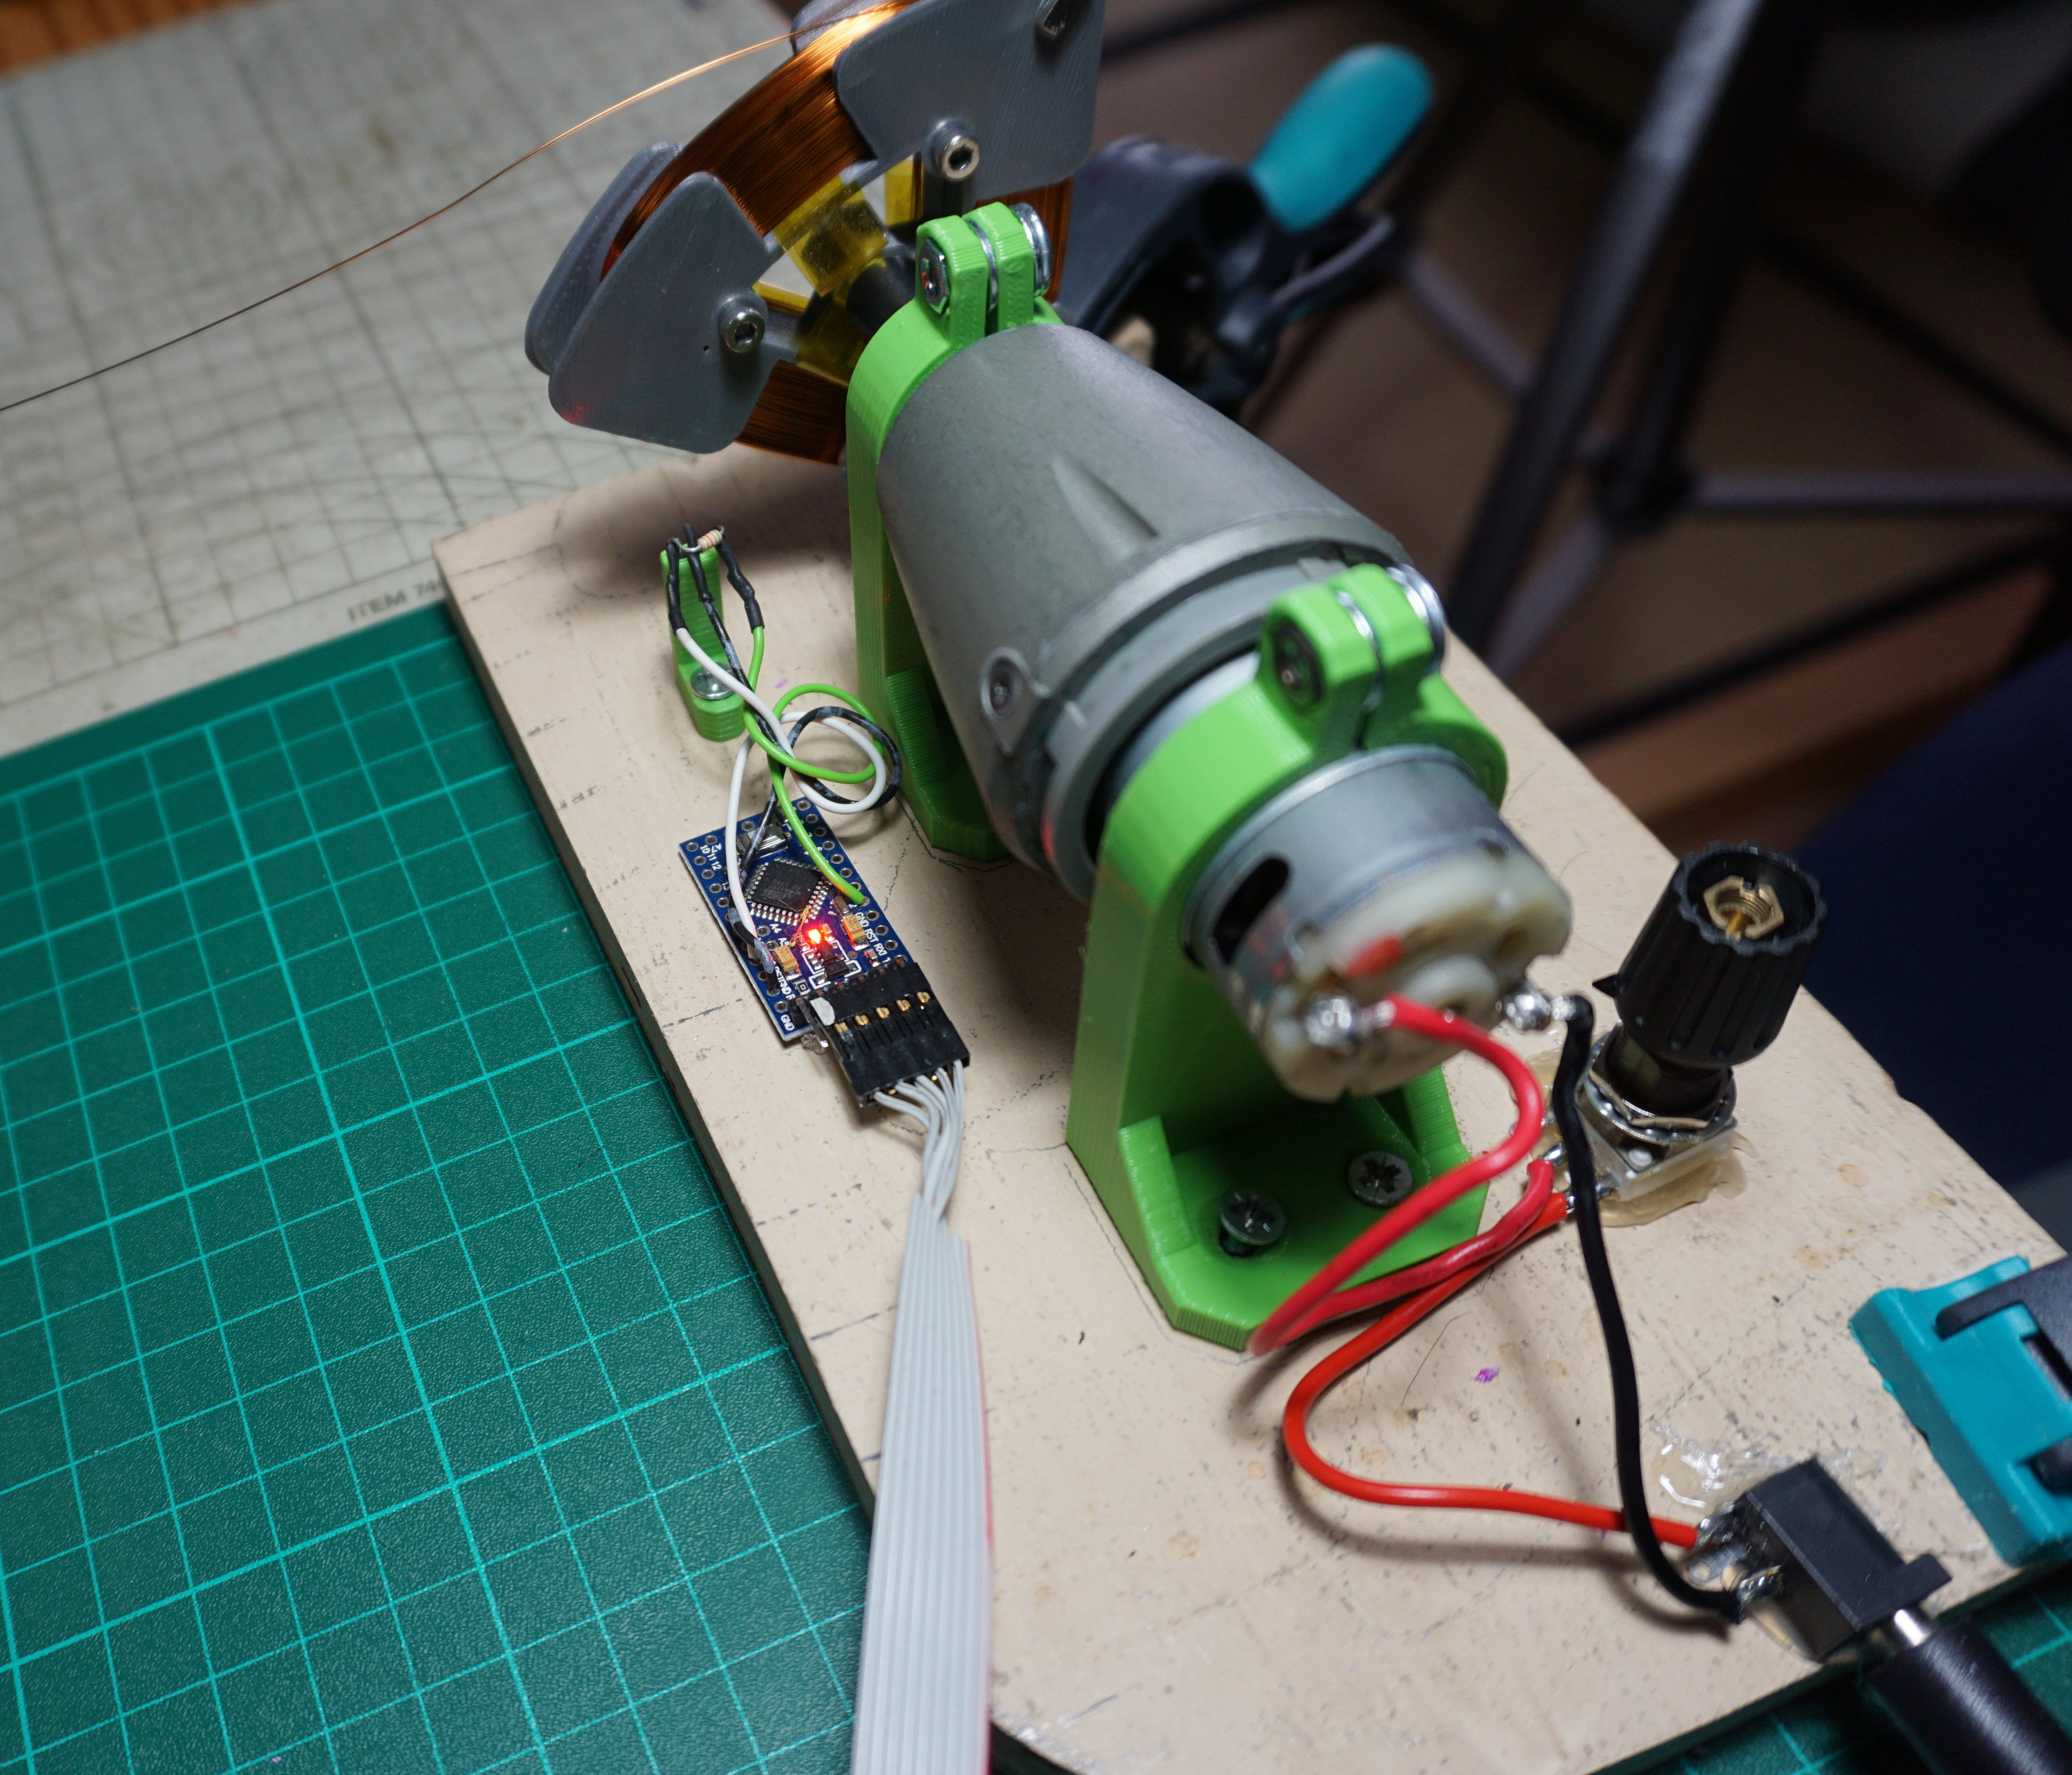
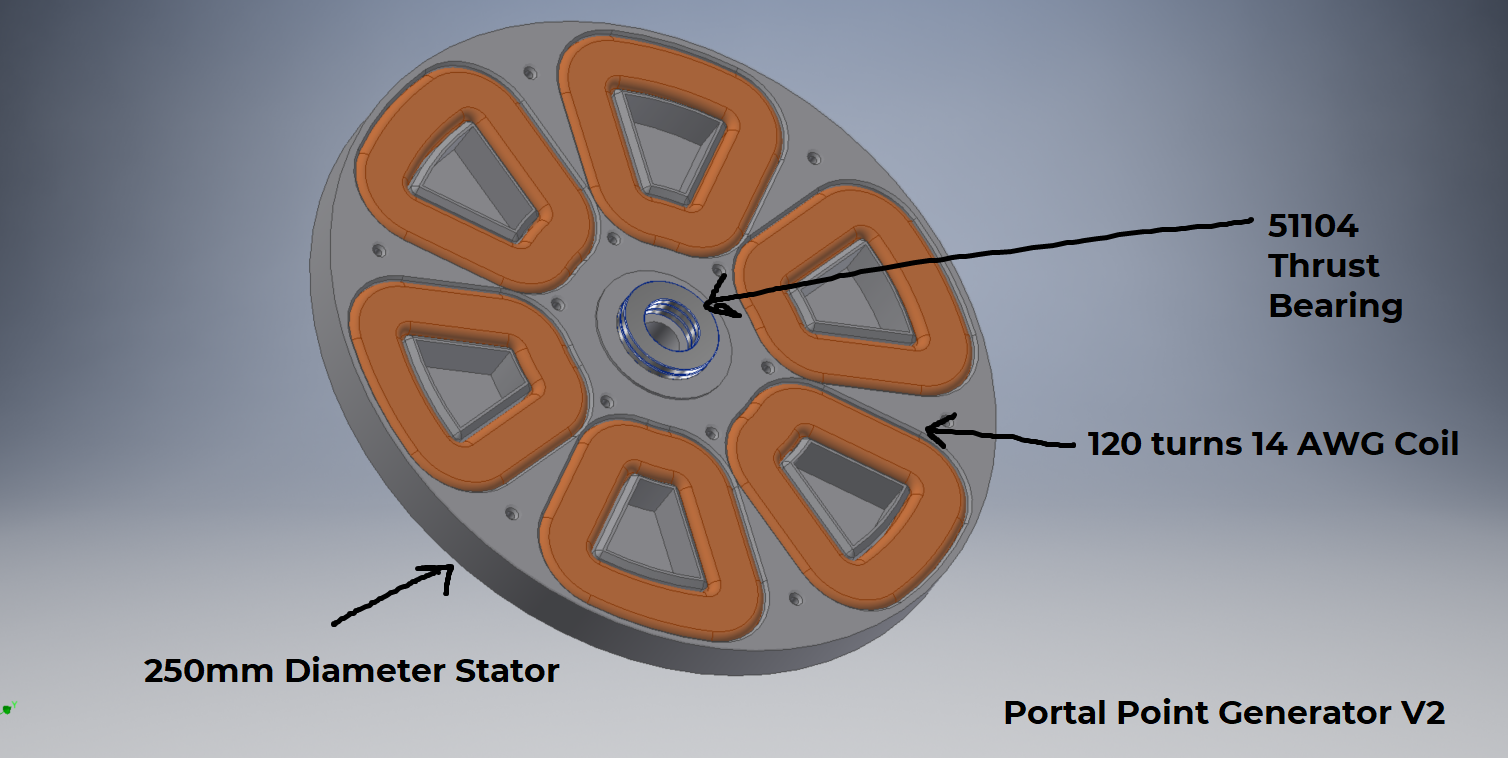 Its time to go big or go home. Portal Point V2 is going to be a 500W generator, while still trying to be compact enough to fit on a commercially available 3D printer. I'm still using the same 40x20x10 N52 grade magnets, but increasing size of the coils.


_gPtyCD81JT.png?auto=compress%2Cformat&w=1280&h=960&fit=max)
_TsuPVNgsSW.png?auto=compress%2Cformat&w=1280&h=960&fit=max)
_RhjUExTi51.png?auto=compress%2Cformat&w=1280&h=960&fit=max)
_najiqEG8nD.png?auto=compress%2Cformat&w=1280&h=960&fit=max)
_xBVzEU8Otz.png?auto=compress%2Cformat&w=1280&h=960&fit=max) Apply glue to the edges of the coil housing
Apply glue to the edges of the coil housing_v16UN1AW8b.png?auto=compress%2Cformat&w=1280&h=960&fit=max) The coil housing is covered with the 3DP Housing Cover
The coil housing is covered with the 3DP Housing Cover_0hSwigP329.png?auto=compress%2Cformat&w=1280&h=960&fit=max)
_B5iVHpUuD4.png?auto=compress%2Cformat&w=1280&h=960&fit=max) Print 2 Jigs, fix them along their shape, and elevations facing each other.
Print 2 Jigs, fix them along their shape, and elevations facing each other._pLHxkTCzky.png?auto=compress%2Cformat&w=1280&h=960&fit=max) Attach the 3DP Jig Holder on one of the faces. I recommend marking this face, and you should use the same convention when winding all the coils., and the winding direction should match.
Attach the 3DP Jig Holder on one of the faces. I recommend marking this face, and you should use the same convention when winding all the coils., and the winding direction should match. _Y8ooqtIZsr.png?auto=compress%2Cformat&w=1280&h=960&fit=max) Fasten everything togehter
Fasten everything togehter_2fSisZZSVH.png?auto=compress%2Cformat&w=1280&h=960&fit=max) There is a small hole in the jig through which you can slot the wire, to keep it in place while winding. Put the 30 AWG wire into this from the inside of the jig, coming out.
There is a small hole in the jig through which you can slot the wire, to keep it in place while winding. Put the 30 AWG wire into this from the inside of the jig, coming out._UEhPOKnZNZ.png?auto=compress%2Cformat&w=1280&h=960&fit=max) Attach kapton tape in the 3 slots . Once the coiling is done, the kapton will be folded onto the finished coil to hold its shape.
Attach kapton tape in the 3 slots . Once the coiling is done, the kapton will be folded onto the finished coil to hold its shape._bx1YKT175O.png?auto=compress%2Cformat&w=1280&h=960&fit=max)
_xfxS2GKSAm.png?auto=compress%2Cformat&w=1280&h=960&fit=max)
_NWNsIPfduO.png?auto=compress%2Cformat&w=1280&h=960&fit=max)


 morgan
 Josh Starnes
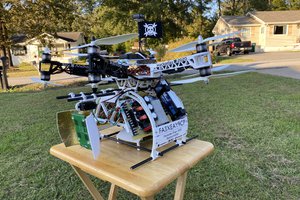
 Fabian
Hey vijay, first off, being from Tamilnadu myself, I am really proud of what you have achieved with this project. If you dont mind me saying, you are living the engineer's dream (congrats!). I have been wanting to build a generator for a while now, purchased a CR-10s recently and I am overwhelmed by the world of 3d printing and its infinite possibilities. I always wanted to explore the scope of 3d printed parts in real world industrial applications but your project has proven that and has given enough motivation to build my own. I have a couple of questions
1. I know that carbon fiber filaments are lot stronger than the regular PLA. How did you print each of these parts ? 100 % infill, 0.2mm layer height ? I know that setting up the prints also play a part in how strong the finished part is.
2. Does the filament hold up well (melting) against heat generated from the coils. ?
3. Since i am pretty much going to be your design as the inspiration in building my own generator, any advice on the do's and dont's. Thanks !!